
NOTICE
- The following procedures are intended for the Anxine C1WG only. For other brands, refer to the original manufacturer’s instructions.
- Always disconnect the power supply before performing maintenance, cleaning, or mold changeover.
- Only trained and authorized persons are permitted to work on the equipment.
- Your equipment may vary from images or videos due to ongoing upgrades.
- If any part of this guide is unclear, contact Anxine for technical support before proceeding.
Section 1: Operation Procedures
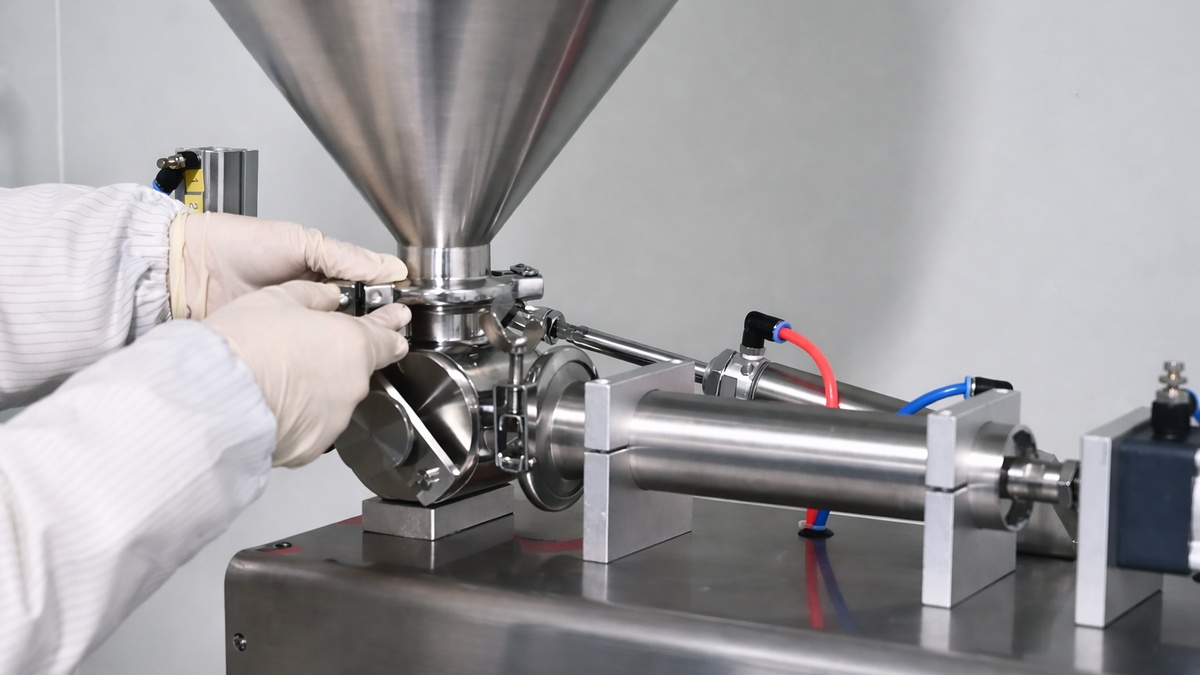
Step 1: Install the stainless steel hopper onto the machine inlet. Use the quick-release clamp to secure it. You can swap hoppers for liquids or pastes on this versatile filling machine.
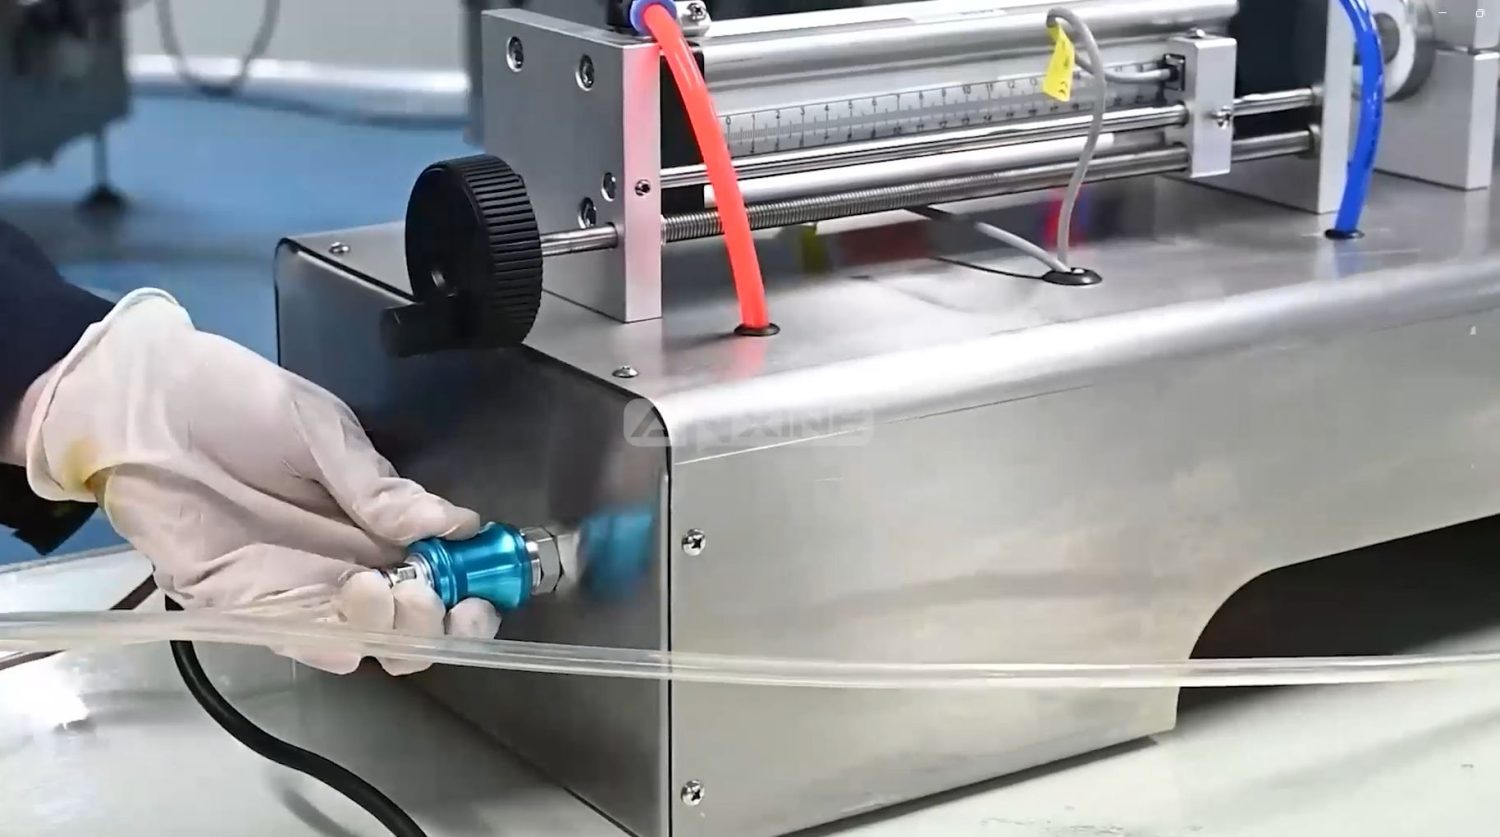
Step 2: Press the blue sleeve on the quick-connect fitting to push in the air hose to lock it in place.
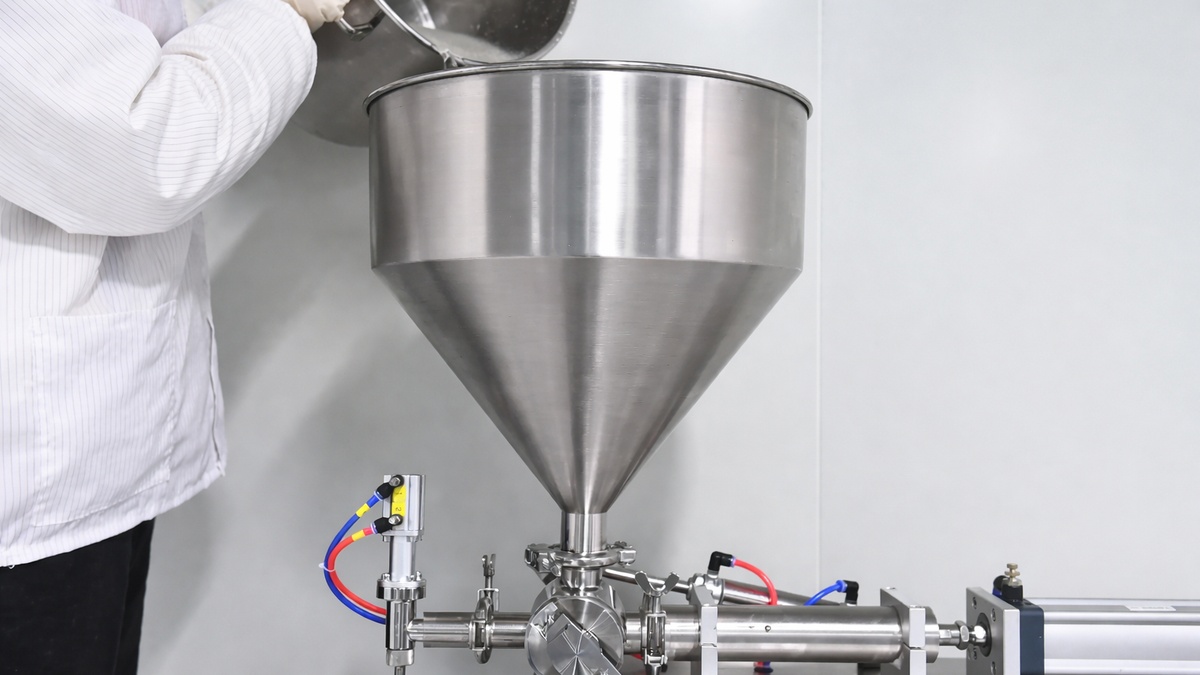
Step 3: Pour the liquid or paste material into the hopper. Make sure there is enough product to keep the piston primed for a consistent flow. Also, avoid overfilling to prevent spills.
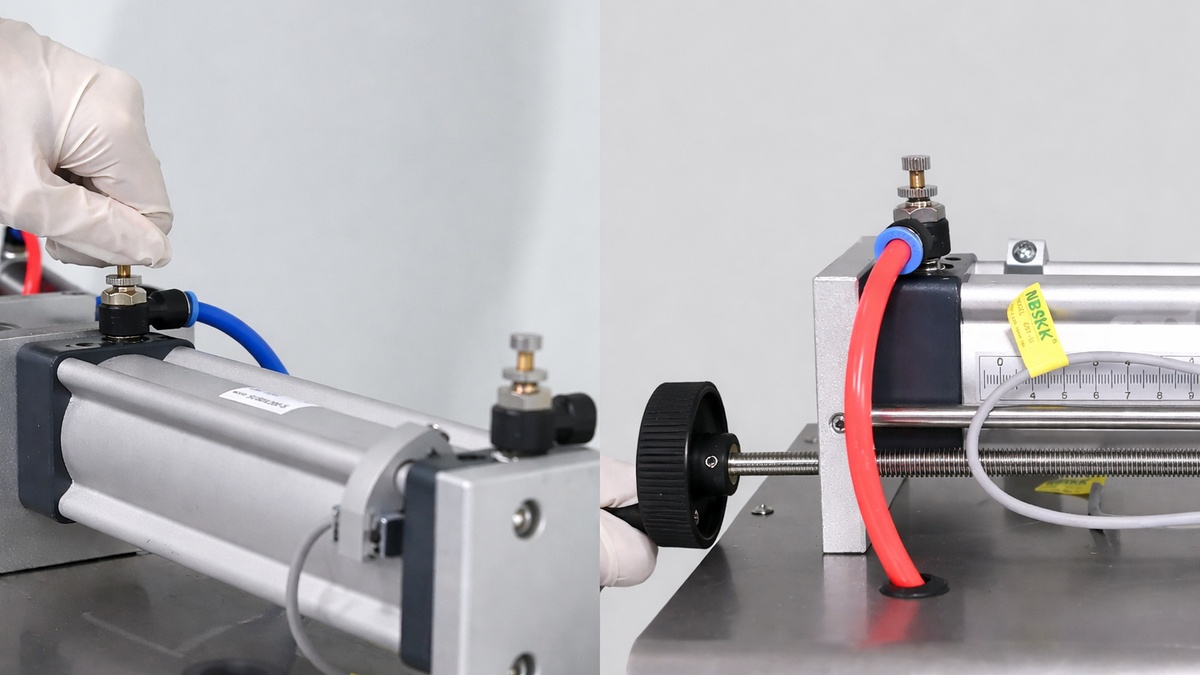
Step 4: Adjust the two speed control valves on the cylinder to regulate the material flow. Then turn the side handwheel to adjust the piston stroke for setting the desired filling volume.
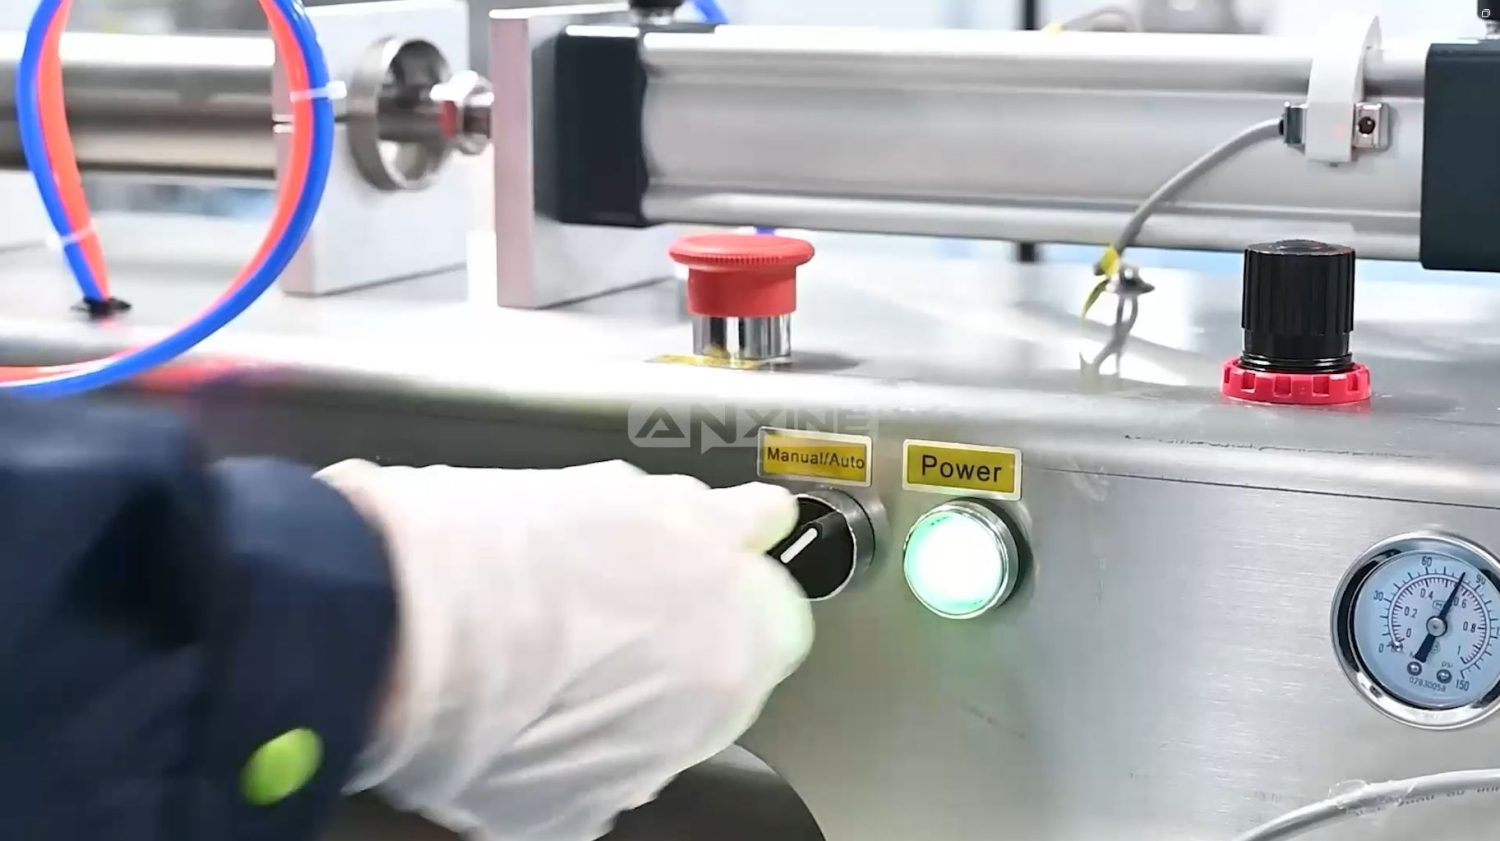
Step 5: Rotate the switch to select Manual or Auto mode. In Manual mode, use the foot pedal to fill. In Auto mode, the machine dispenses continuously. In both modes, you still need to position and replace empty bottles.
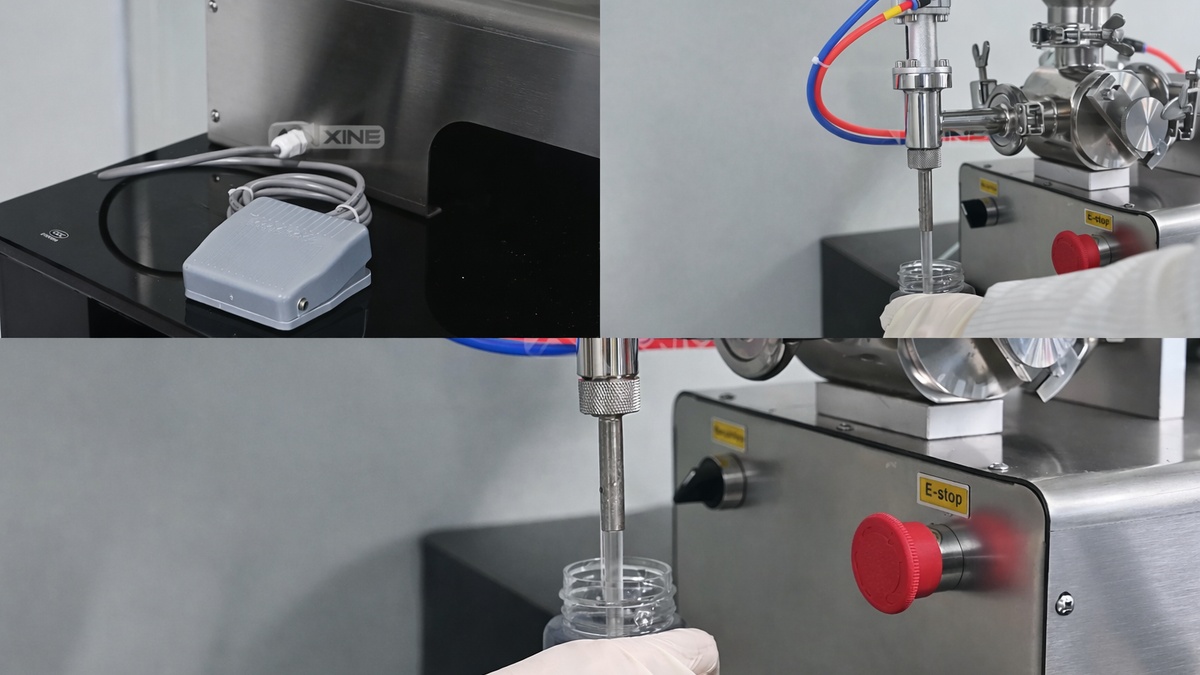
Step 6: After one batch, turn the selector switch back to Manual. This will stop the automatic cycle and prevent accidental dispensing.
See the workflow in real-time! Check out our demo video below to learn how the piston-driven system fills thick pastes and liquids.
Section 2: Installation and Debugging Procedures
Note: The structure diagram is attached at the end of this section.
Step 1: Install the three-way control valve (1), install the three-way feed inlet joint (2), and then connect the feed hose to the joint (the three-way clamp and the leather hose buckle must be locked in place).
Step 2: Install the hopper and lock the clamp.
Step 3: Adjust the height of the filling head (18) according to the height of the items to be filled.
Step 4: Confirm the positions of the movable (4) and fixed (5) magnetic switches on the cylinder (the fixed magnetic switch (5) is preset and cannot be moved).
Step 5: Insert the feeding hose (3) into the storage tank or connect it to the storage tank. (Before filling, it is recommended to clean the machine with detergent first and then rinse with clean water to avoid oil stains or foreign matter mixing with materials, which may cause material waste or machine damage.)
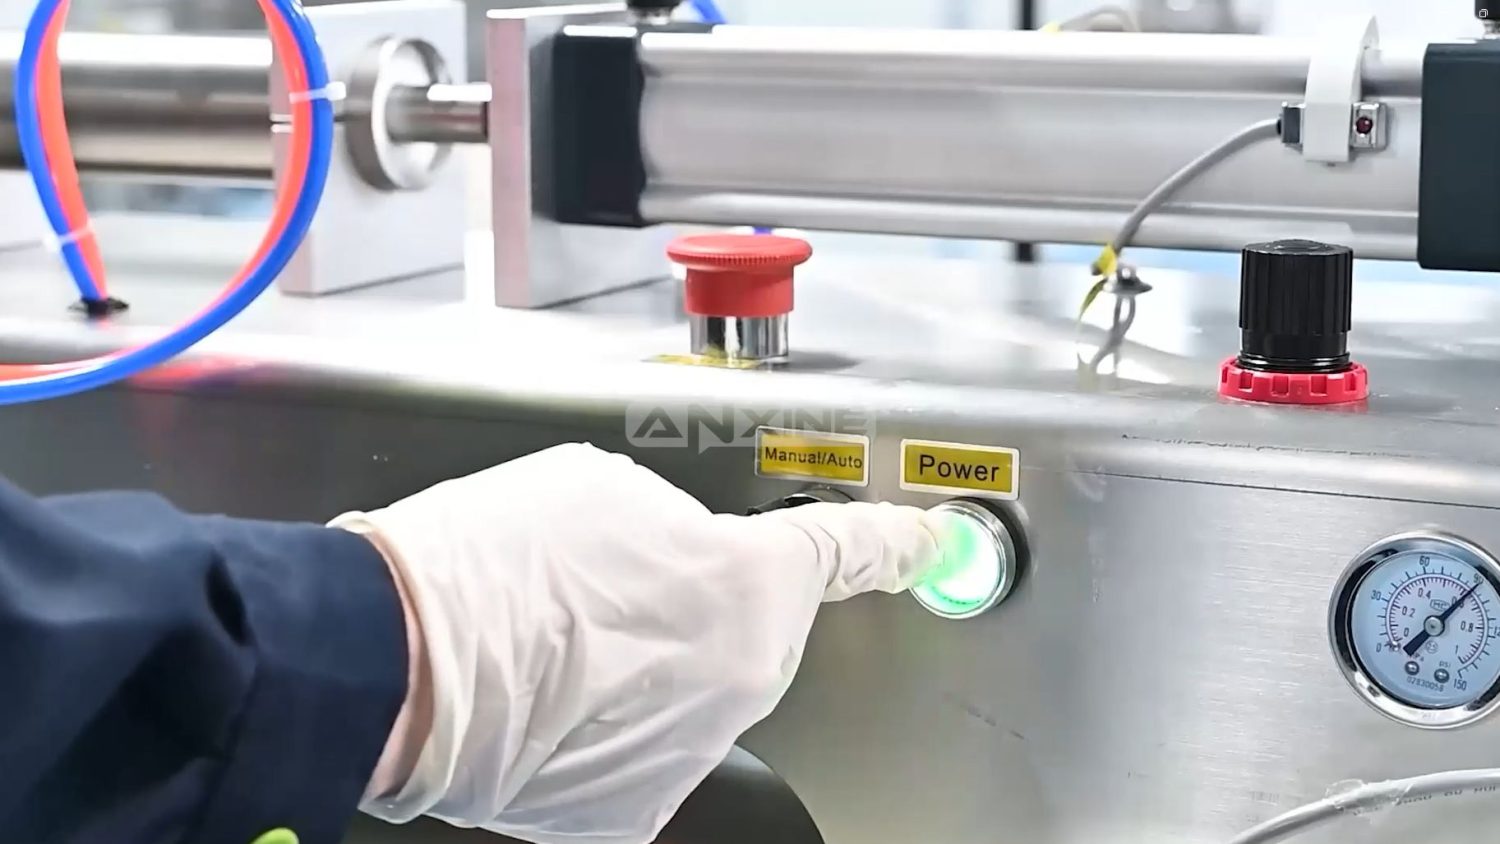
Step 6: Plug in the power cord (6) and turn on the power switch (7). (This step does not apply to explosion-proof filling machines.)
Step 7: Connect the air inlet pipe to the air source quick straight-through connector (8) and turn on the air source switch (9). Push the switch to open and pull it out to close it. The air pressure can be adjusted by pulling out and rotating the upper part of the pressure regulating filter (29), and the pressure can be set according to requirements.
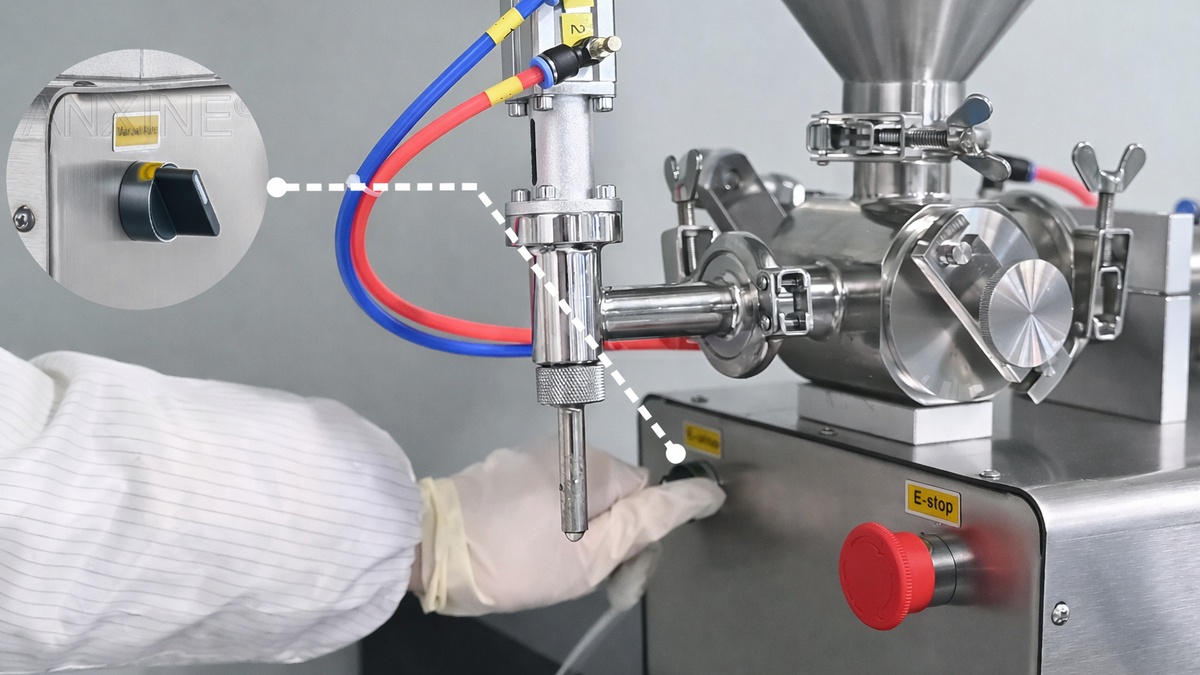
Step 8: Switch the working mode selector (10) to “Electric”.
Step 9: Jog the foot switch until material flows out from the filling head.
Step 10: Rotate the filling machine speed adjustment valve (12) and filling interval adjustment valve (13) to set the appropriate pumping speed. Slightly reduce the valve (12) speed to prevent material or air bubbles from splashing out during filling.
Step 11: According to filling requirements, adjust the position of the movable magnetic switch (4) on the cylinder according to filling requirements via the right-hand handwheel (14) to determine the filling volume. (The greater the distance between the movable switch (4) and fixed switch (5), the larger the filling volume, and vice versa.)
Step 12: After becoming familiar with the operation, switch the working mode to “Auto”.
Below is the structure diagram of the single-head paste filling machine.
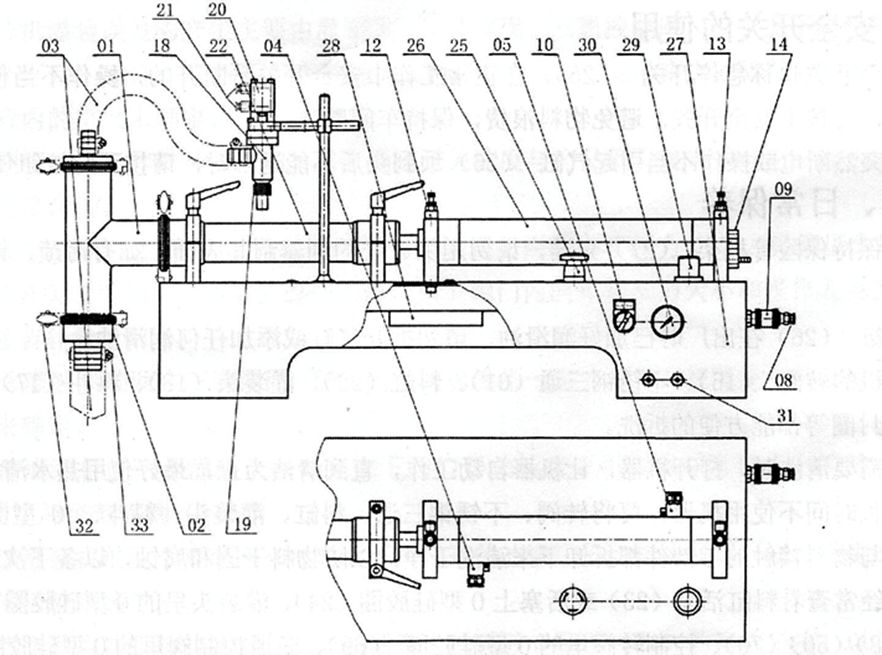
(01) Three-way control valve (02) Feed inlet joint (03) Leather tube (04) Movable magnetic switch (05) Fixed magnetic switch (06) Power cord (07) Power switch (08) Gas source quick straight-through socket (09) Air source switch (10) Selection switch (11) Insurance seat (12) Filling speed adjustment throttle valve (13) Filling interval adjustment throttle valve (14) Hand wheel (15) U-shaped three way (16) Control rotary valve (17) Hopper (18) Filling head (19) Replaceable nozzle (20) Thin cylinder (21) Thin cylinder throttle valve (22) Material cylinder (23) Material cylinder piston (24) Piston O-type silicone sealing ring (25) Emergency stop switch (26) Cylinder (27) Frame (28) 2-position 5-way solenoid valve (29) Regulator filter (30) Air pressure gauge (31) Foot switch cable (32) Clamp (33) Leather hose buckle
Section 3: Cleaning Procedures
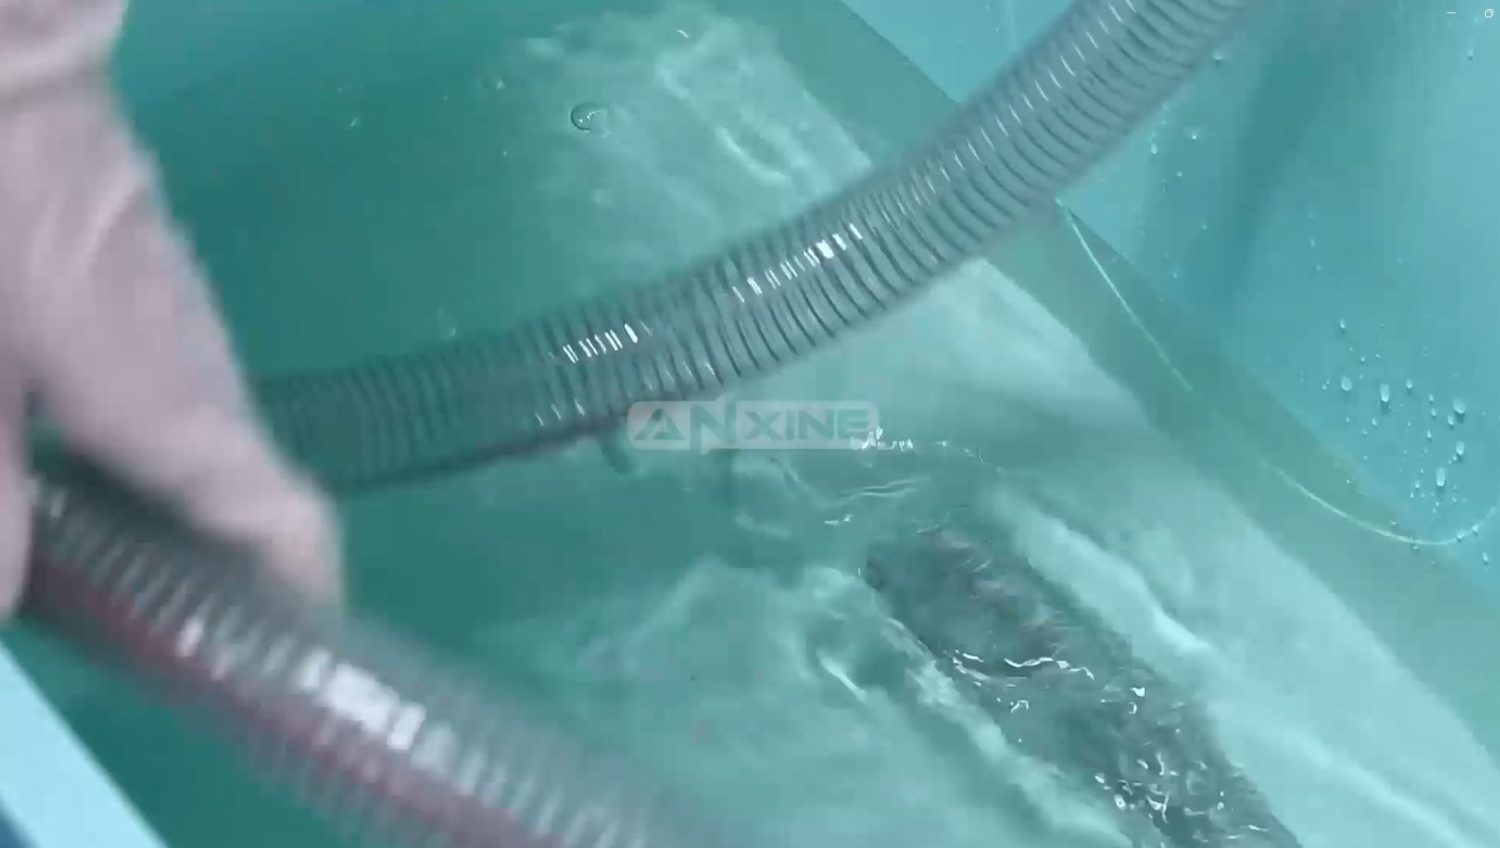
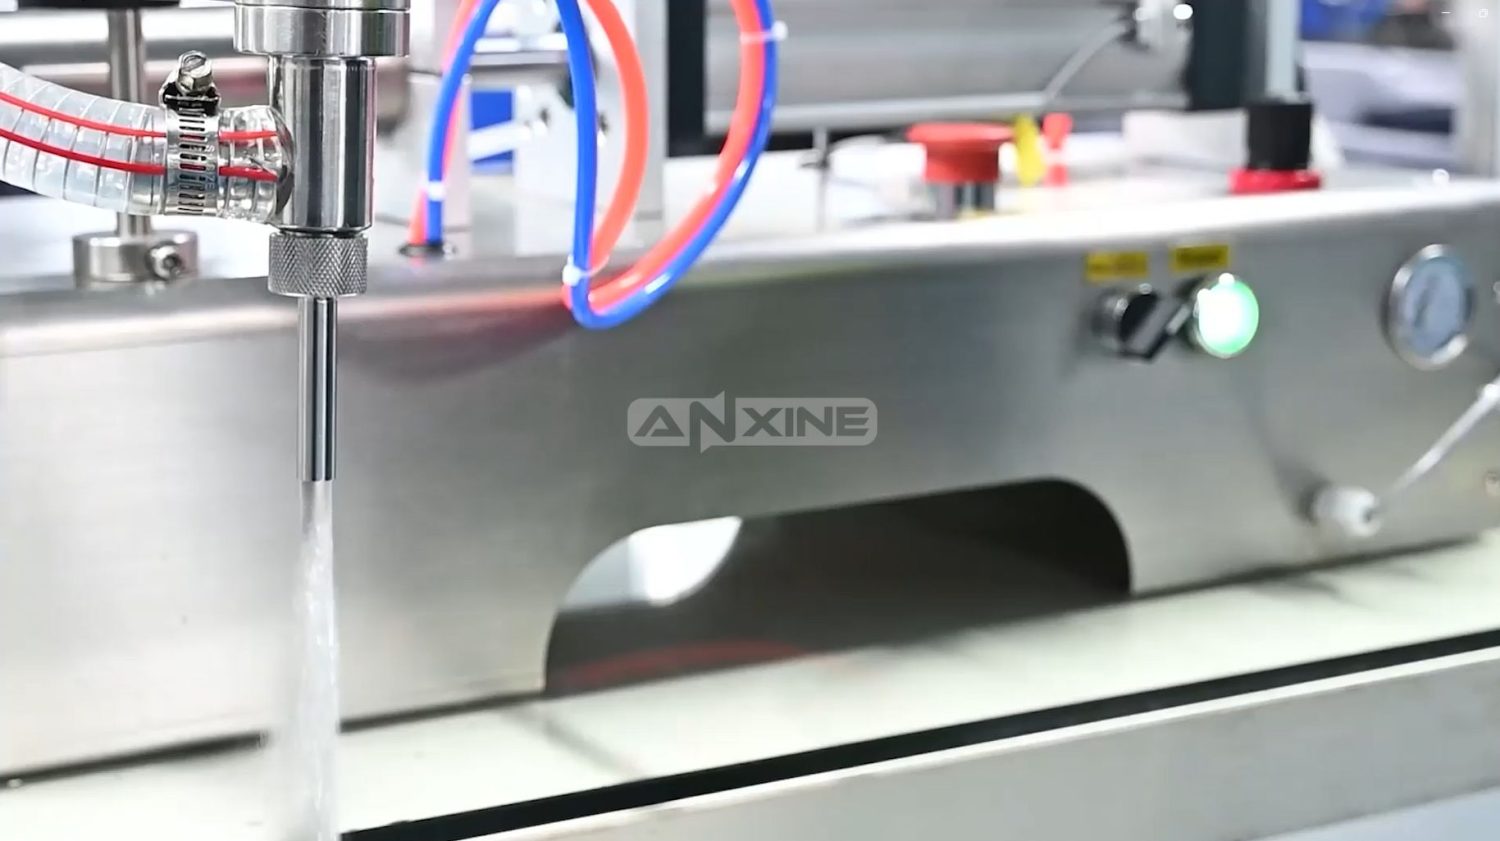
Step 1: Place the inlet tube into clean water.
Step 2: Press the blue sleeve on the quick-connect fitting, insert the air hose, and lock it in place.

Step 3: Turn on the power switch.
Step 4: Set the mode switch to AUTO mode.
Step 5: Start cleaning.
See the video below for the cleaning operation process of the semi-automatic bottle filler for cosmetics, food & pharma products.
Section 4: Maintenance Guides
Note 1: To keep the fuse holder (27) clean, do not scrape its surface with sharp or hard objects. If there is any stain, wipe it with alcohol.
Note 2: The cylinder (26) has been lubricated before leaving the factory. Do not disassemble it or add any lubricating oil.
Note 3: The rotary valve, stainless steel three-way valve (01), filling head (18), hopper, O-ring, sealing ring, etc., of this machine can be easily disassembled and washed.
Note 4: When cleaning is required, turn on the machine and let it run in automatic mode until cleaning is completed. It is recommended to use hot water for cleaning.
Note 5: If the machine is not used for a long time, disassemble and clean the rotary valve, stainless steel tee, filling head, O-ring, sealing ring, and other parts that come into contact with materials to prevent residue from drying and causing corrosion, ensuring proper operation for the next use.


