NOTICE
- The following procedures are intended for Anxine equipment only. For other brands, refer to the original manufacturer’s instructions.
- Always disconnect the power supply before performing maintenance, cleaning, or mold changeover.
- Only trained and authorized persons are permitted to work on the equipment.
- Your equipment may vary from images or videos due to ongoing upgrades.
- If any part of this guide is unclear, contact Anxine for technical support before proceeding.
Fully automatic capsule filling machines are increasingly popular now. They are easy to operate, clean, and maintain. If you run a big-scale business and have enough budget, fully automatic models are good choices. They greatly improve your production efficiency and maintain good accuracy. Take our NJP series as an example.
NJP series fully automatic capsule filling machines complete capsule feeding, separation, filling, locking and discharge by themselves. After empty capsules and materials are fed into the hopper, the body and cap are then separated by vacuum. Next, the material is dosed into the capsule body by the dosing plate and tamping system. Then, the cap is locked back onto the body and the finished capsules are discharged automatically. The operation is easy for newbies.
How to Operate a Fully Automatic Capsule Filler?
There are many models in the NJP series to fill different powders. Their operating process is similar whether for powder or liquid filling. You can check the video to see how it works for powder filling.
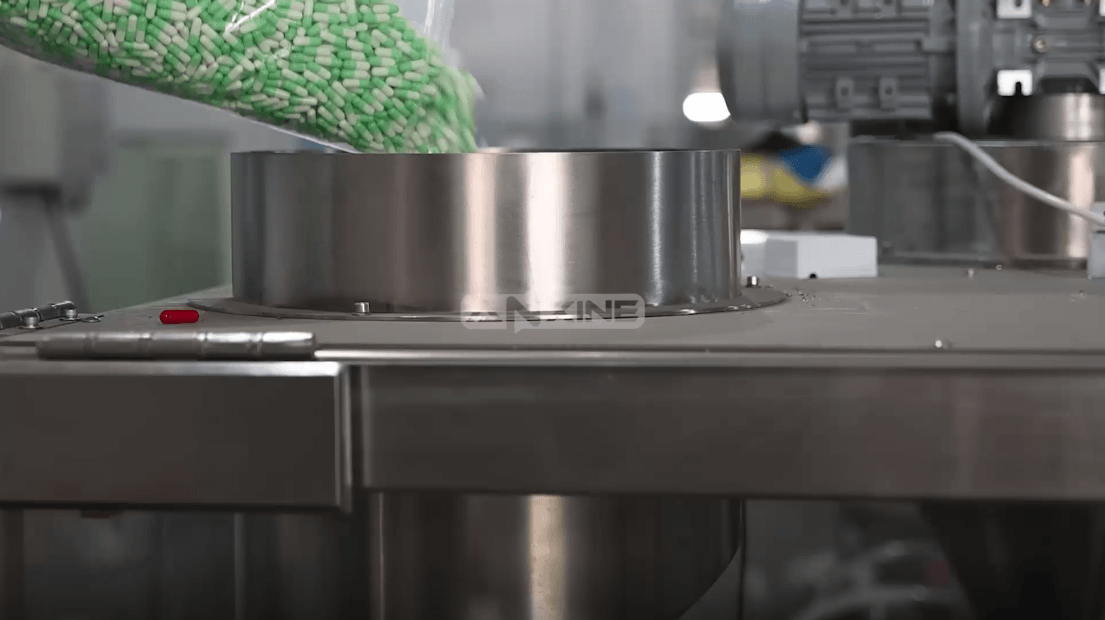
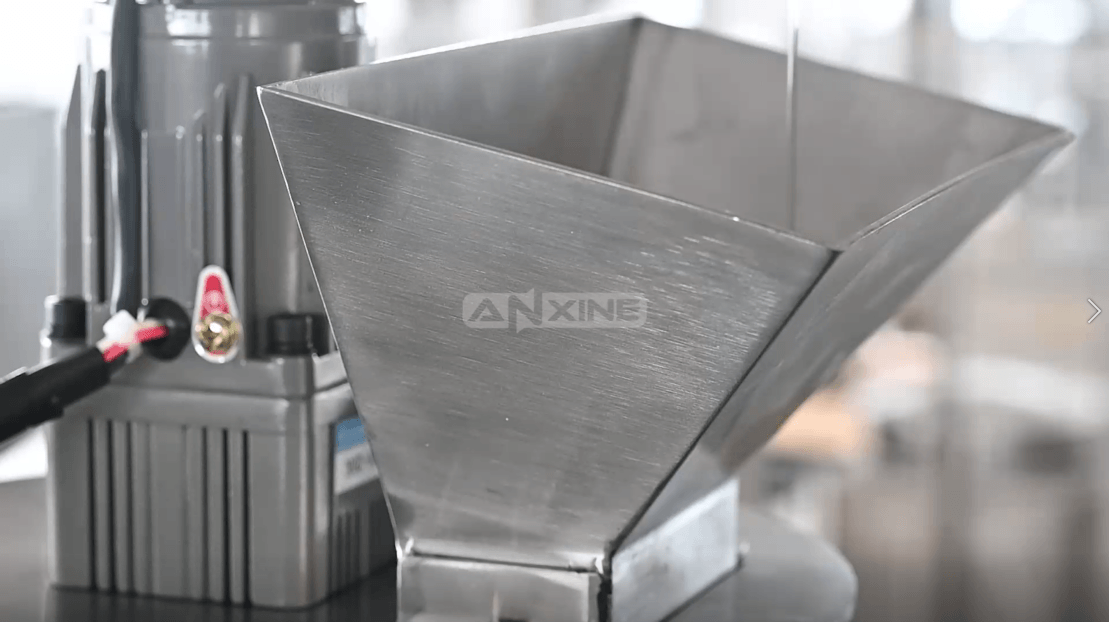
Step 1: Pour the empty capsules into the hopper.
For liquid filling, you need to set the glue box temperature for the glue box and the wheel speed.

Step 2: Pour the powders into the material hopper.
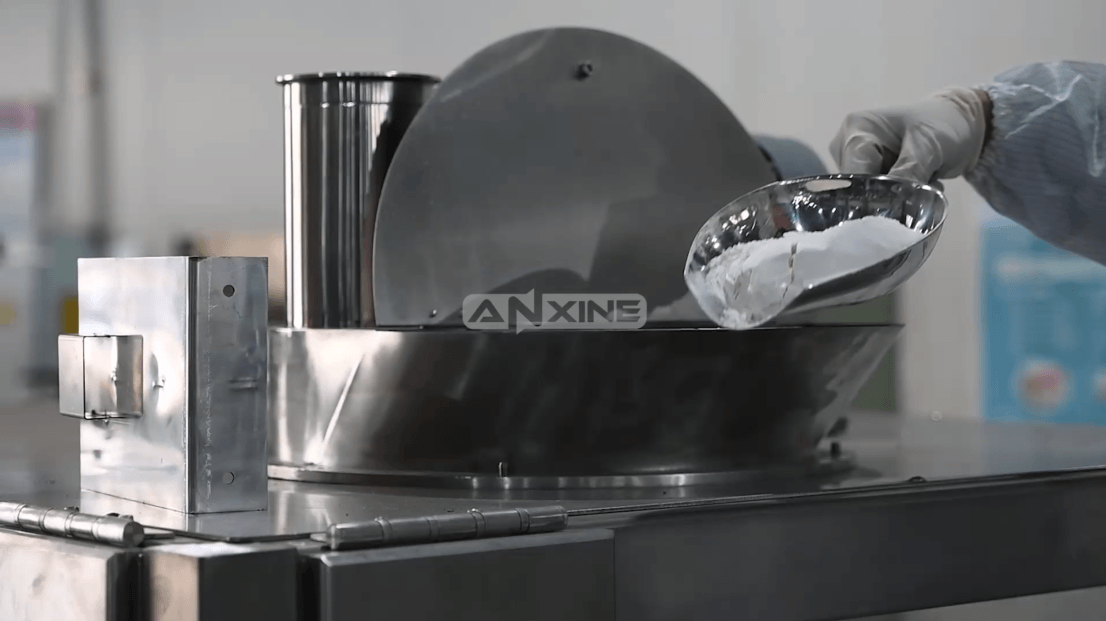
If you fill liquid into capsules, pour the liquid material into the hopper.
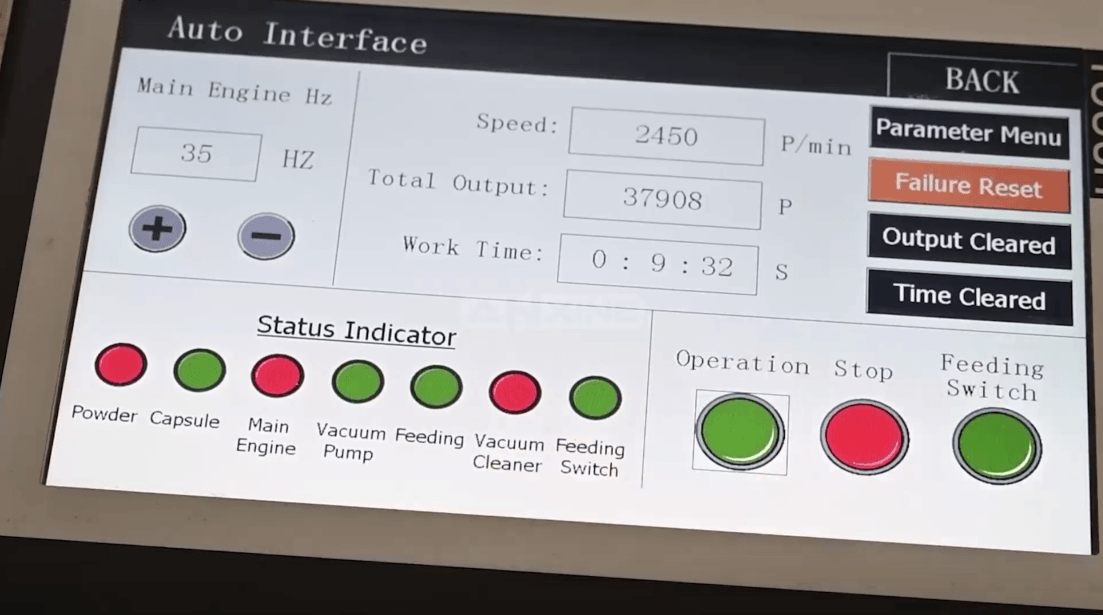
Step 3: Click the button to begin operation. You can also adjust the filling speed or volume on the panel. Then you can wait for the filling process to be completed.
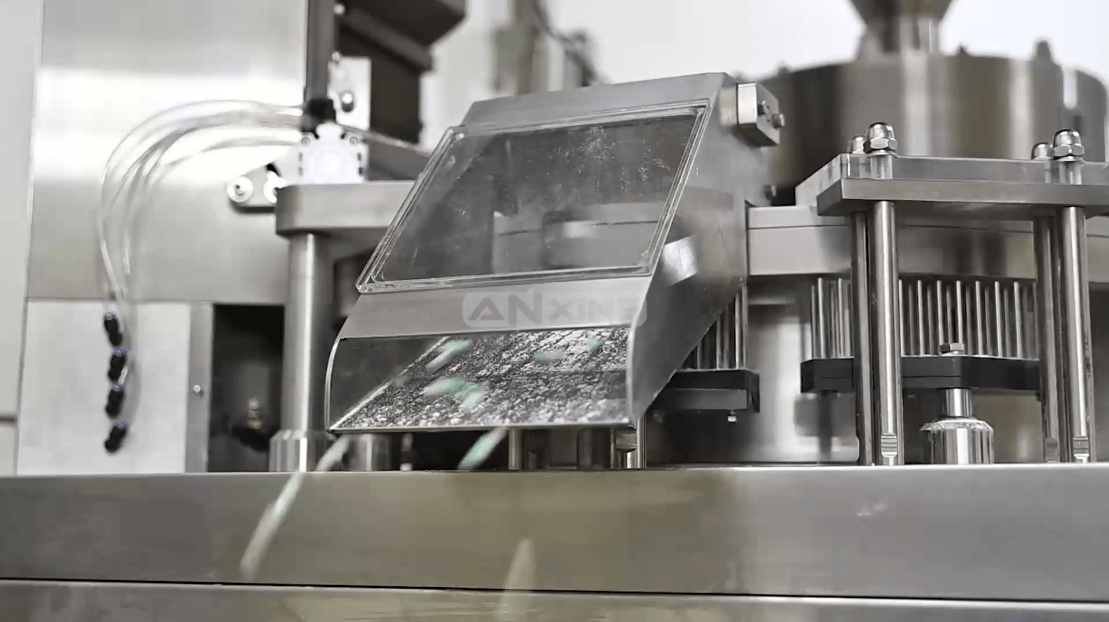
Step 4: After filling, the capsules are ejected automatically.
During operation, you may meet problems like cleaning, maintenance, or mold change. Actually, they are easy to conduct. Here are some examples for your reference. But please note that these tips only apply to the NJP series. If other types or brands of machines are used, you’d better follow their instructions.
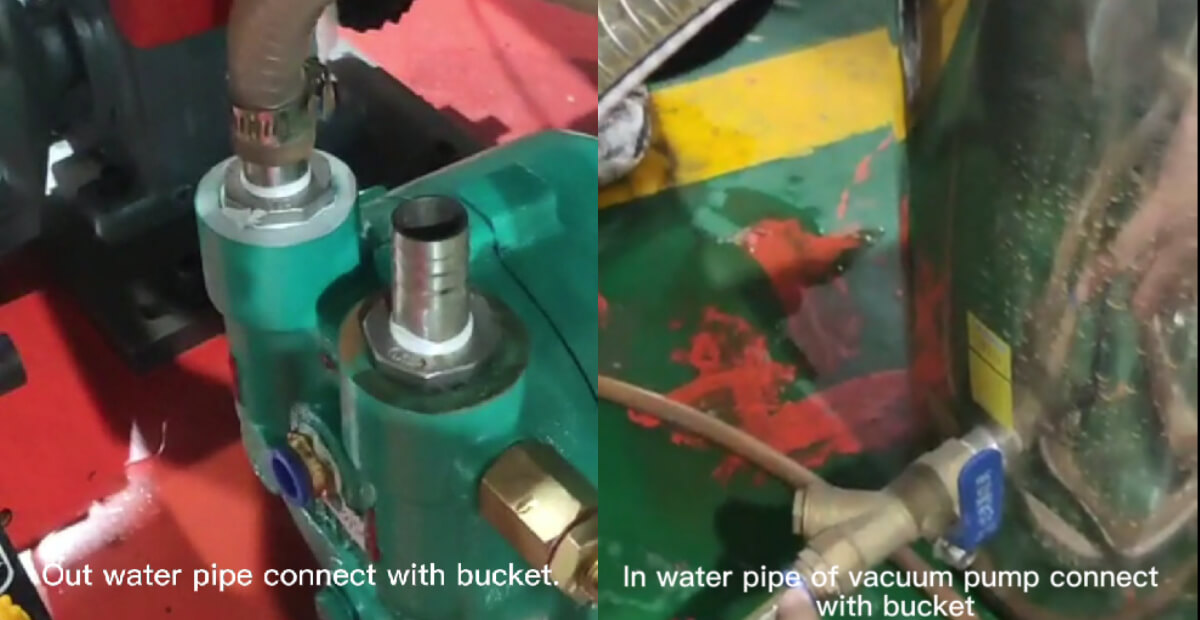
How to Connect the Vacuum Pump?
The vacuum pump has multifunctions in a fully automatic capsule filler. It helps separate the capsule cap and body, keeps capsules stable and supports dust and powder control. If you find problems during operation, it may be because the connection between the vacuum pump and the machine is not good. You can follow the steps to connect them well.
Step 1: The outlet water pipe connects with the bucket.
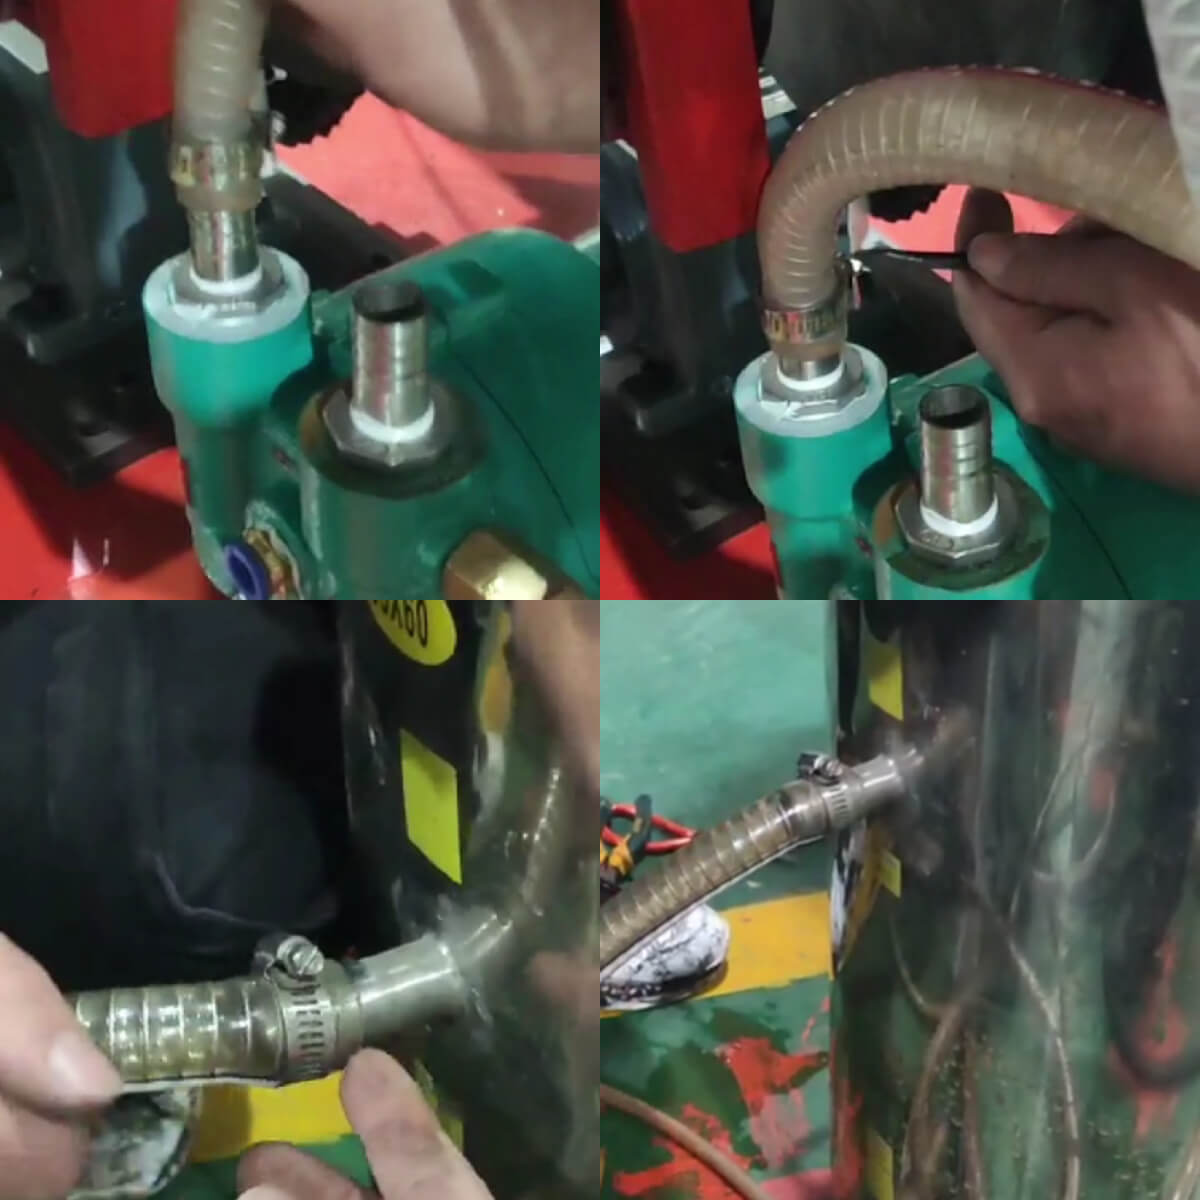
Step 2: The inlet water pipe connects with the bucket.
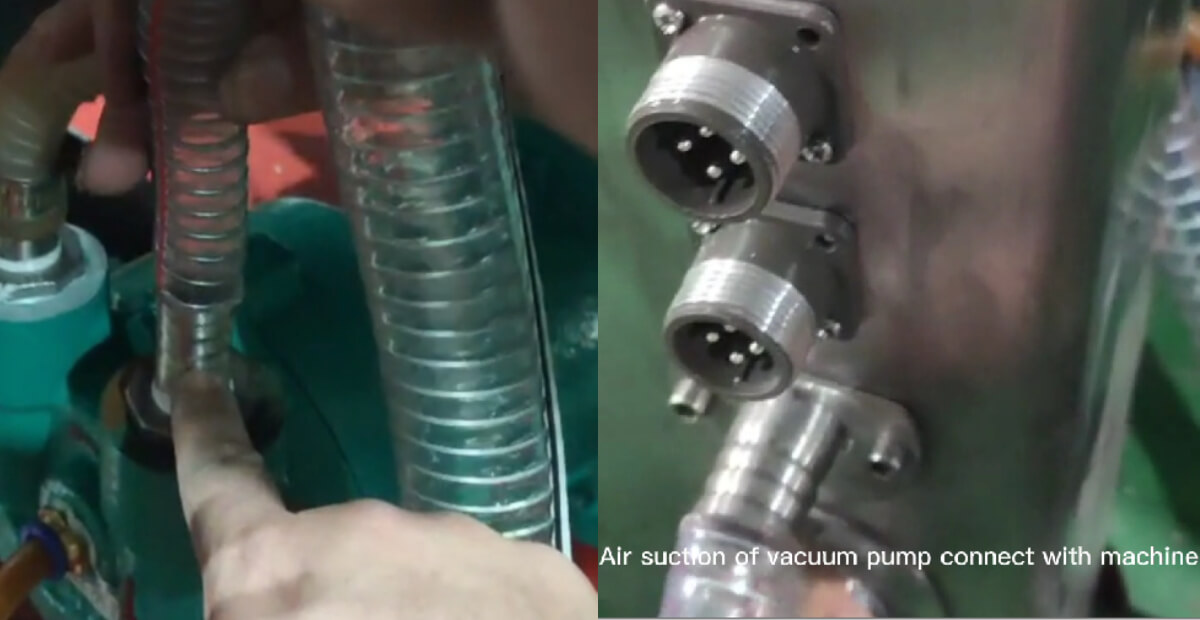
Step 3: Connect the air suction of the vacuum pump to the machine.
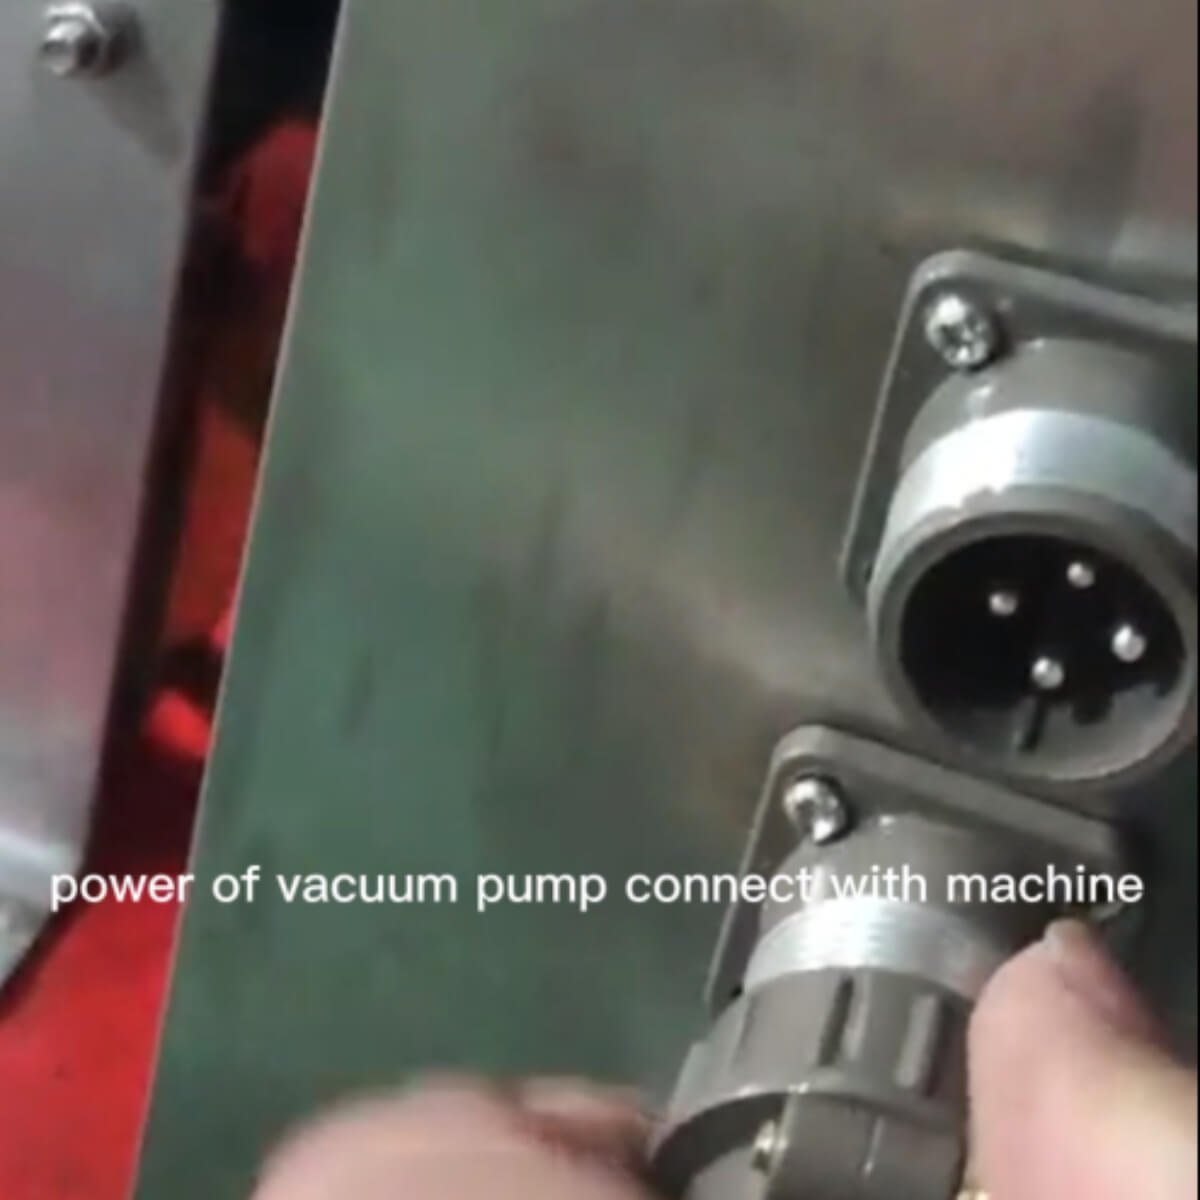
Step 4: Connect the power of the vacuum pump to the machine.
Step 5: Connect the vacuum feeder to the machine.
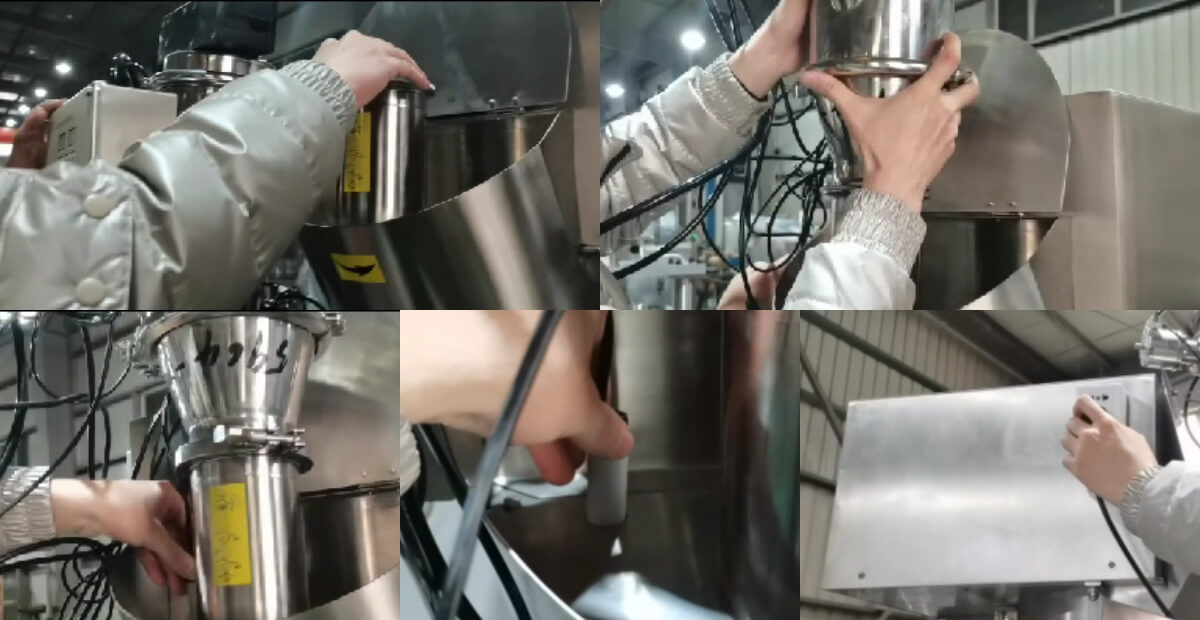
Step 6: Connect with the air compressor.
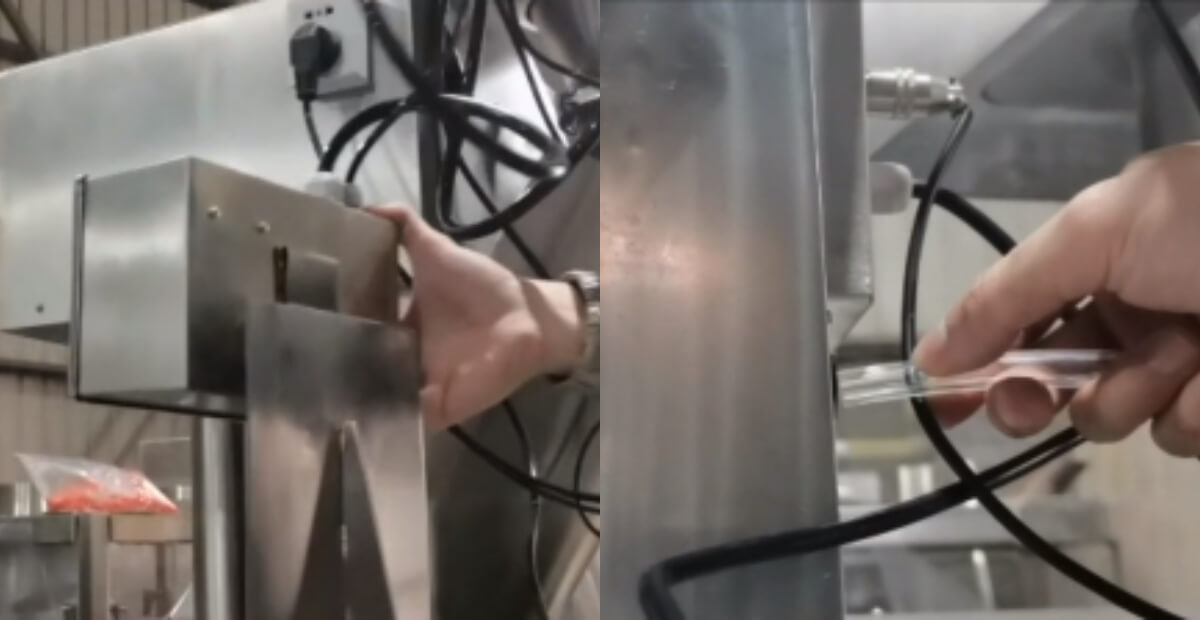
You can check the video to see the whole process clearly.
How to Adjust the Parts to Change the Filling Volume?
The filling volume is sometimes changed for different production batches. It depends on the dosing plate for adjustment. The dosing plate is a precision disk with multiple bores that set the target fill volume for each capsule. During operation, tamping pins compact powder into these bores, and the powder is then released into the capsule body. When the dosing plate height or clearance is adjusted with a feeler gauge, the amount of powder compacted into each bore changes. This directly affects capsule filling weight and the pass rate of finished capsules.
The adjustment steps are more complex than others. You can see the video at first.
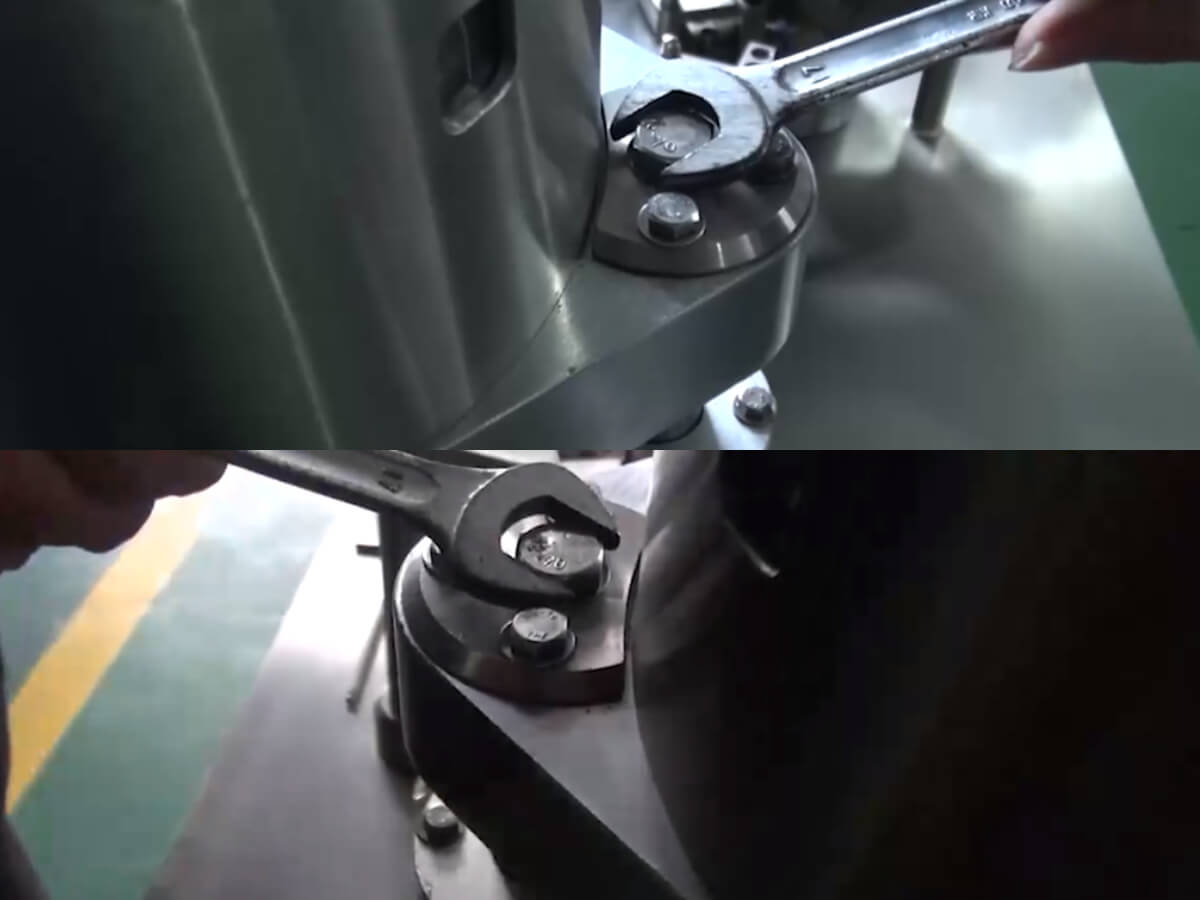
Step 1: Insert a feeler gauge of 0.07mm between the dosing plate and the copper plate. If you find the gap is too large, adjust the screw below.
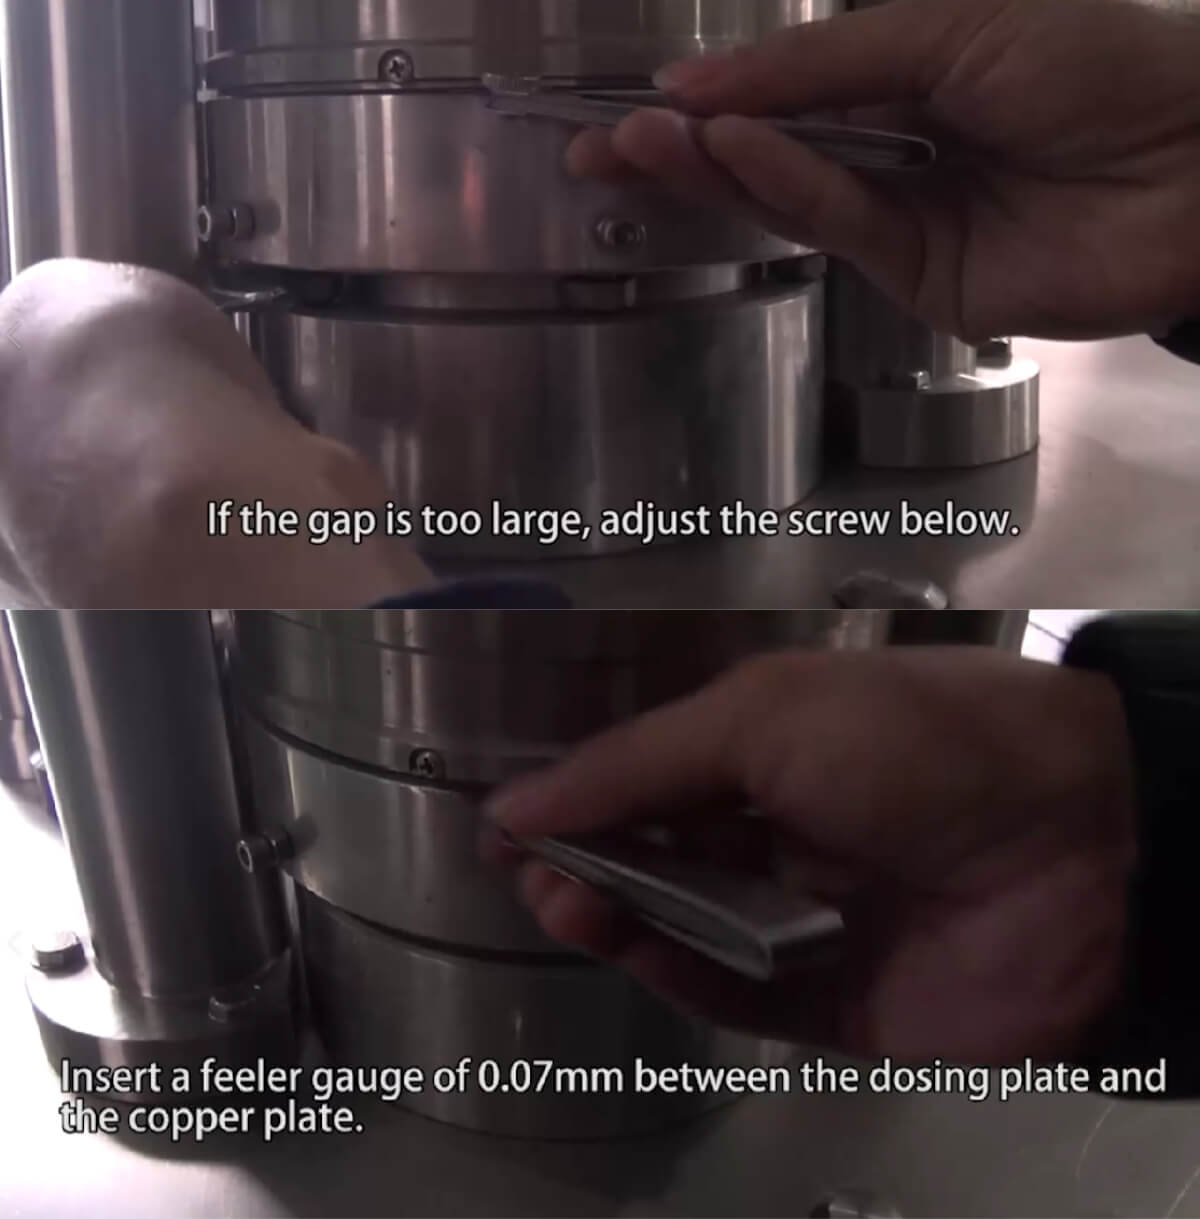
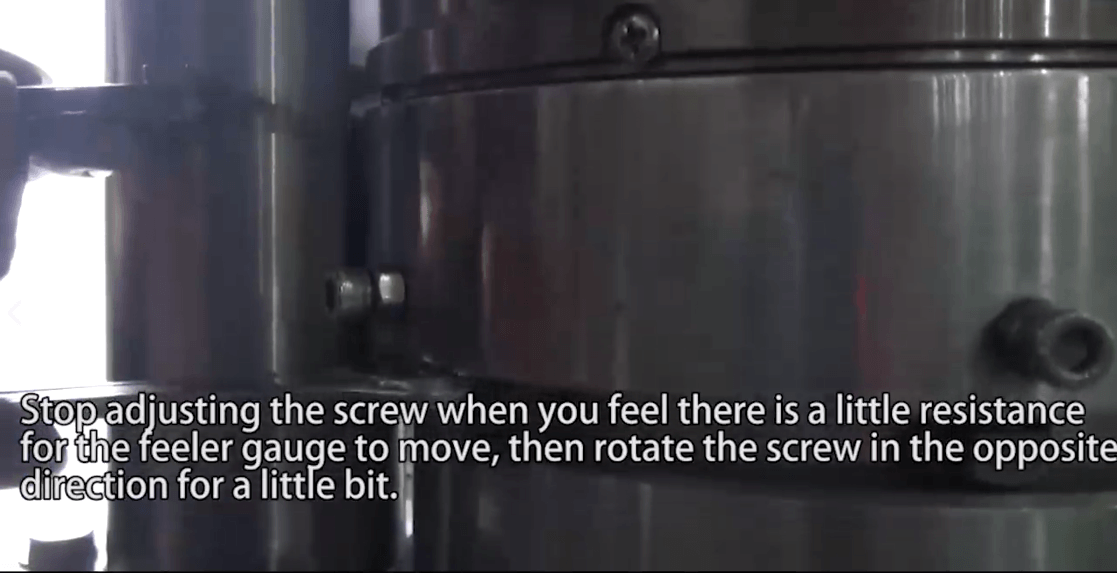
Step 2: Stop adjusting the screw when you feel slight resistance while moving the feeler gauge. Then, rotate the screw in the opposite direction for a little bit.
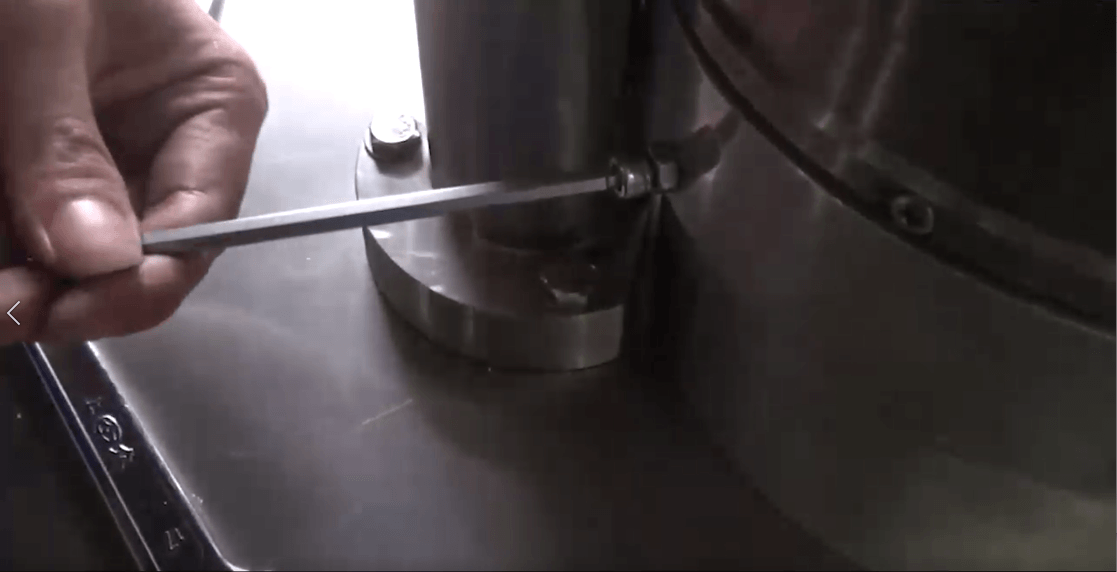
Step 3: Lock the screws, and then adjust the other 5 groups in the same way.
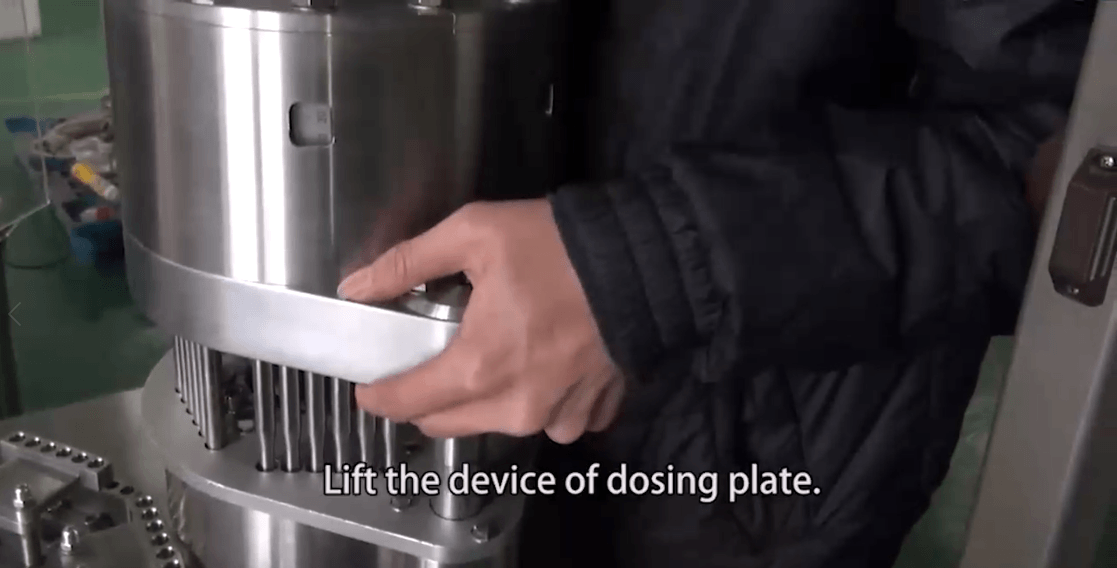
Step 4: Loosen the screws on both sides.
Step 5: Lift the dosing plate.
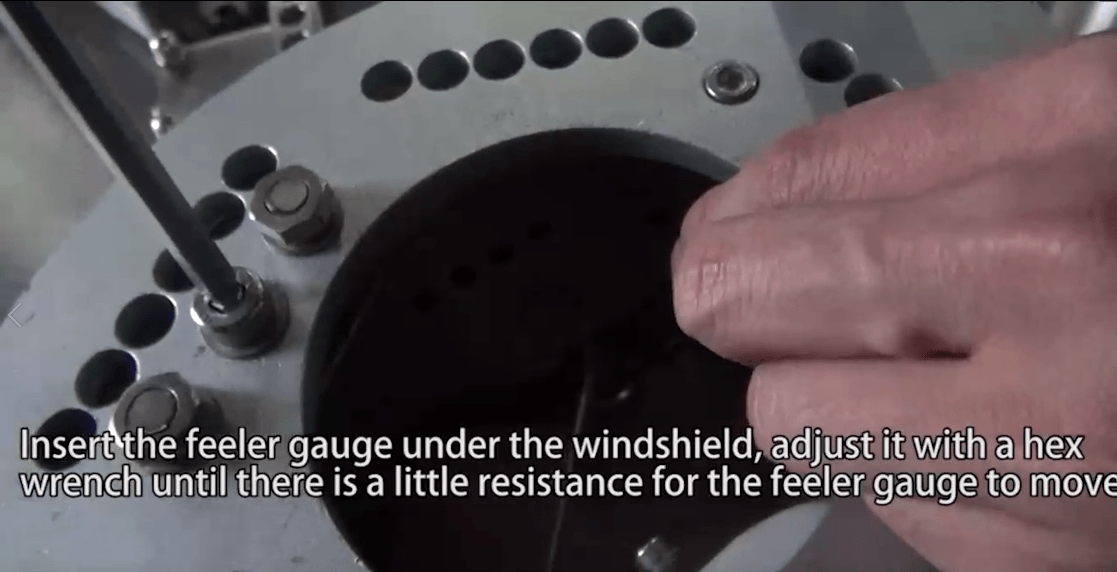
Step 6: According to your powder, choose a feeler gauge of 0.05-0.1mm. This is a feeler gauge of 0.08mm in the video. Next, insert the feeler gauge under the windshield, and adjust it with a hex wrench until there is a little resistance for the gauge to move.
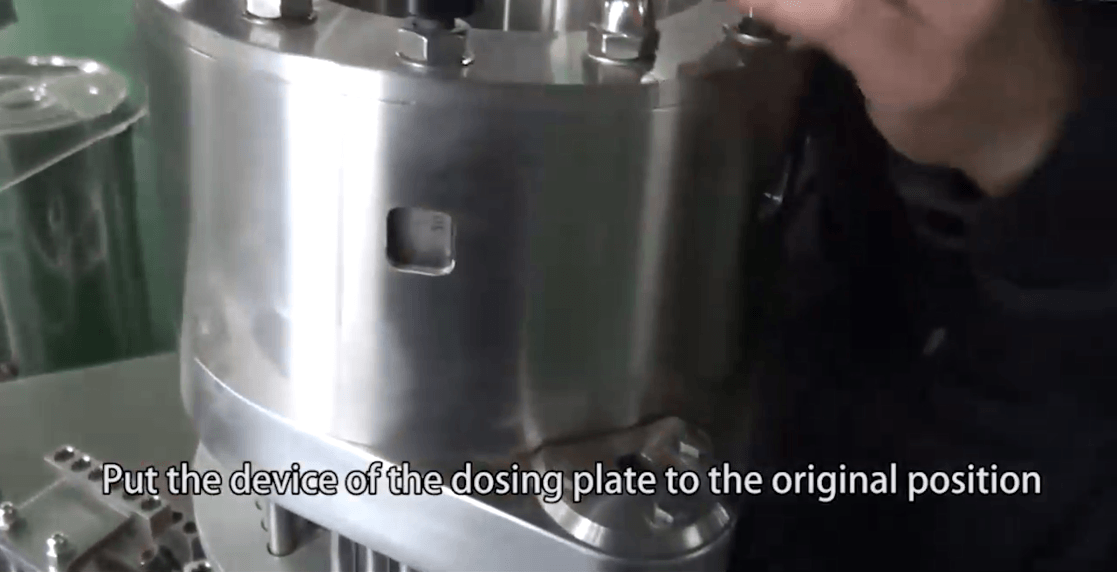
Step 7: Put the device of the dosing plate to the original position.
Step 8: Rotate the hand wheel to make the punch to the lowest position.
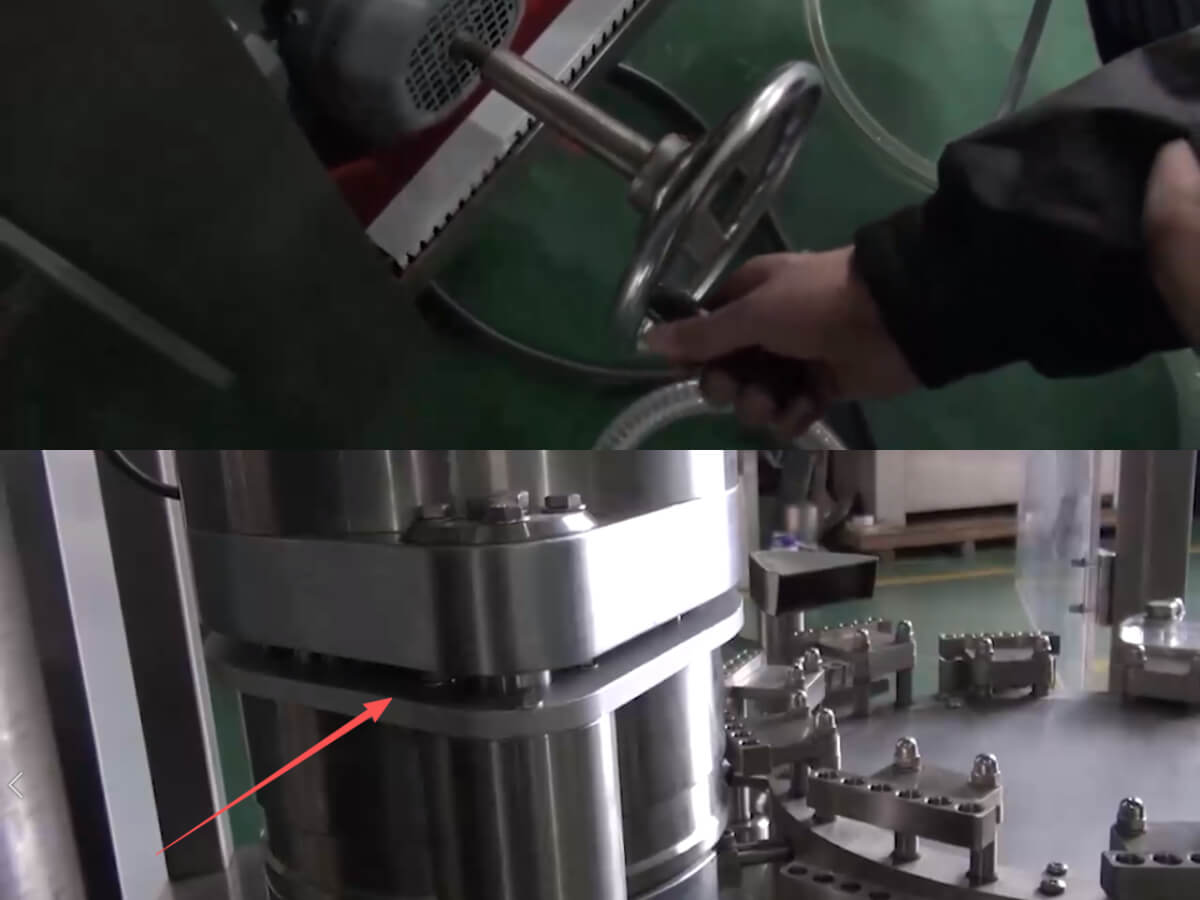
Step 9: Adjust the knob of the main punch. This part controls the final compression of the powder inside the dosing plate bores. The punch will go downward while rotating the knob counterclockwise, and the punch will go upwards if rotating the knob clockwise.
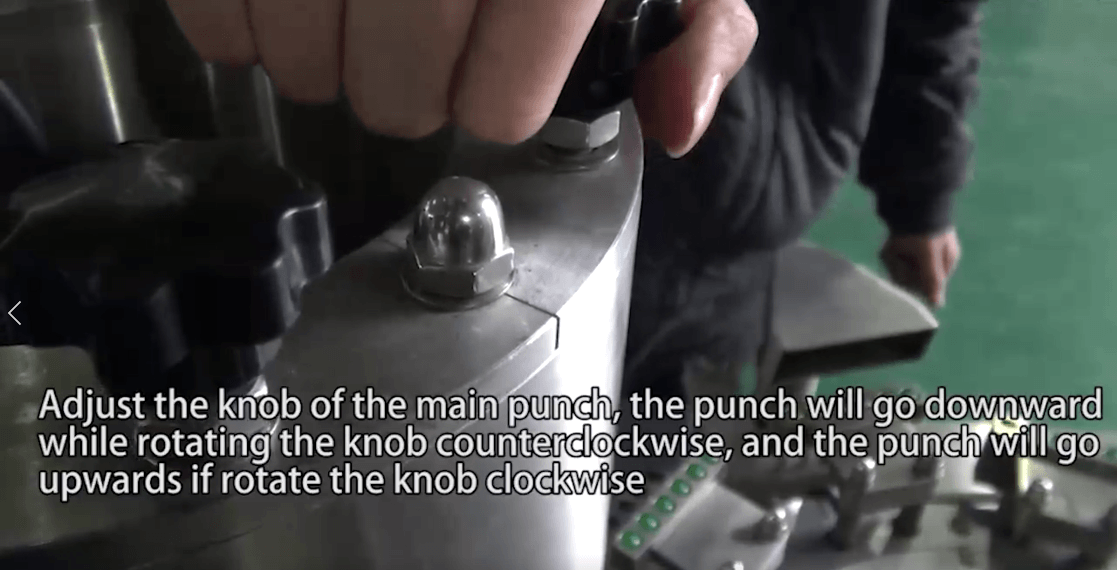
Step 10: You need to check the circled position. A slight powder ejection should be visible at this point. This means the main punch compression is correct for stable dosing and smooth powder release.

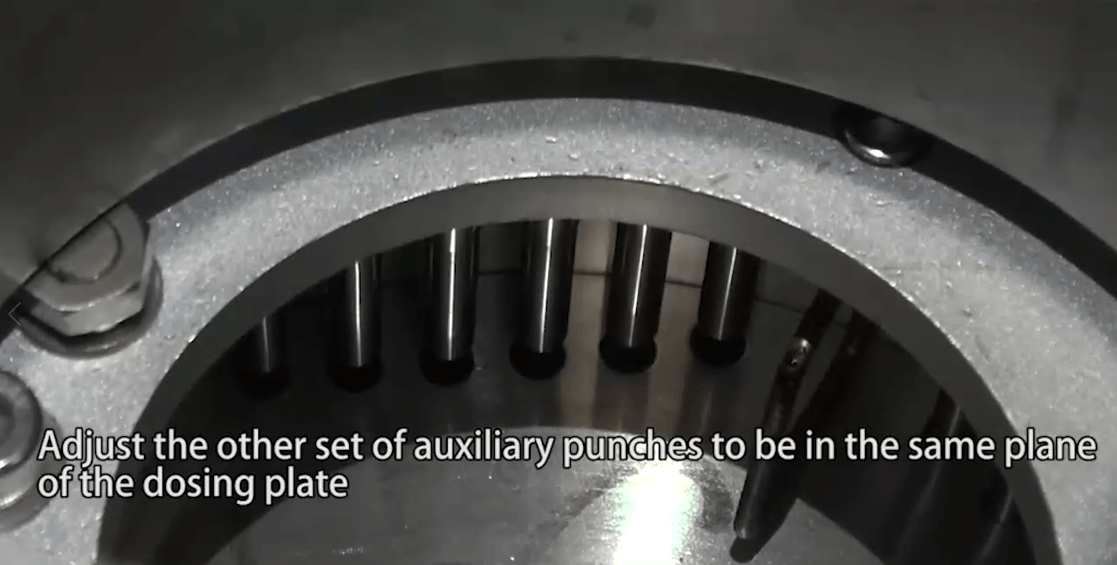
Step 11: Adjust the other set of auxiliary punches to be on the same plane as the dosing plate. This ensures that each tamping station applies a similar compression level. It is essential for consistent fill weight and high yield. Record the scale and set the same scale value for the other four groups.
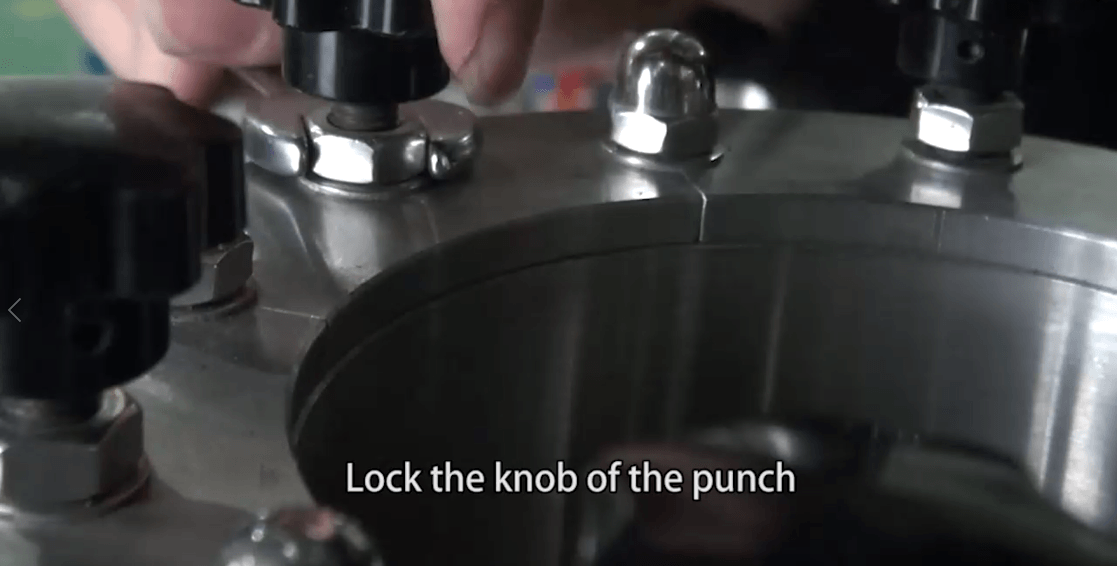
Step 12: Lock the knob of the punch.
Step 13: Turn on the power switch and hold still the “JOG” button to see if the machine can run well.
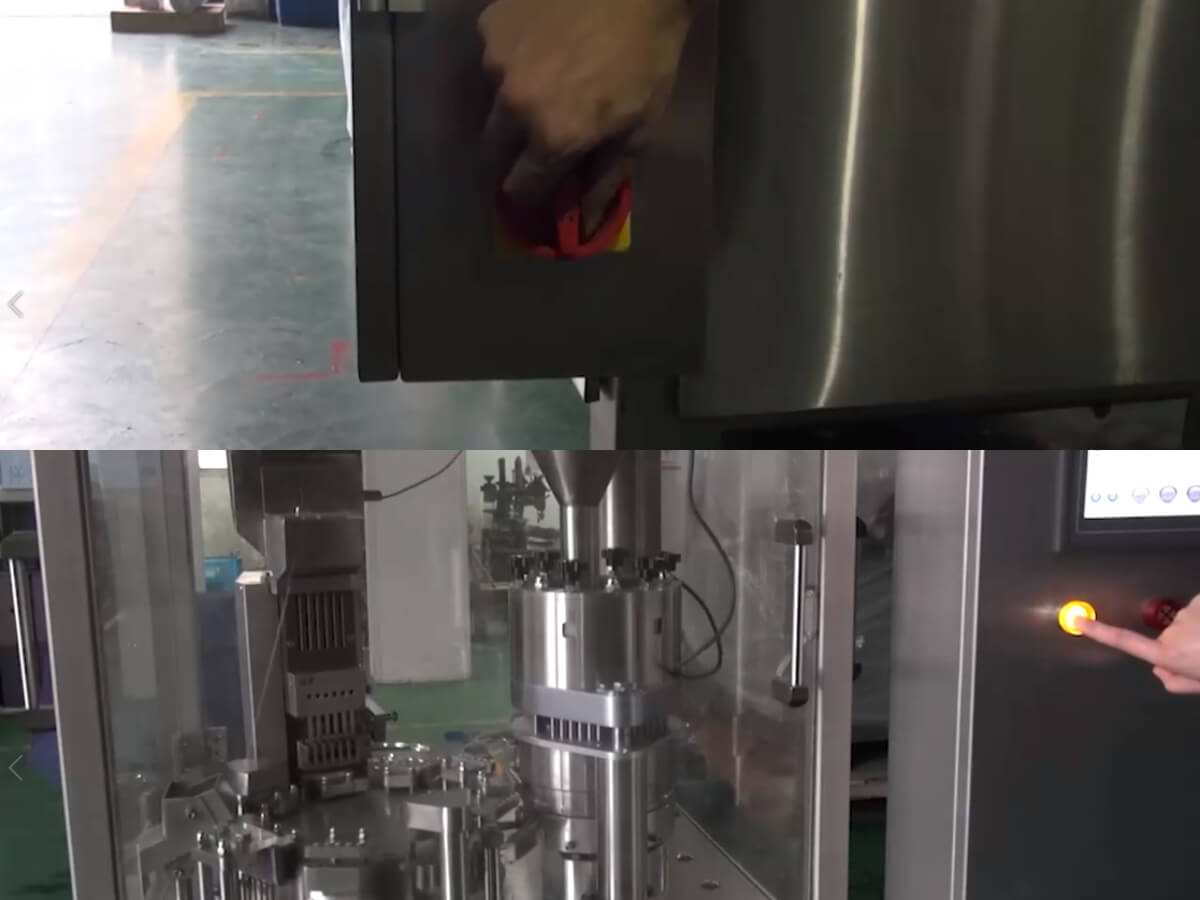
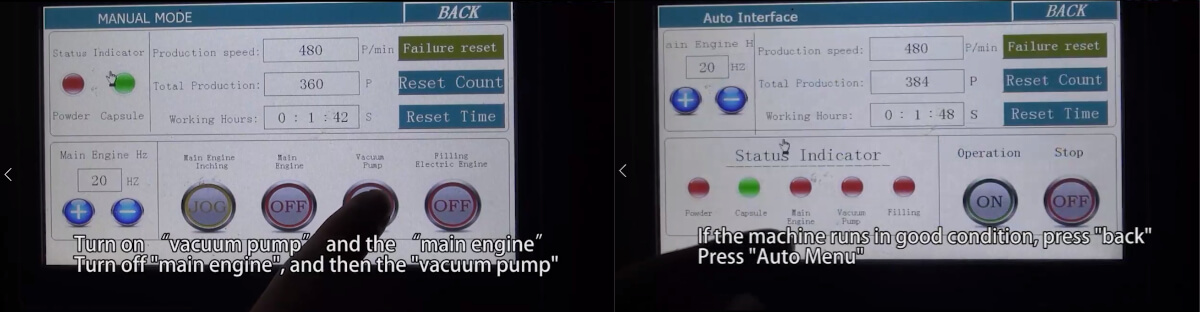
Step 14: Turn on the “vacuum pump” and “main engine” for seconds. Then turn them off.
If the machine runs in good condition, press “back” and then “Auto Menu”.
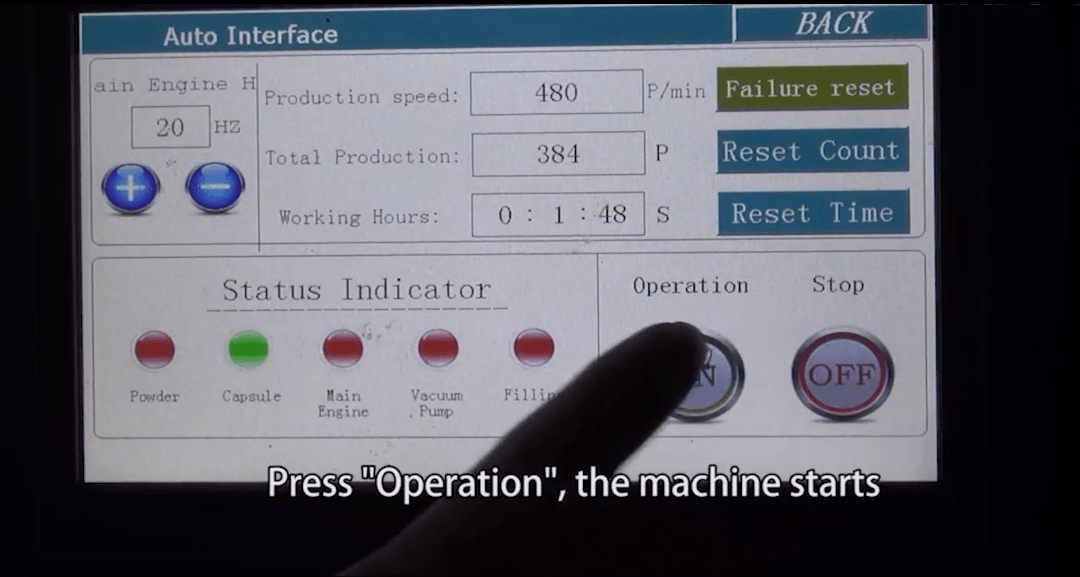
Step 15: Press “Operation” and the machine starts.
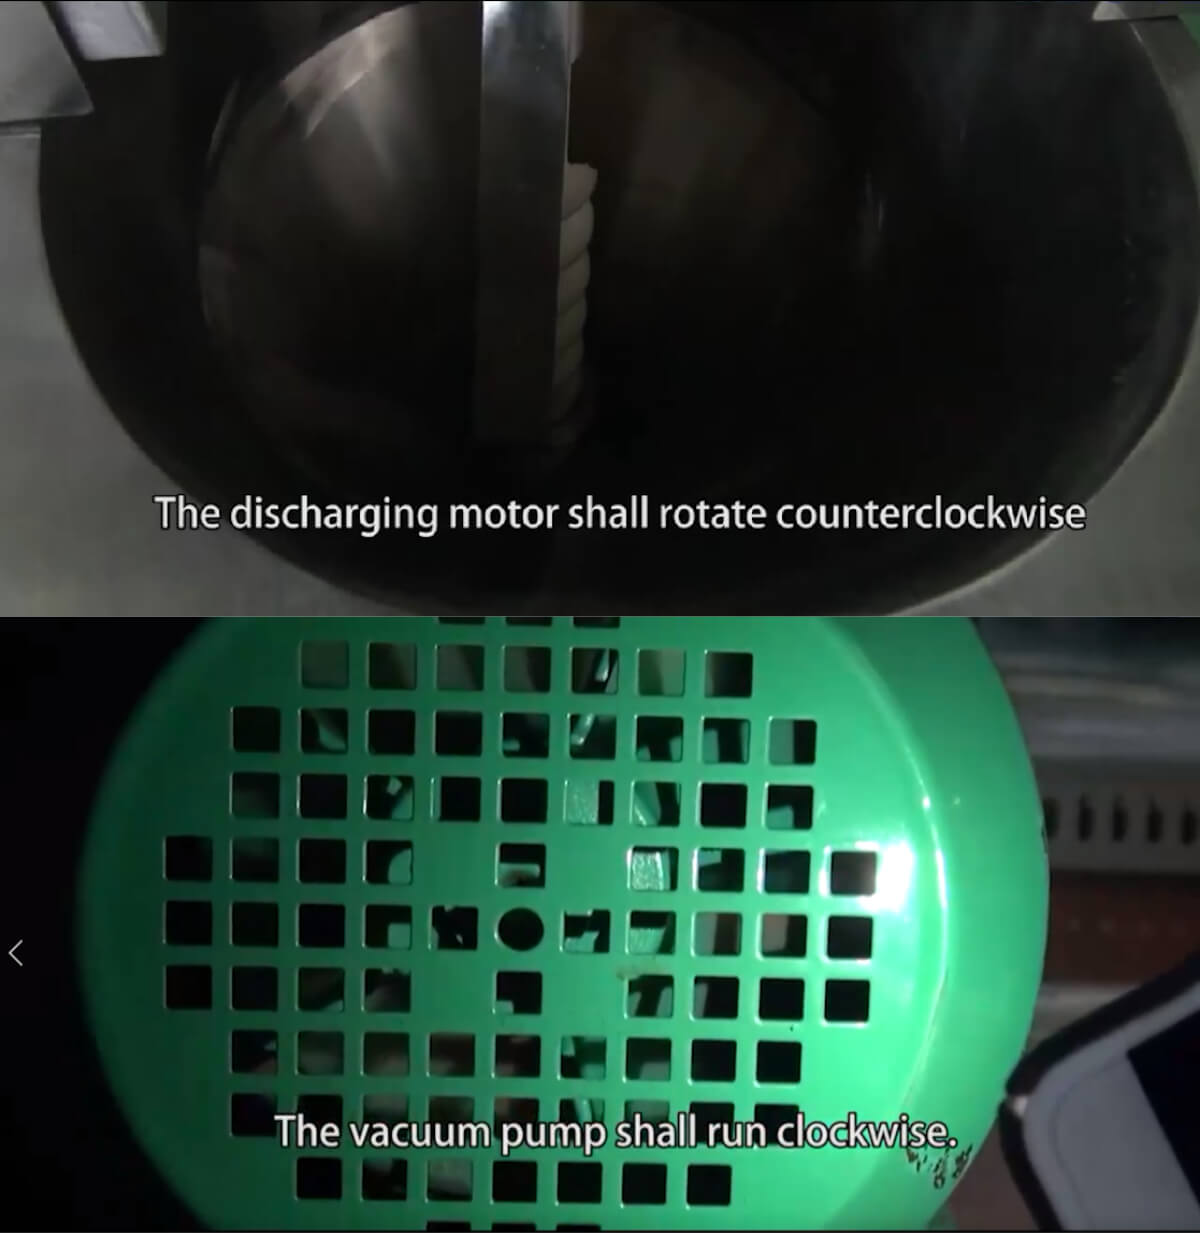
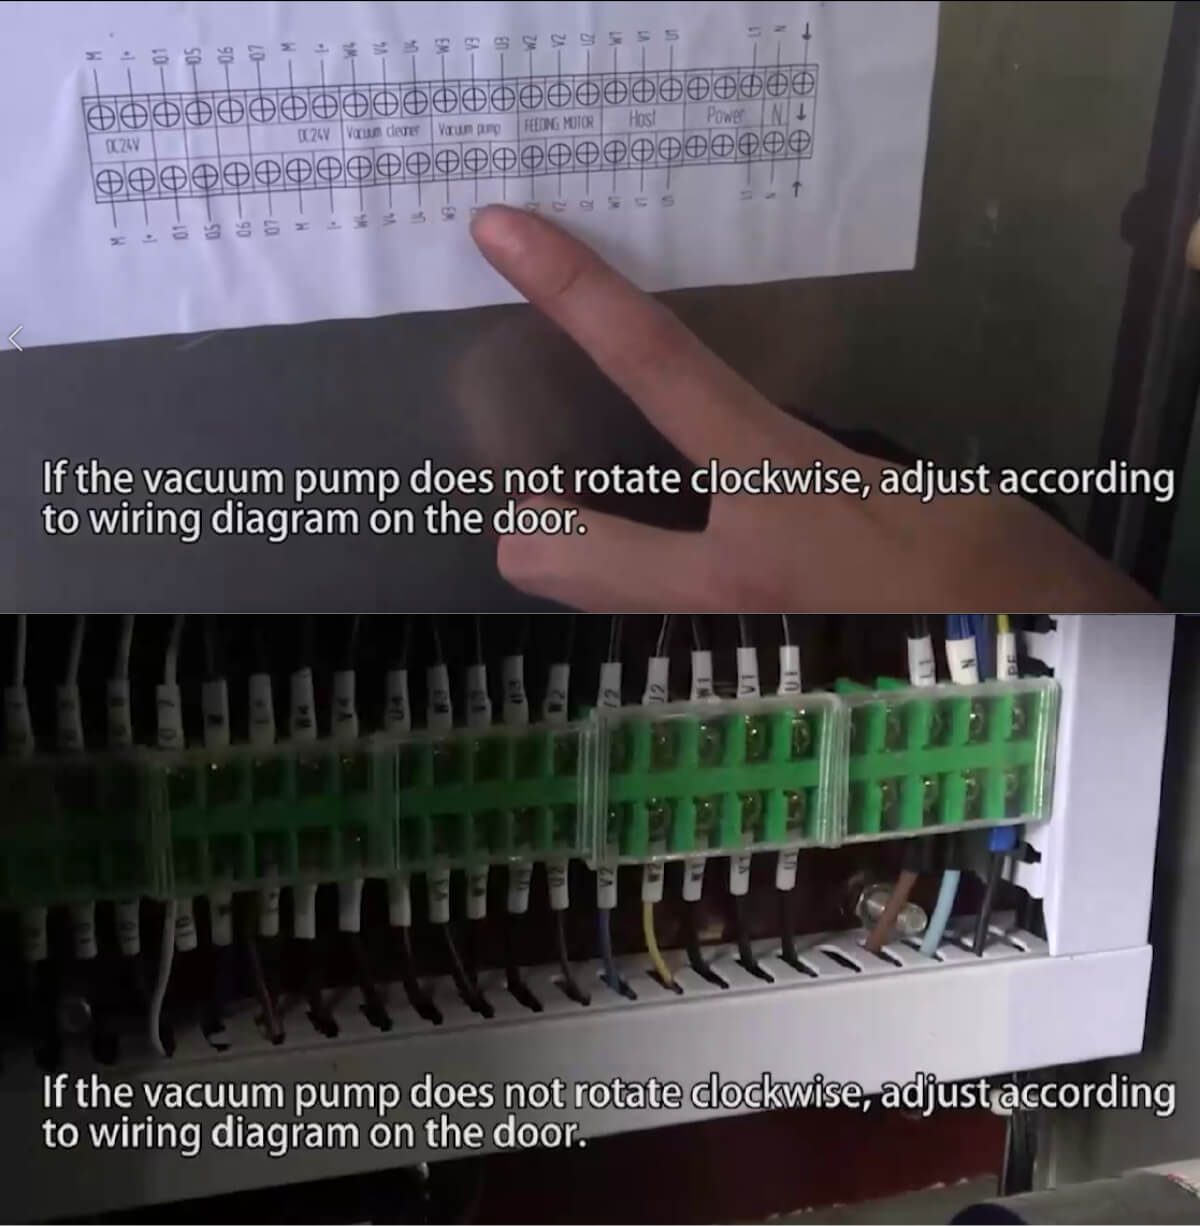
You can check the discharging motor. It shall rotate counterclockwise. And the vacuum pump shall run clockwise.
Step 16: If you find the vacuum pump does not rotate clockwise, adjust according to the wiring diagram on the door. You need to find the wiring on the terminal, and exchange the position of any two lines.
Note that this operation must be performed by qualified electricians. Also, the main power should be turned off and locked out for safety.
How to Install the Part for Dosing and Locking?
In a fully automatic capsule filler, capsule separation, filling, and sealing are finished in a continuous way. So a correct part placement is important.
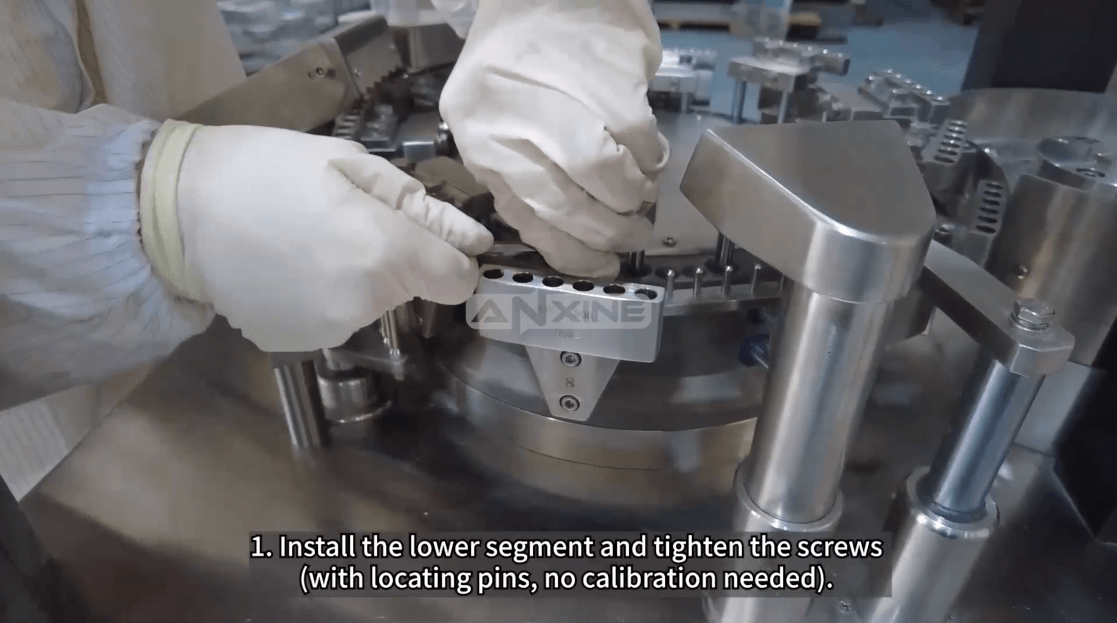
Step 1: Install the lower segment and tighten the screws. Since locating pins are used, no calibration is needed.
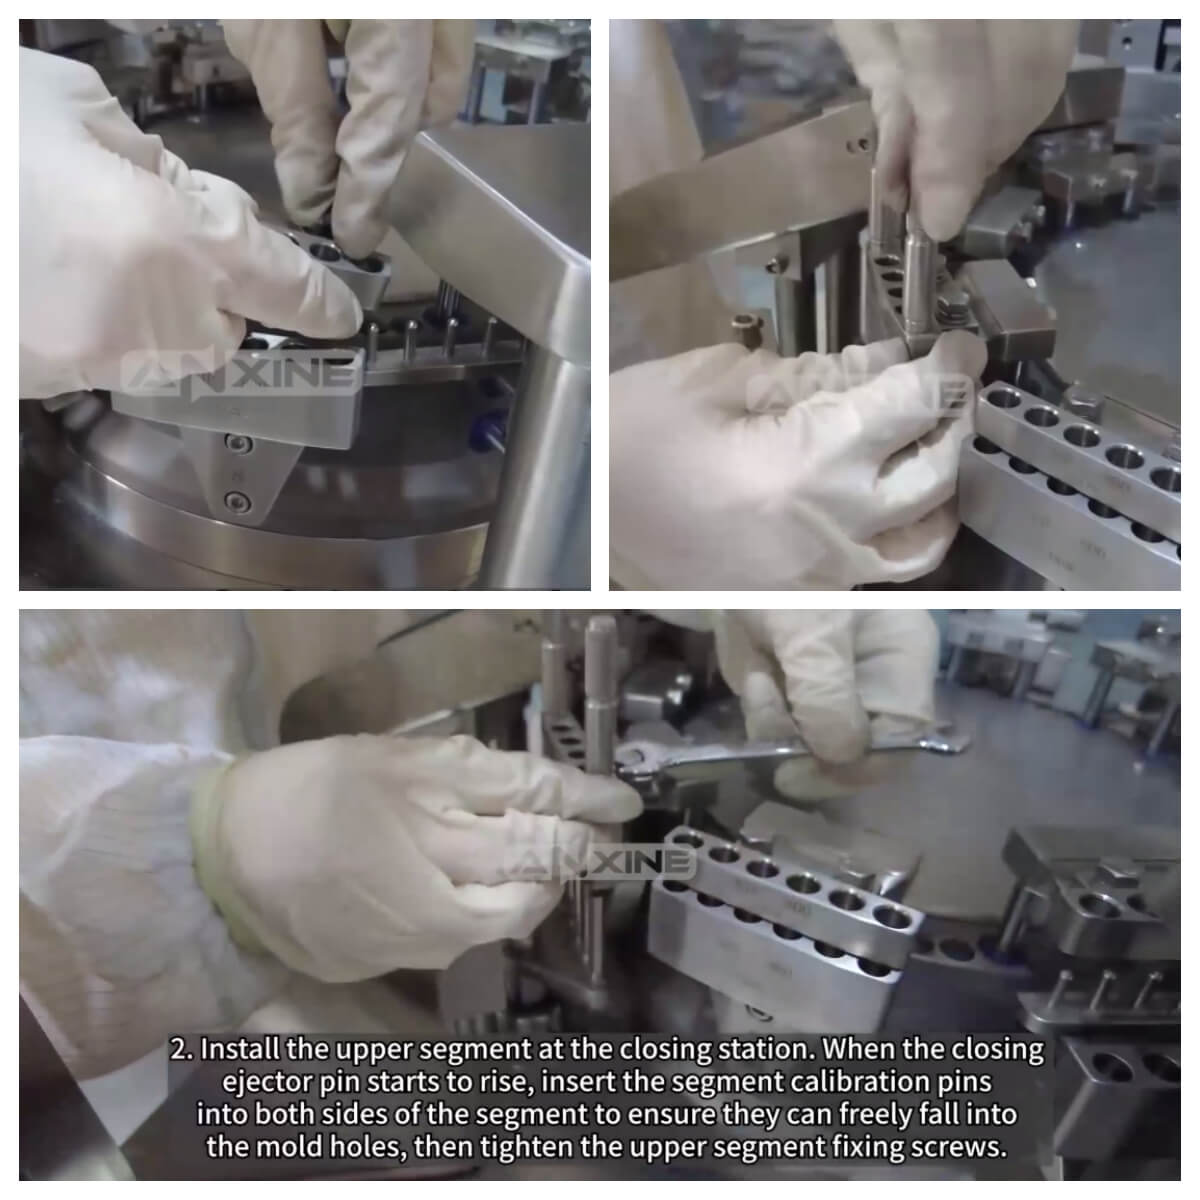
Step 2: Install the upper segment at the closing station. When the closing ejector pin starts to rise, insert the segment calibration pins on both sides of the segment. They should freely fall into the mold holes.
Then, tighten the upper segment’s fixing screws.
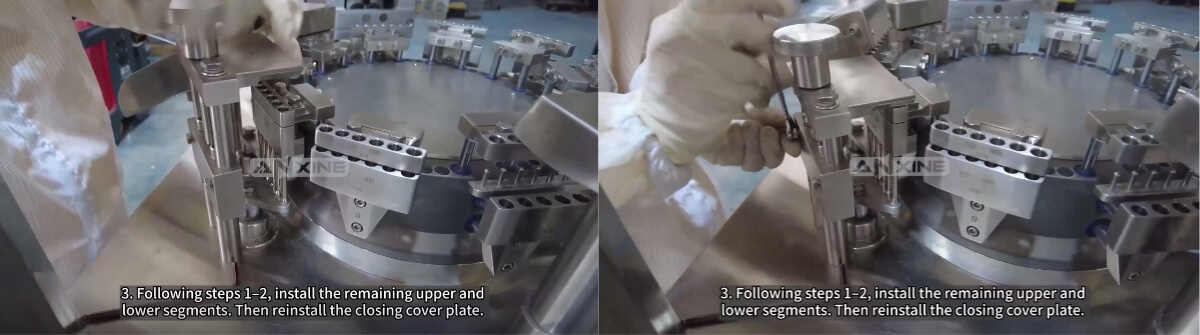
Step 3: Following steps 1-2, install the remaining upper and lower segments. Then, reinstall the closing cover plate.
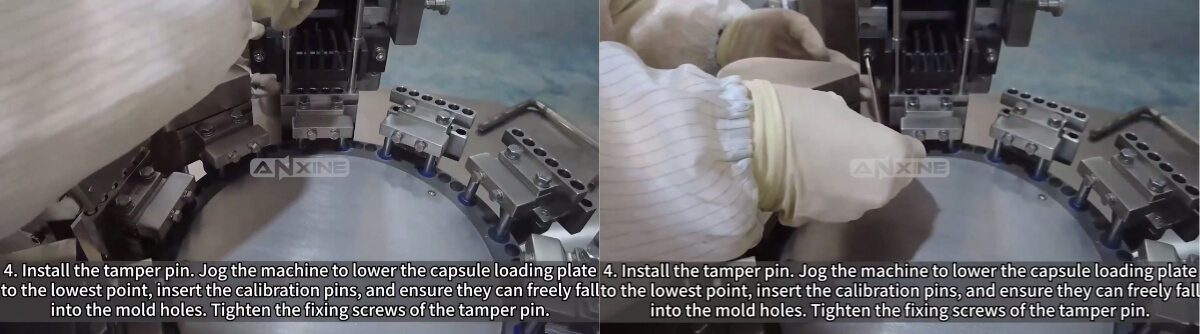
Step 4: Install the tamper pin. Jog the machine to lower the capsule loading plate to the lowest point, and insert the calibration pins. You also need to ensure they can freely fall into the mold holes. Next, tighten the fixing screws of the tamper pin.
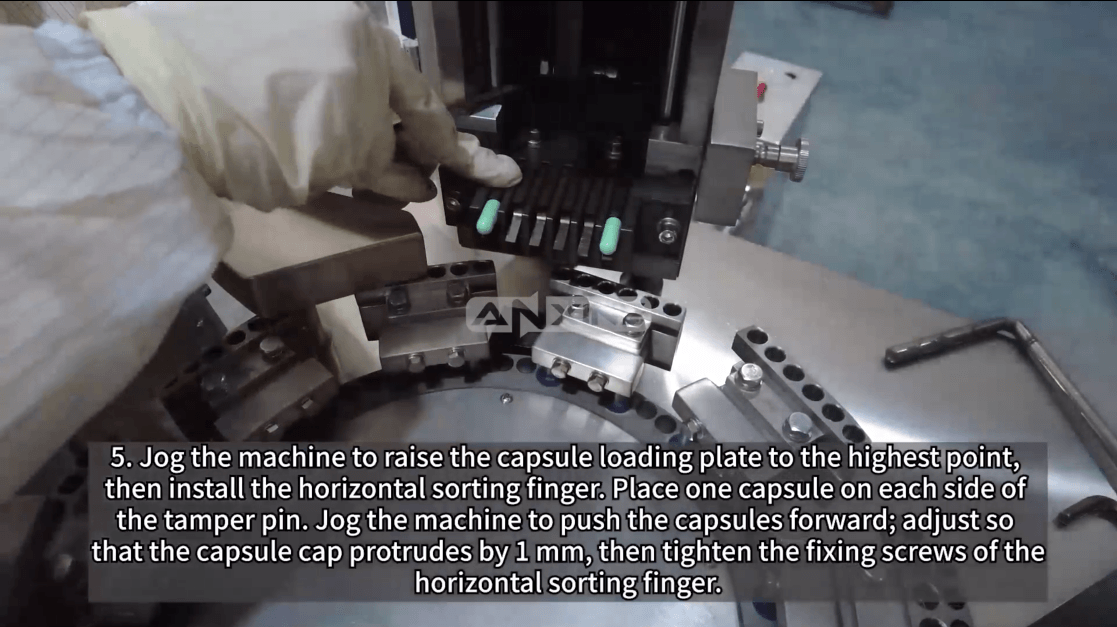
Step 5: Jog the machine to raise the capsule loading plate to the highest point, and then install the horizontal sorting finger. Place one capsule on each side of the tamper pin and jog the machine to push the capsules forward.
Adjust so that the capsule cap protrudes by 1mm, then tighten the fixing screws of the horizontal sorting finger.
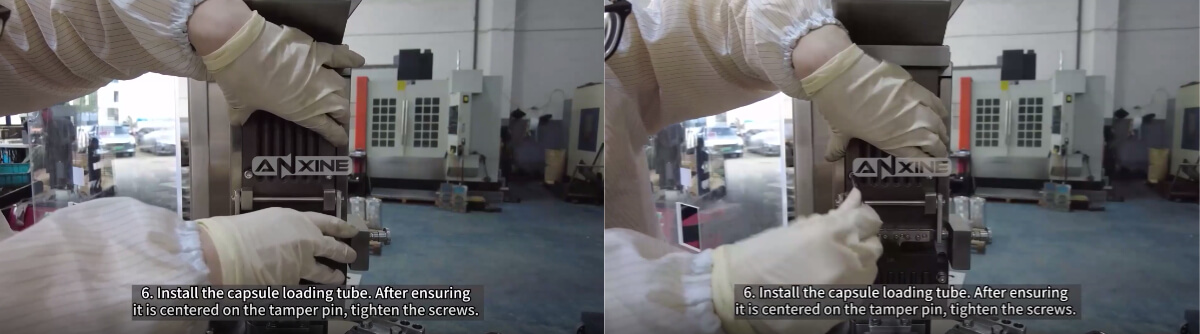
Step 6: Install the capsule loading tube. After ensuring it is centered on the tamper pin, tighten the screws.
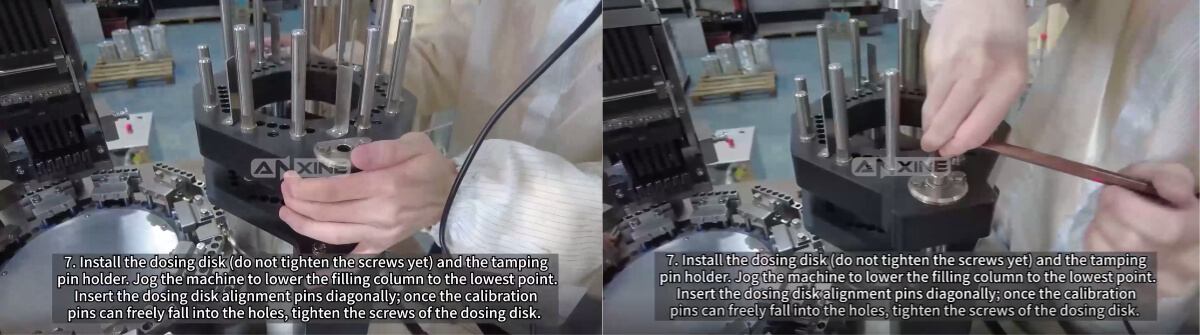
Step 7: Install the dosing disk (do not tighten the screws yet) and the tamping pin holder. Jog the machine to lower the filling column to the lowest point. Insert the dosing disk alignment pins diagonally.
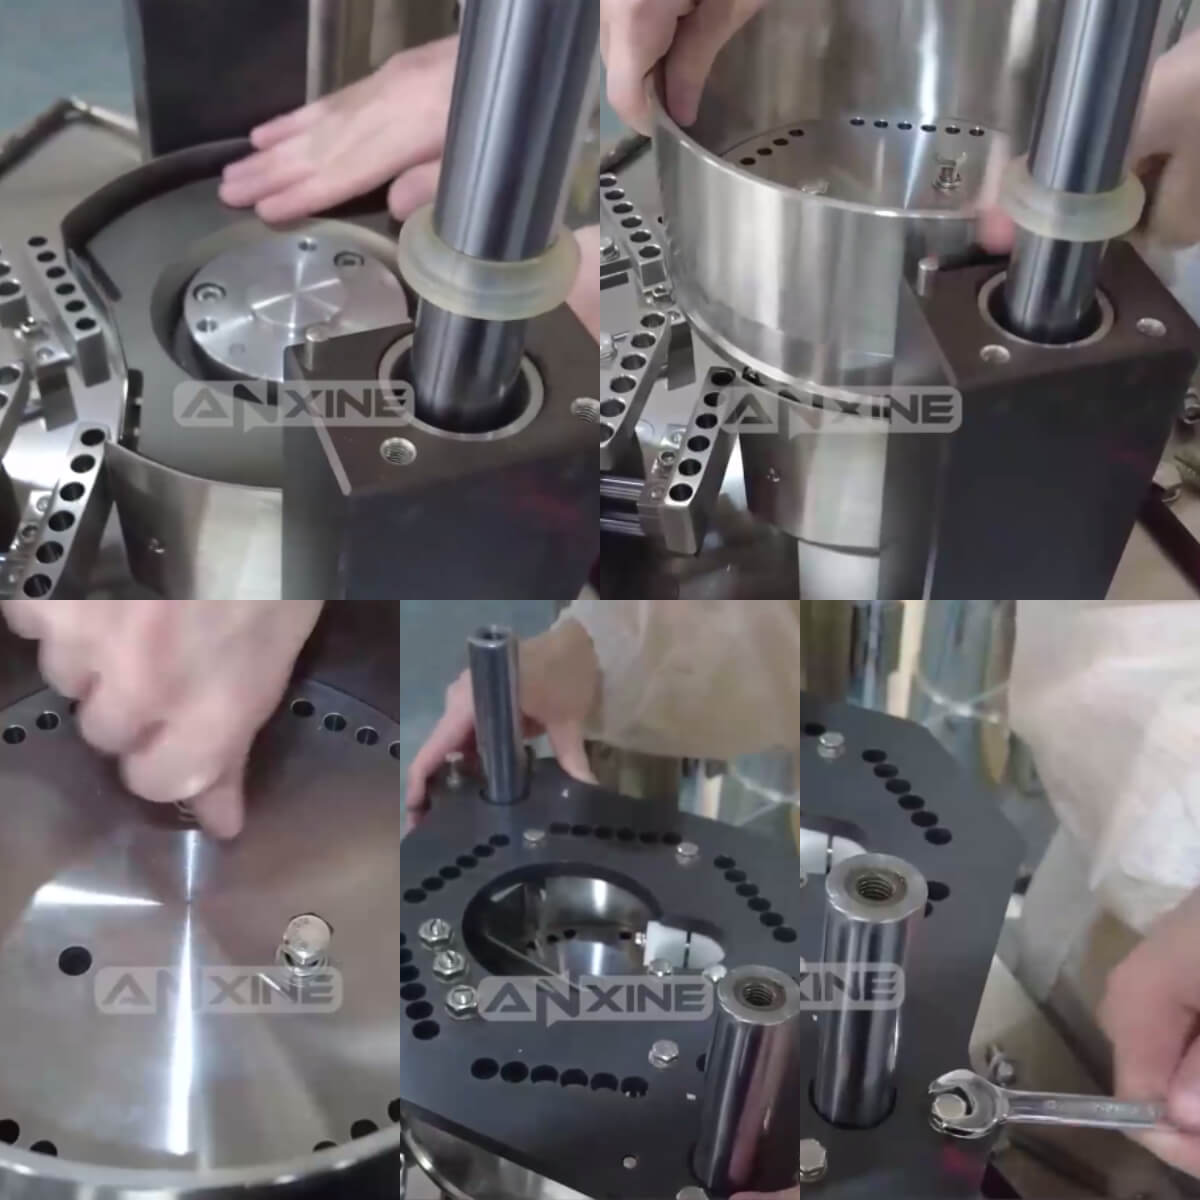
Once the calibration pins can freely fall into the holes, tighten the screws of the dosing disk.
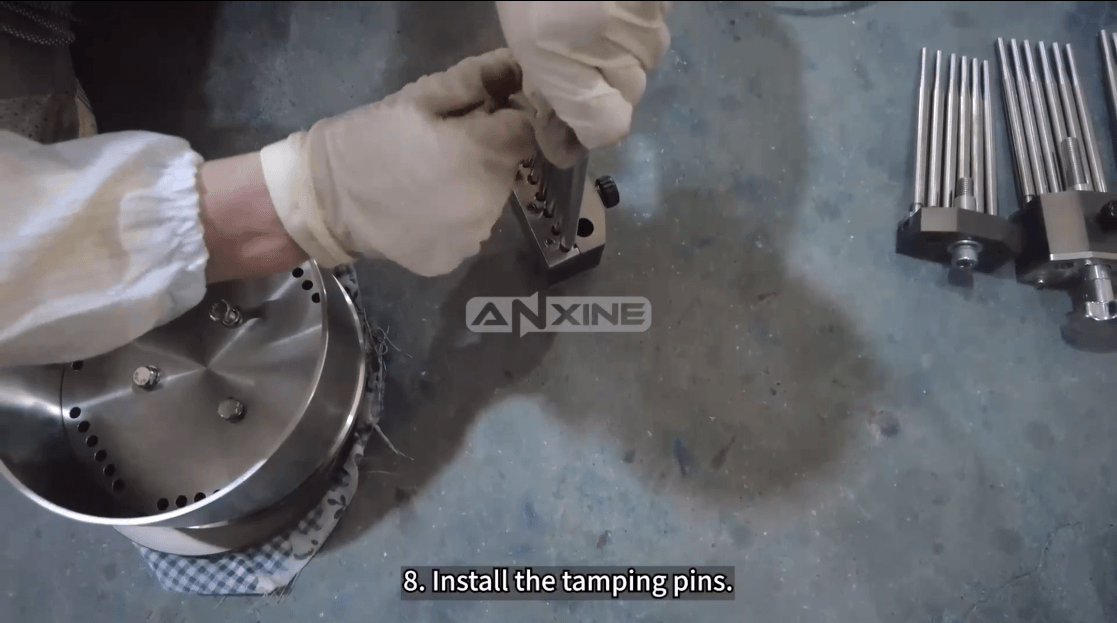
Step 8: Install the tamping pins and tighten the screws.
Step 9: Insert the tamping pins sequentially into the positioning plate. Note that one set of tamping pins without springs should be installed toward the lower segment.
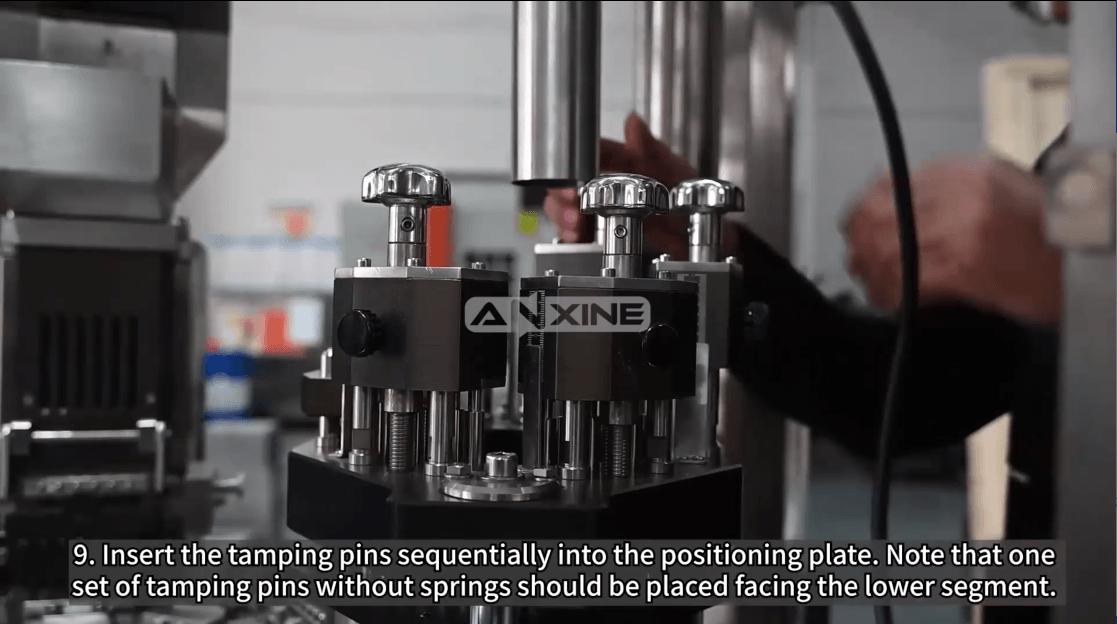
The video can show you how the process is operated.
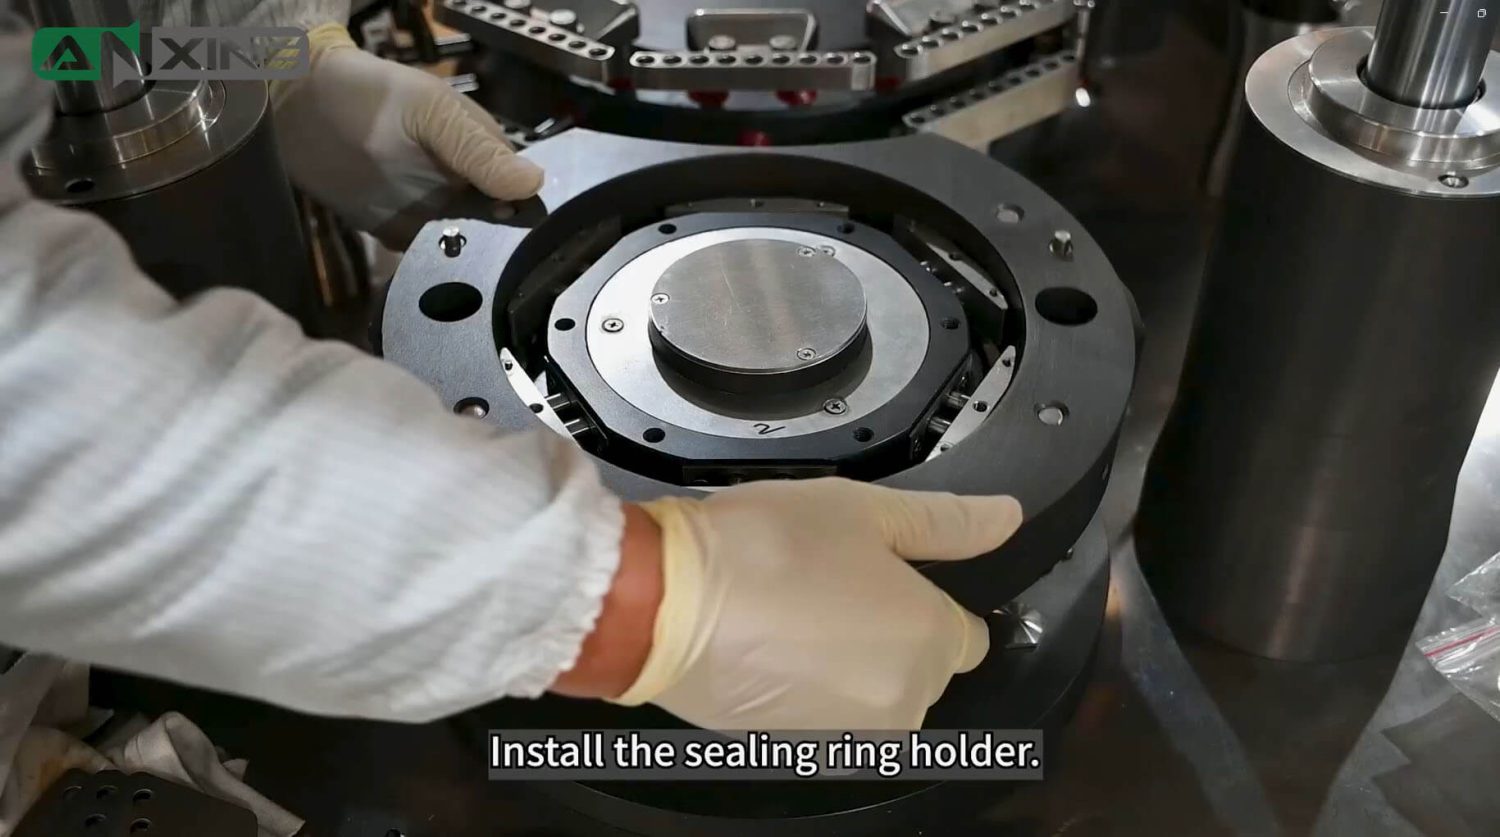
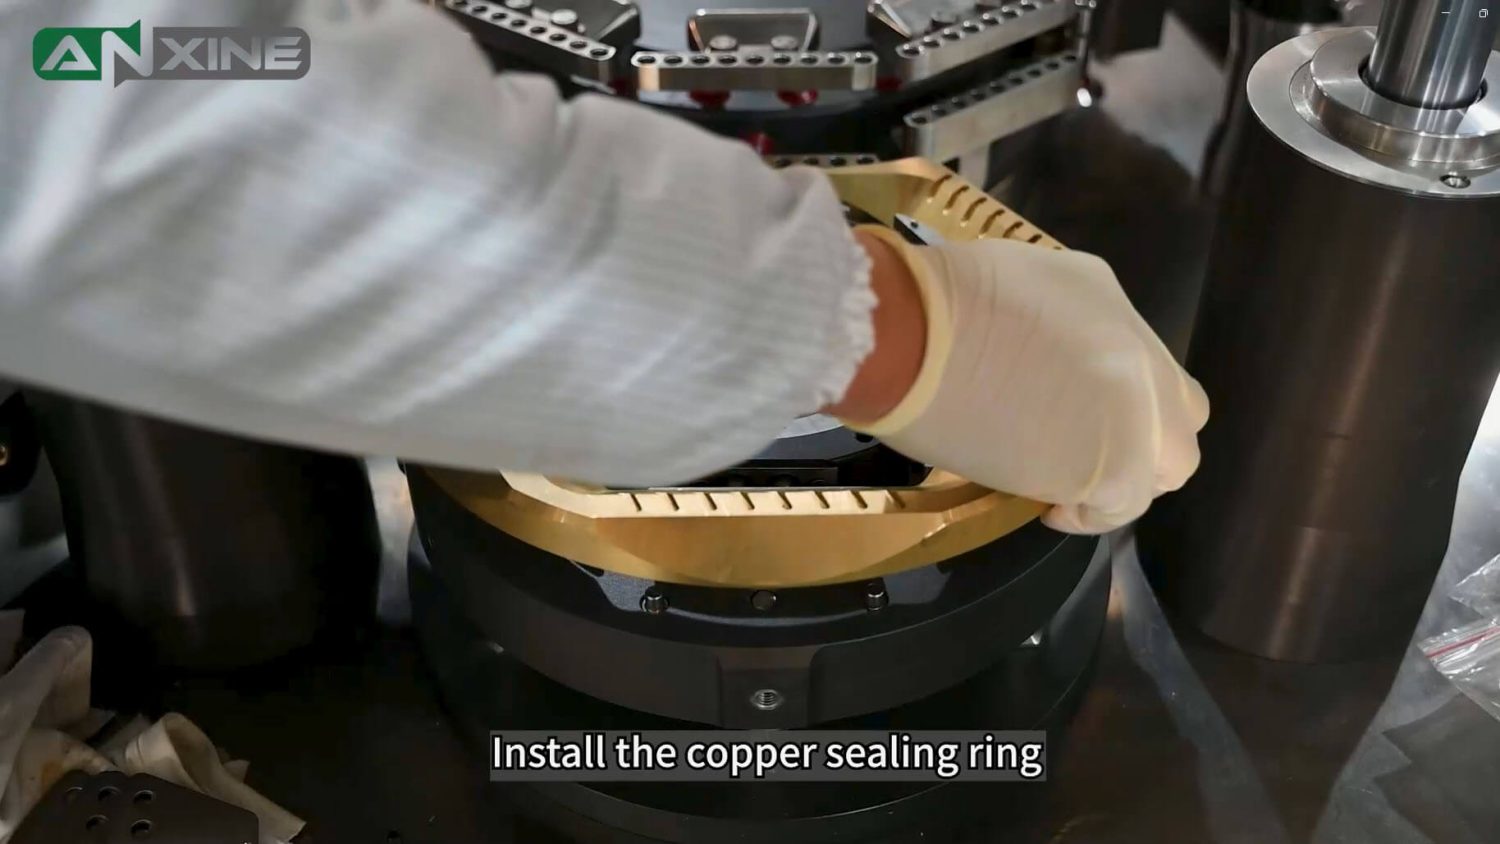
How to Install the Anti-Leakage Device
Step 1: Install the sealing ring holder.
Step 2: Install the copper sealing ring
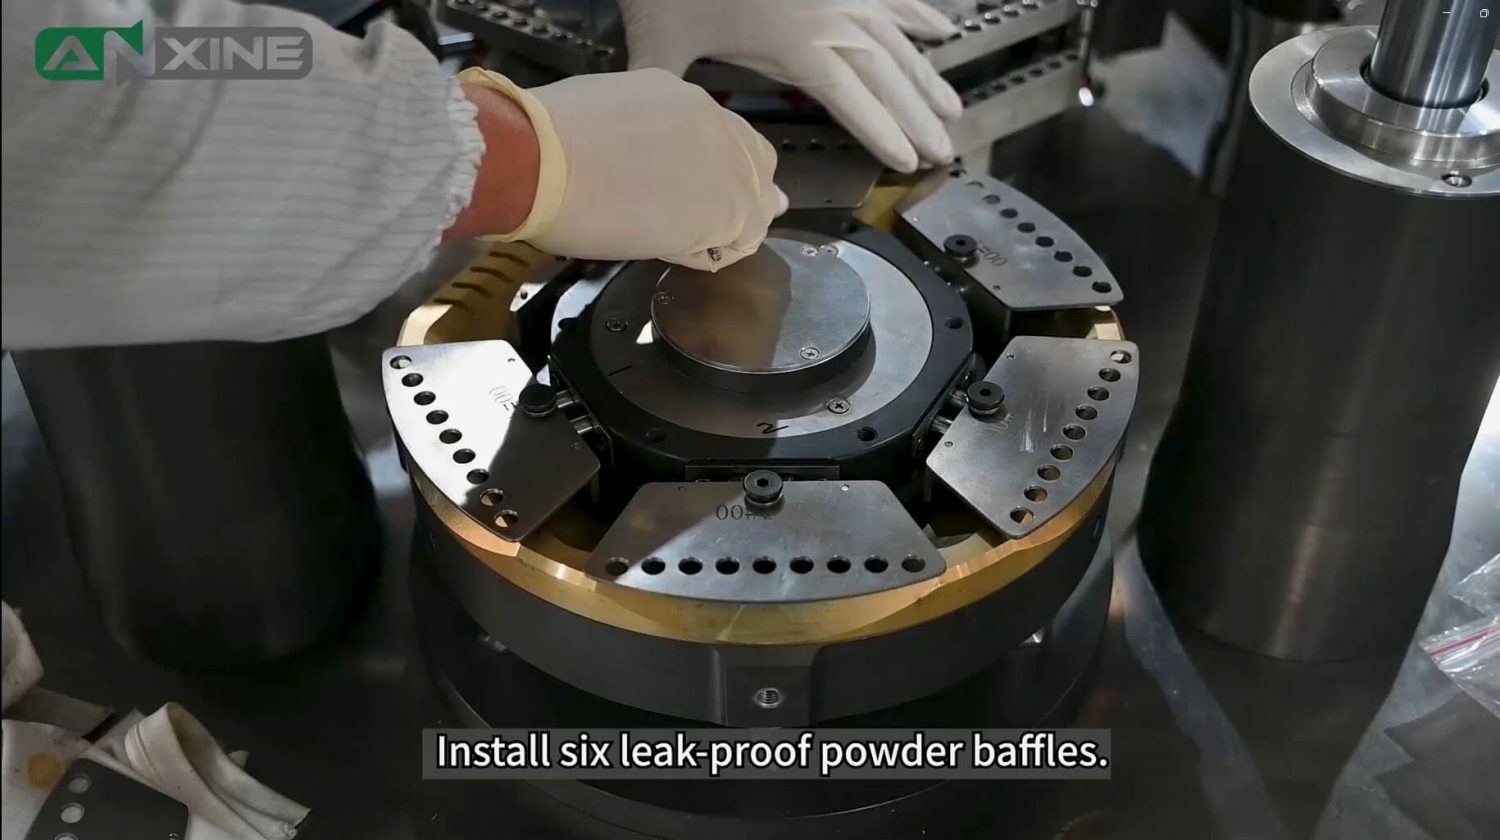
Step 3: Install six leak-proof powder baffles
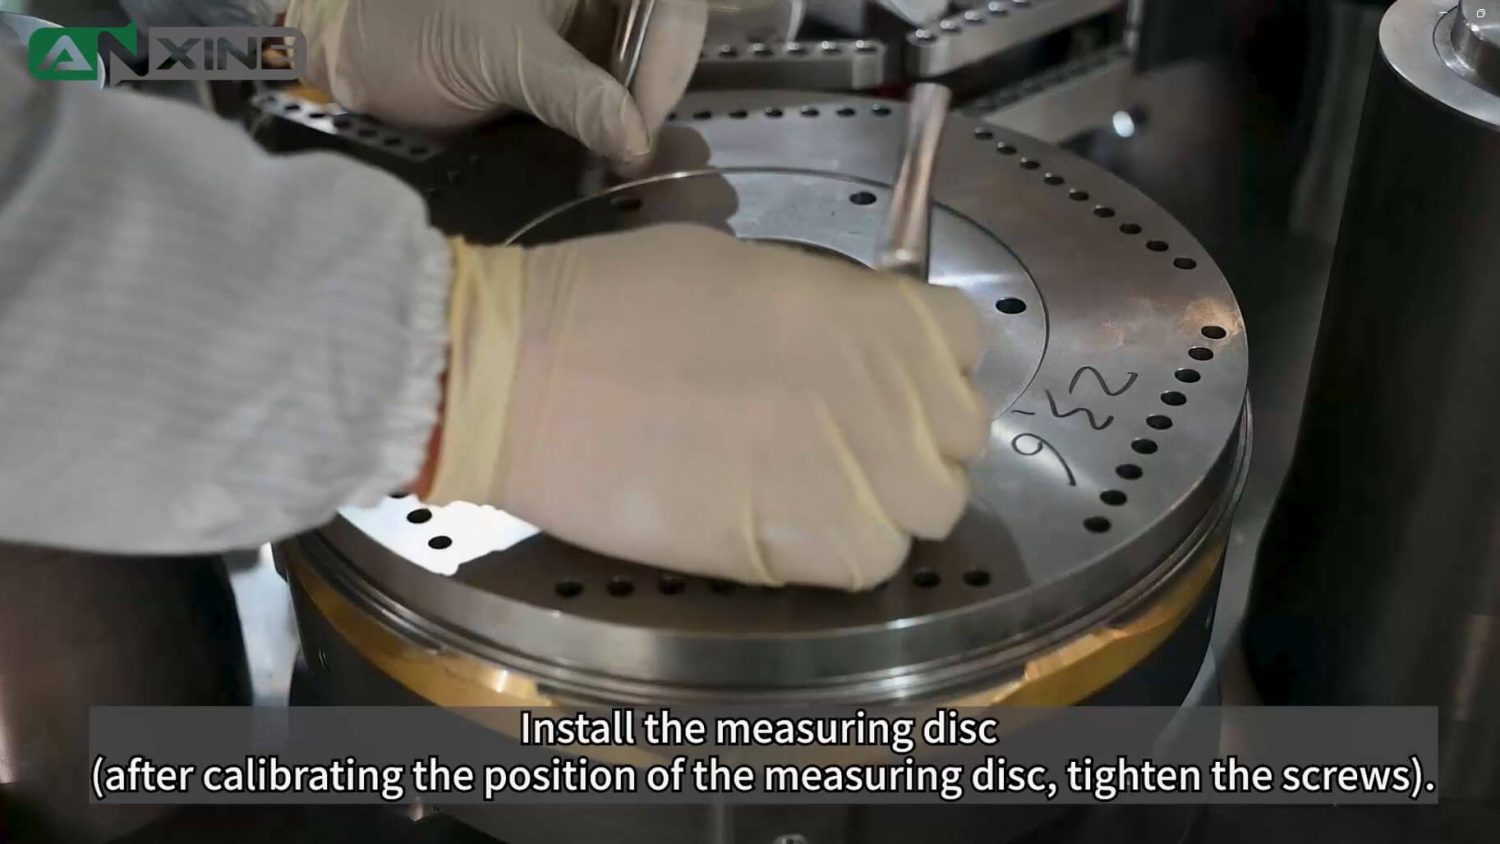
Step 4: Install the measuring disc (after calibrating the position of the measuring disc, tighten the screws).
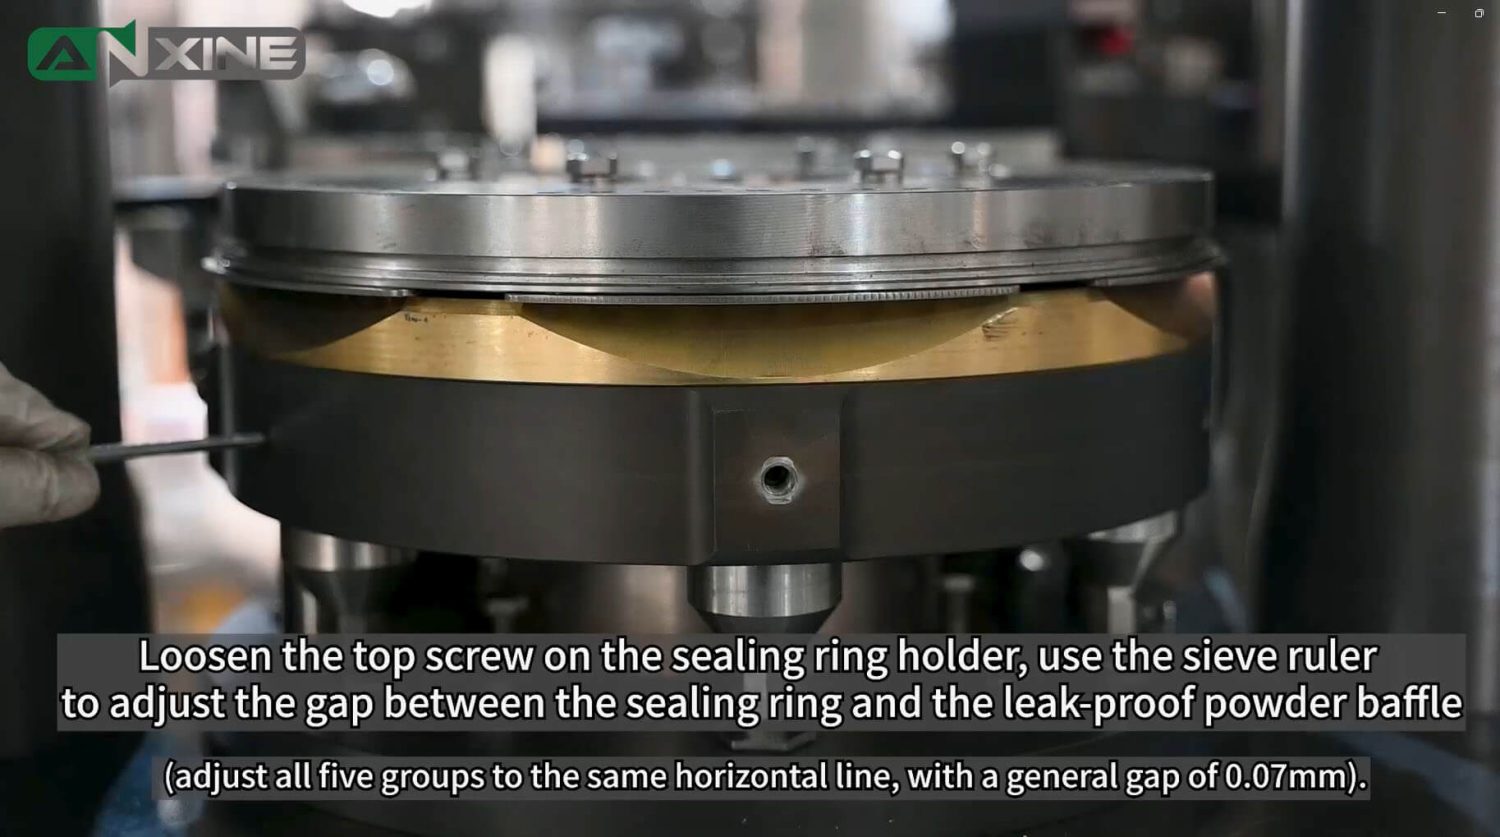
Step 5: Loosen the top screw on the sealing ring holder. Use a feeler gauge to adjust the gap between the sealing ring and the leak-proof powder baffle (adjust all five groups to the same horizontal line, with a gap of about 0.07 mm).
For more detailed procedures, please click to watch the video below.
How to Install the Punch Rod
Step 1: Insert the punch rods into the holes in the punch guide plate.
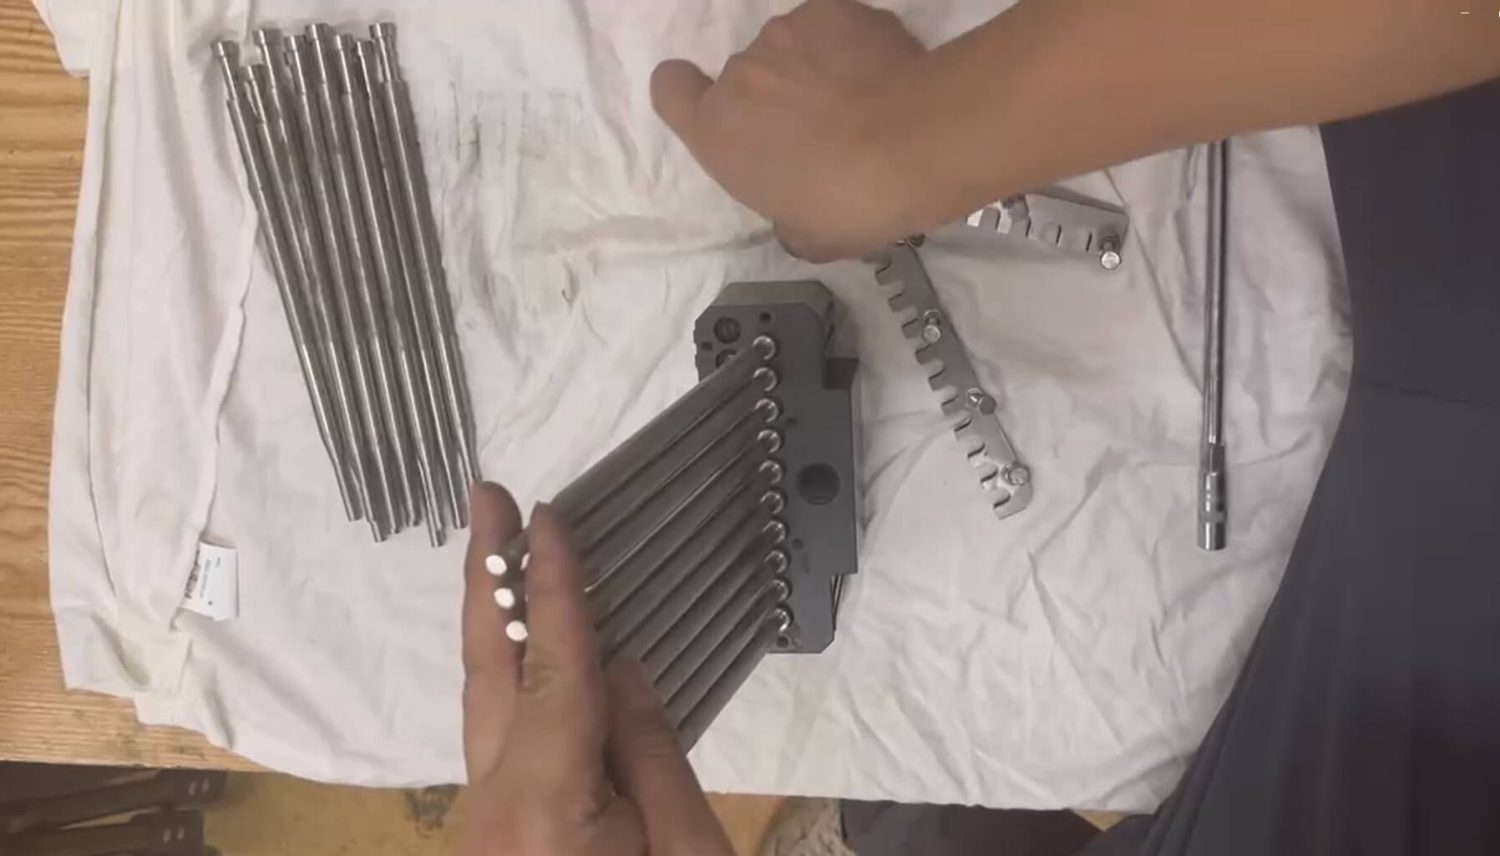
Step 2: Use the punch positioning bracket to hold the punch rods, then fasten it with screws.
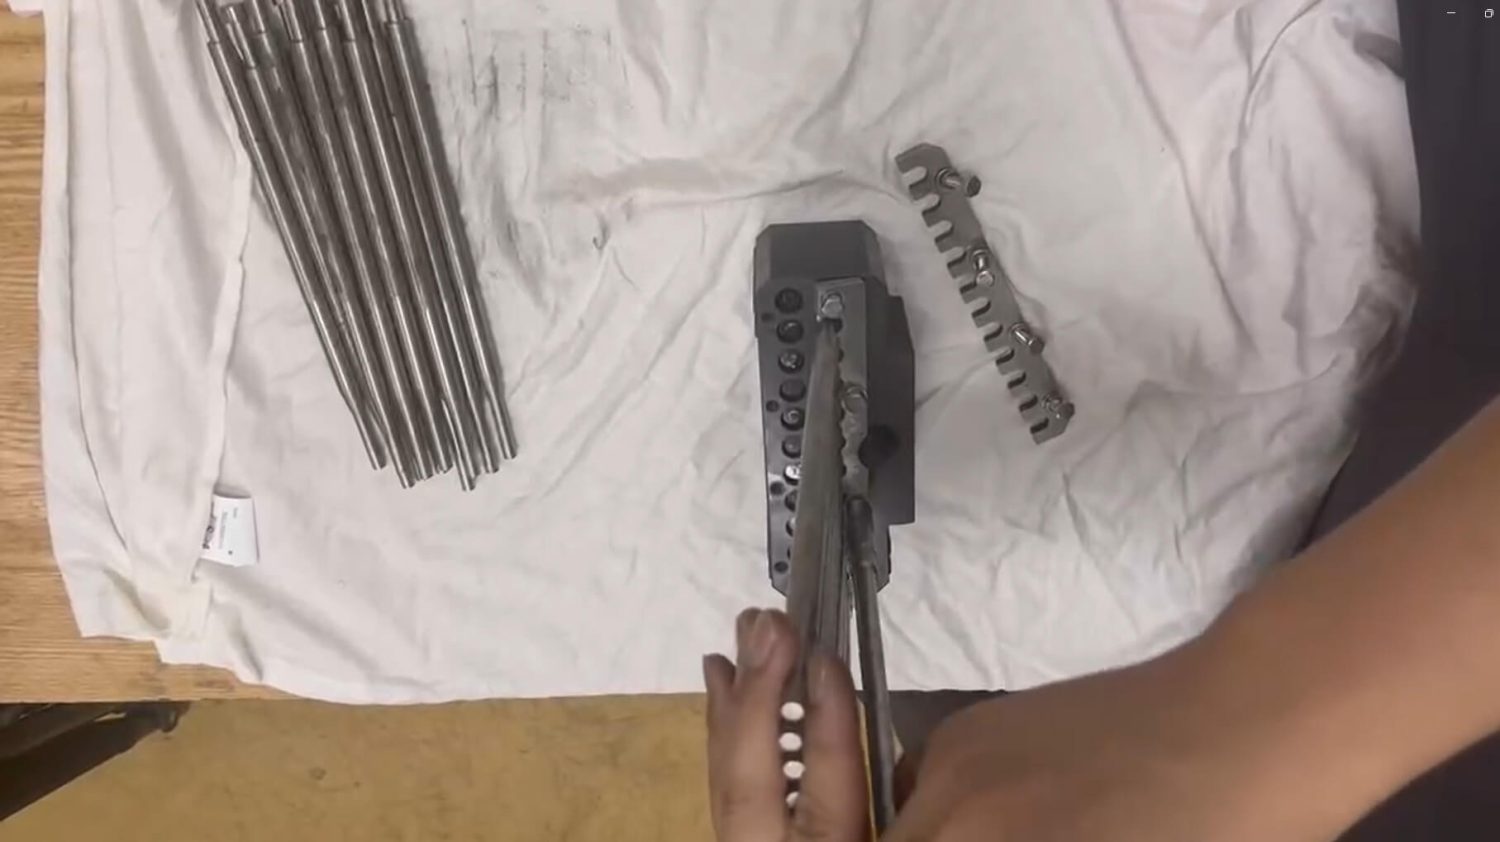
Step 3: Repeat the same on the other side
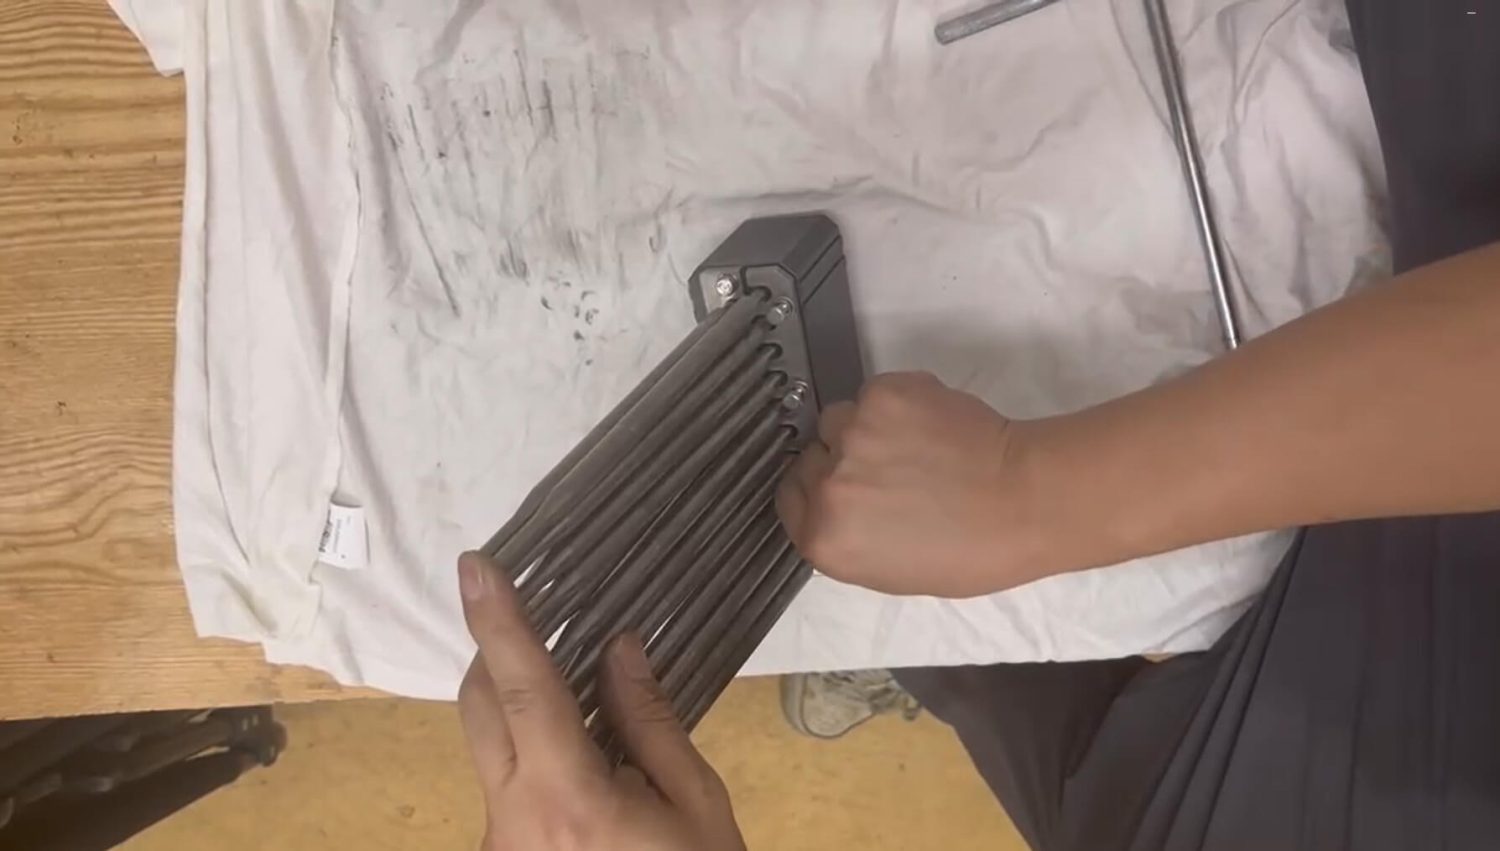
The video below shows clear installation steps. Please click to watch.
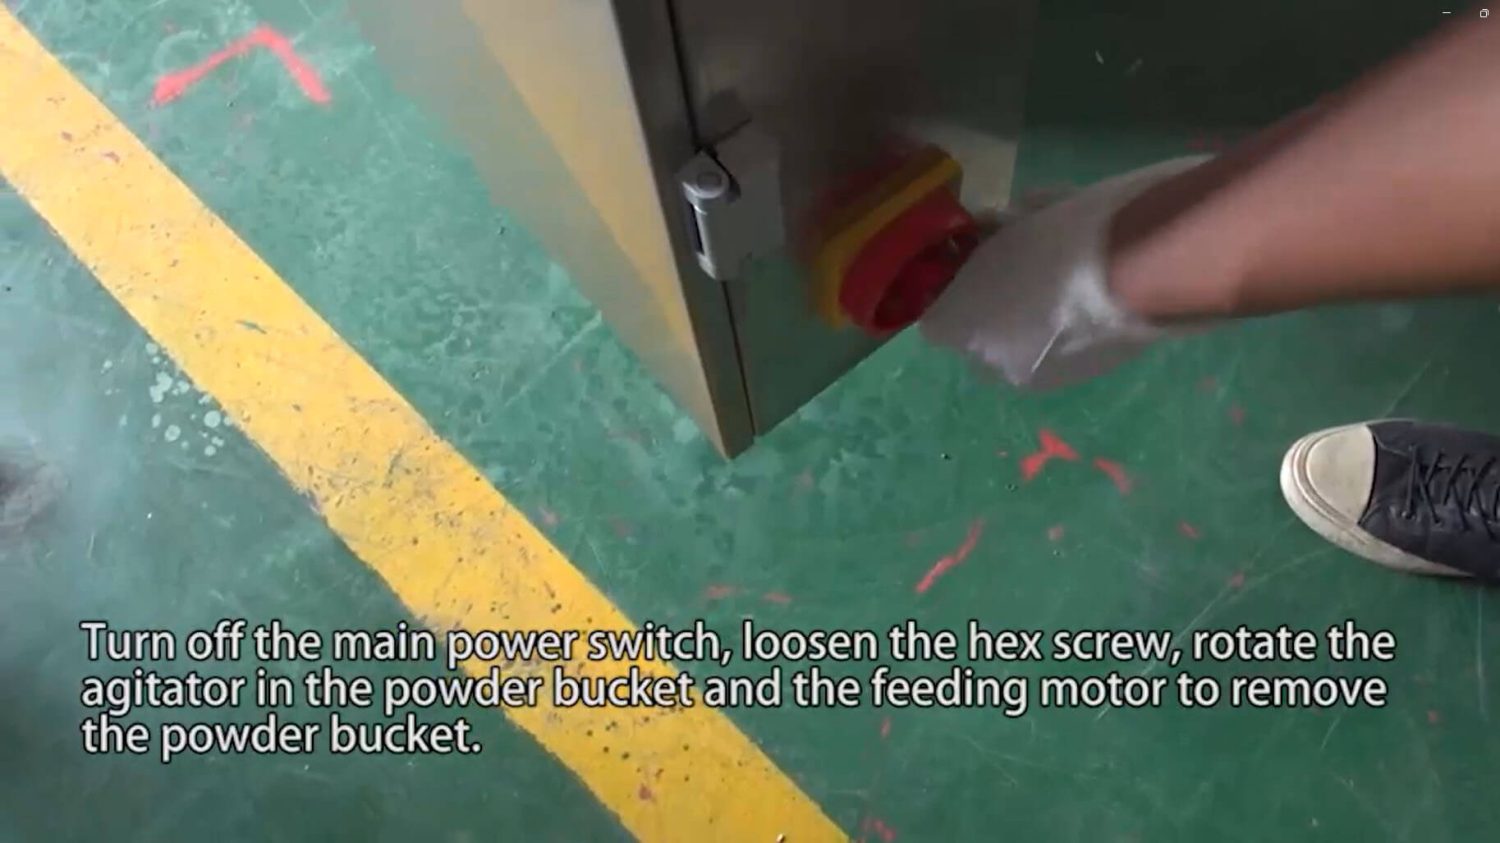
How to Remove the Molds
Step 1: Turn off the main power switch. Loosen the hex screw. Rotate the agitator in the powder bucket and the feeding motor to assist in removing the powder bucket.
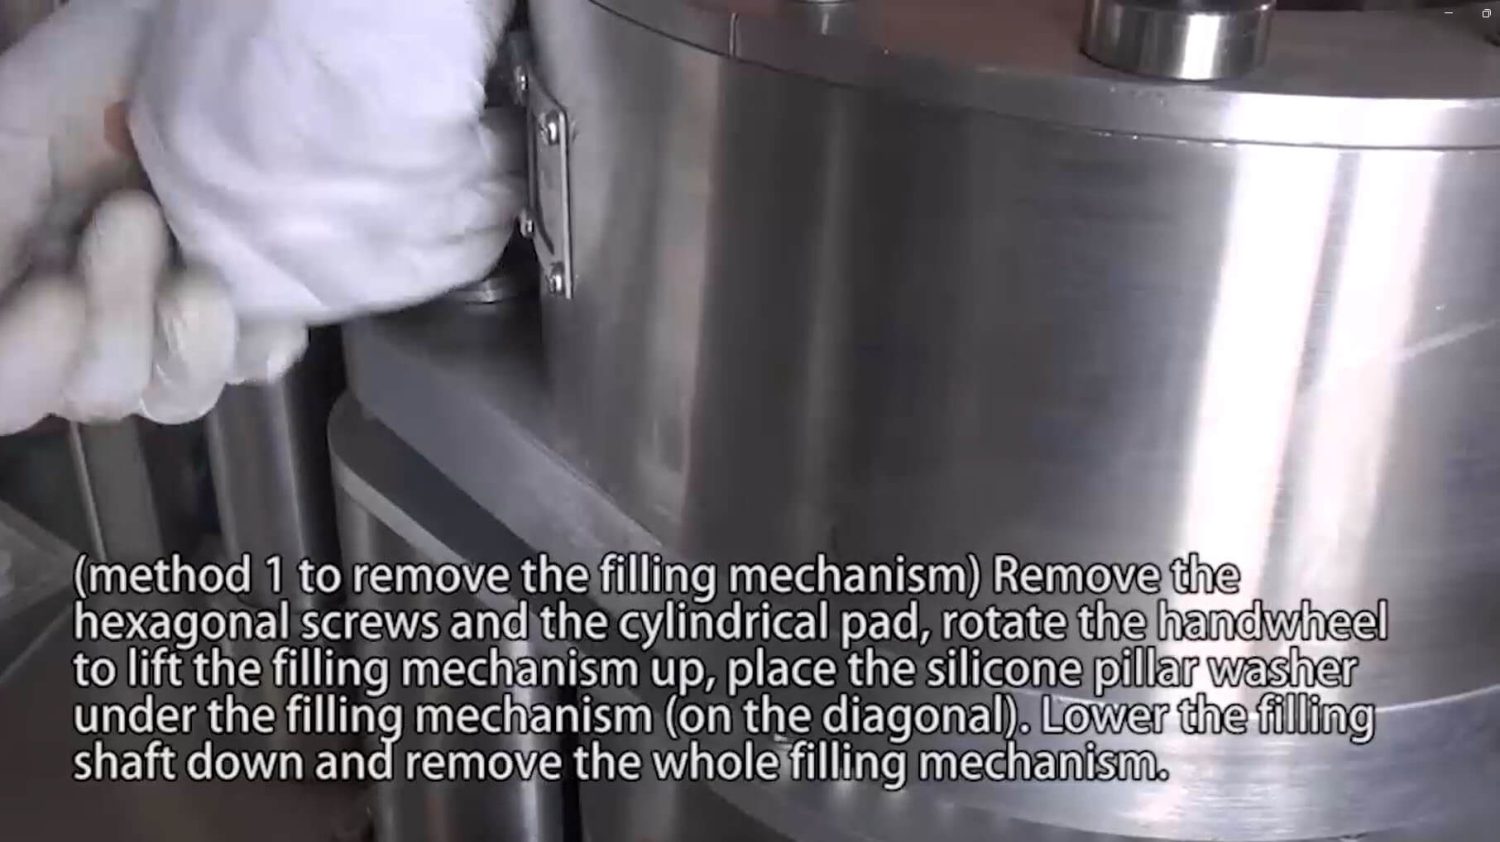
Step 2: Method 1 to remove the filling mechanism: Remove the hexagonal screws and the cylindrical pad, rotate the handwheel to lift the filling mechanism up, and place the silicone pillar washer under the filling mechanism (on the diagonal). Lower the filling shaft and remove the whole filling mechanism.
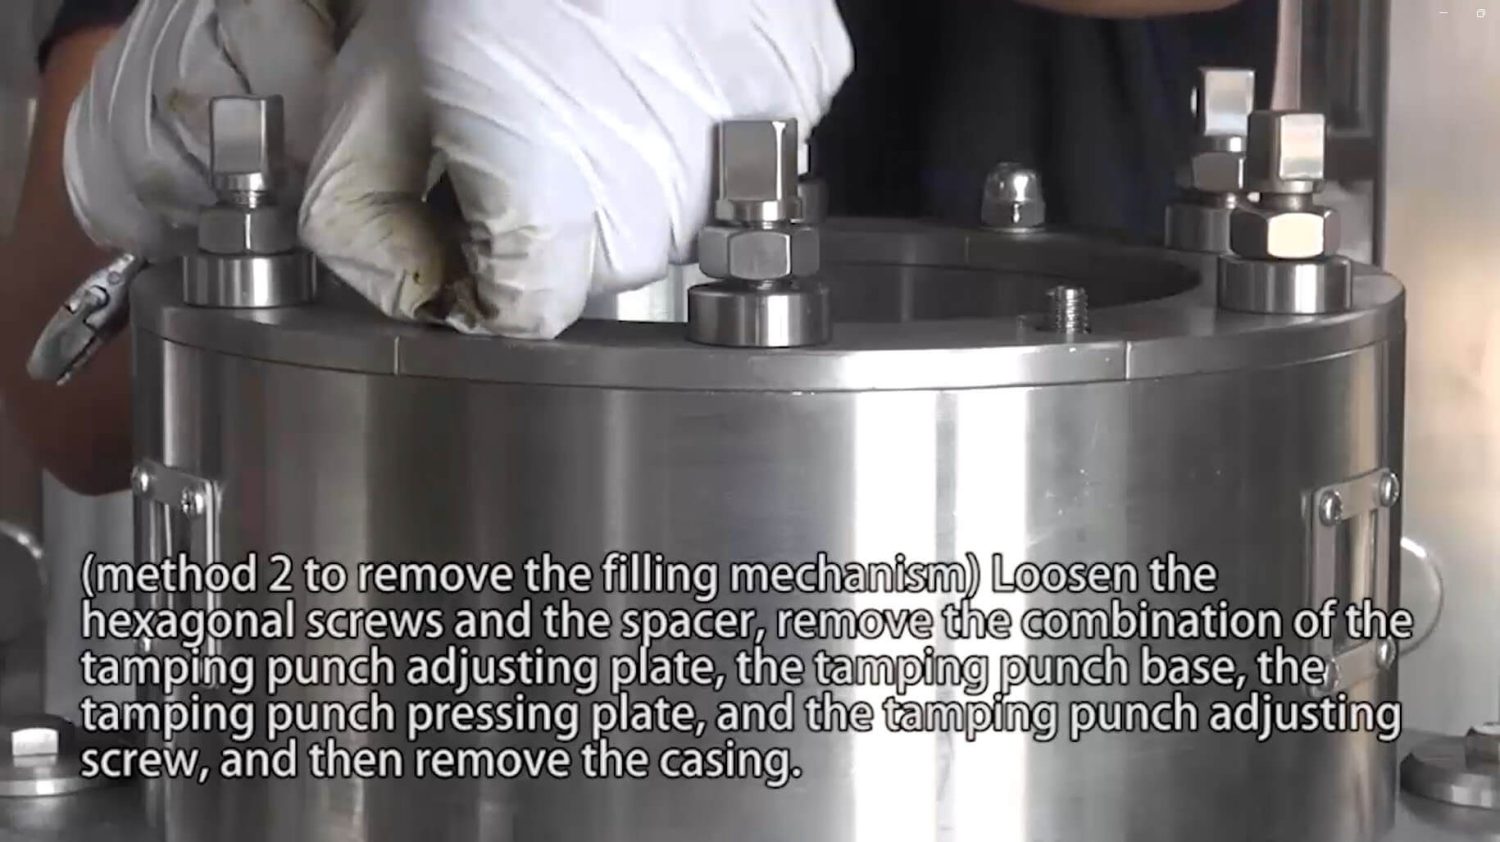
Method 2 to remove the filling mechanism: Loosen the hexagonal screws and the spacer, remove the assembly consisting of the tamping punch adjusting plate, tamping punch base, tamping punch pressing plate, and tamping punch adjusting screw, and then remove the casing.
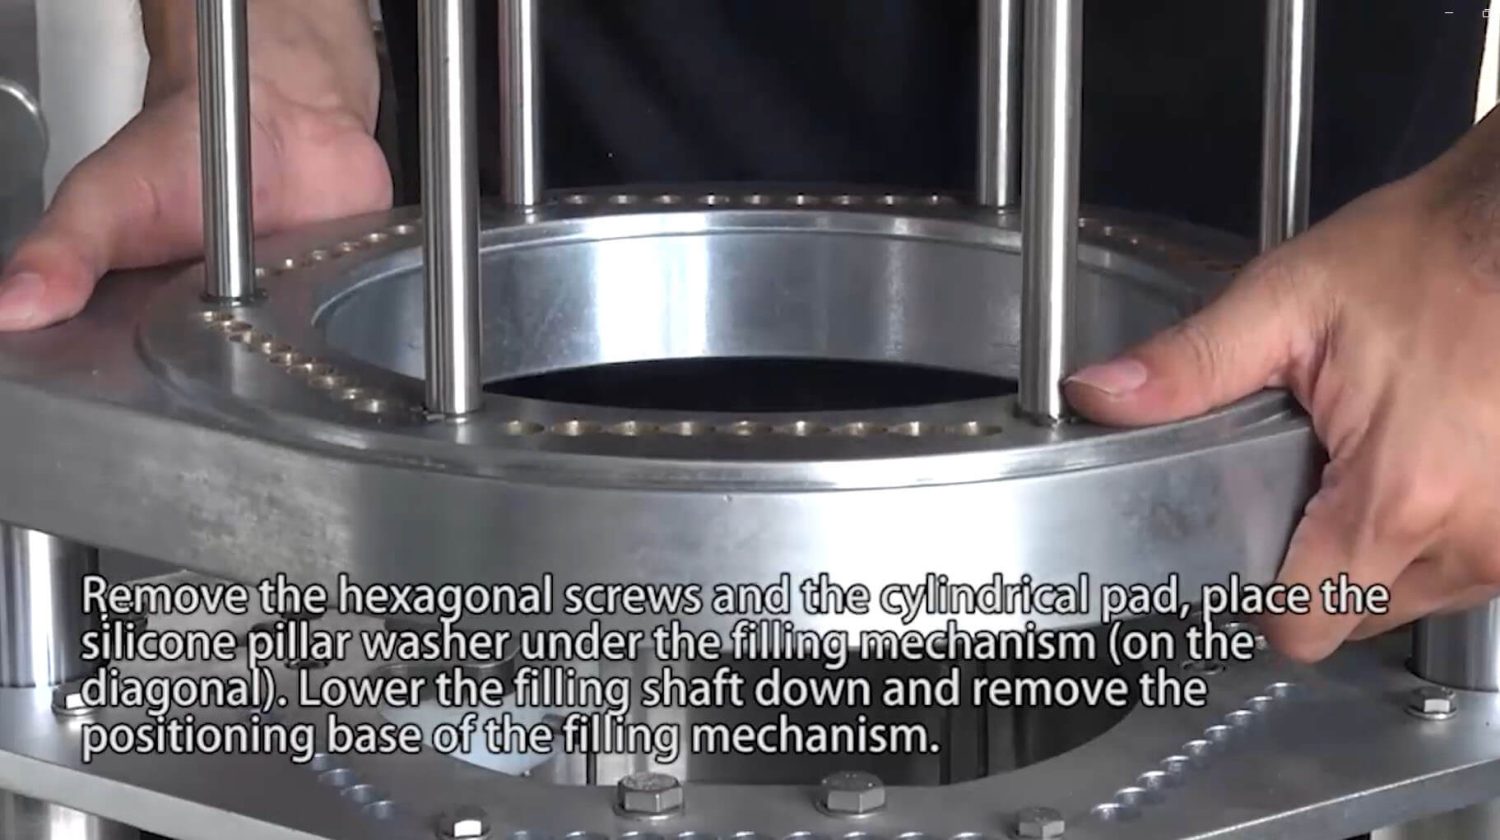
Step 3: Remove the hexagonal screws and the cylindrical pad, and place the silicone pillar washer under the filling mechanism (on the diagonal). Lower the filling shaft and remove the positioning base of the filling mechanism.
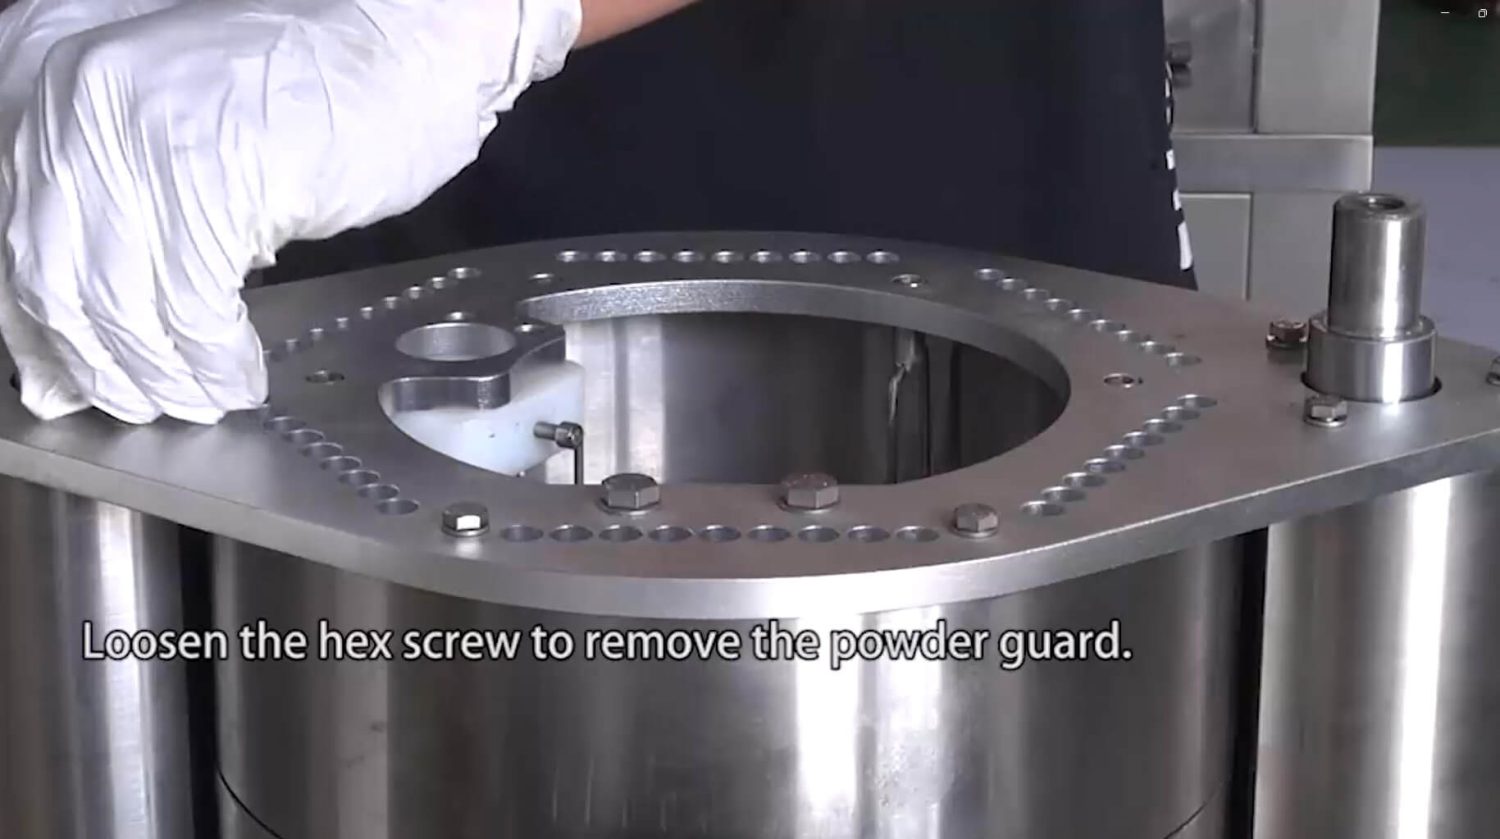
Step 4: Loosen the hex screw to remove the powder guard.
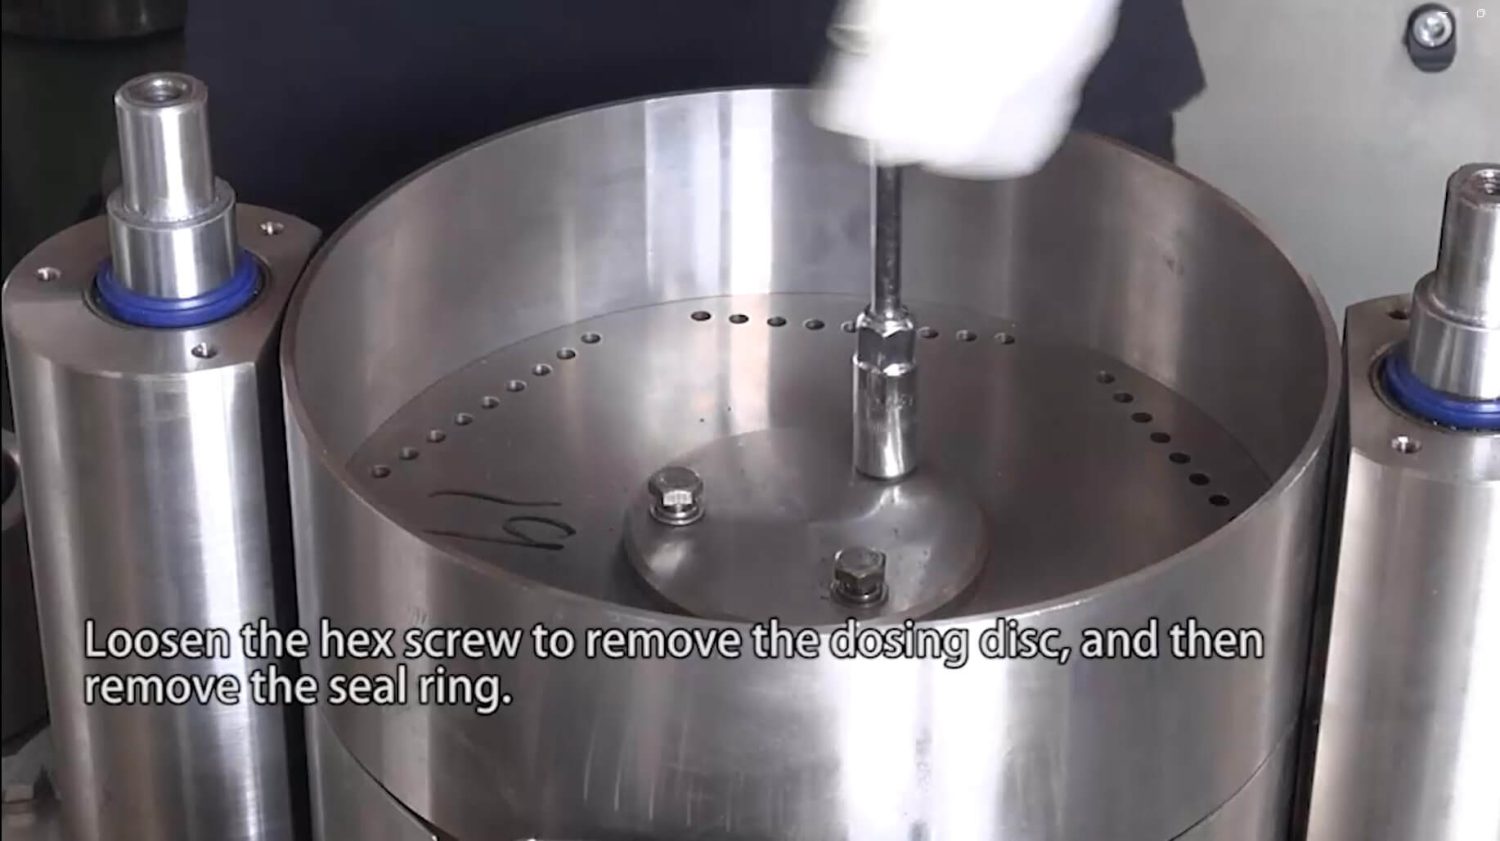
Step 5: Loosen the hex screw to remove the dosing disc, and then remove the seal ring.
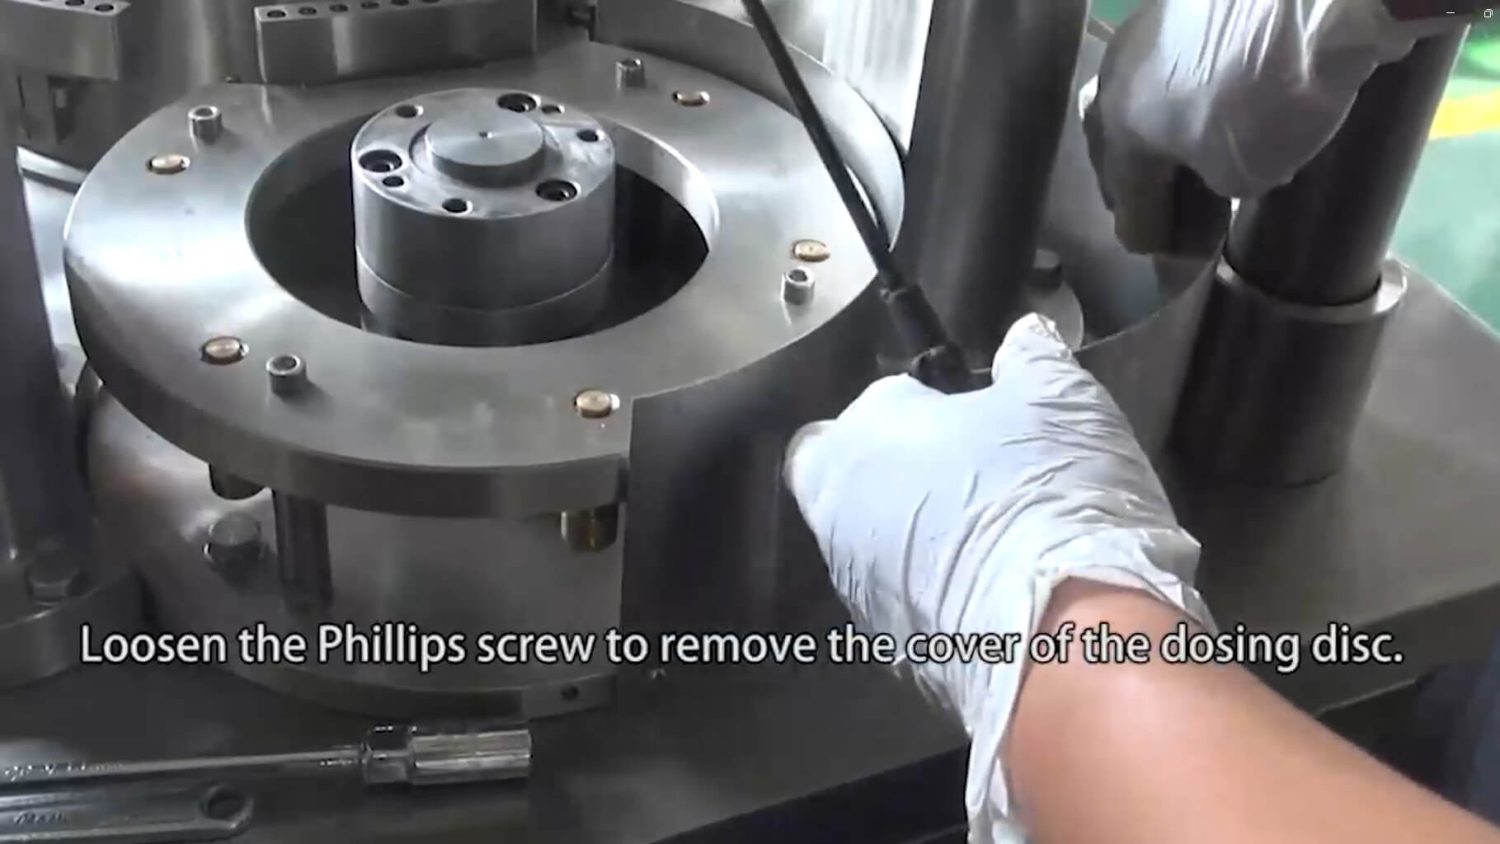
Step 6: Loosen the Phillips screw to remove the cover of the dosing disc.
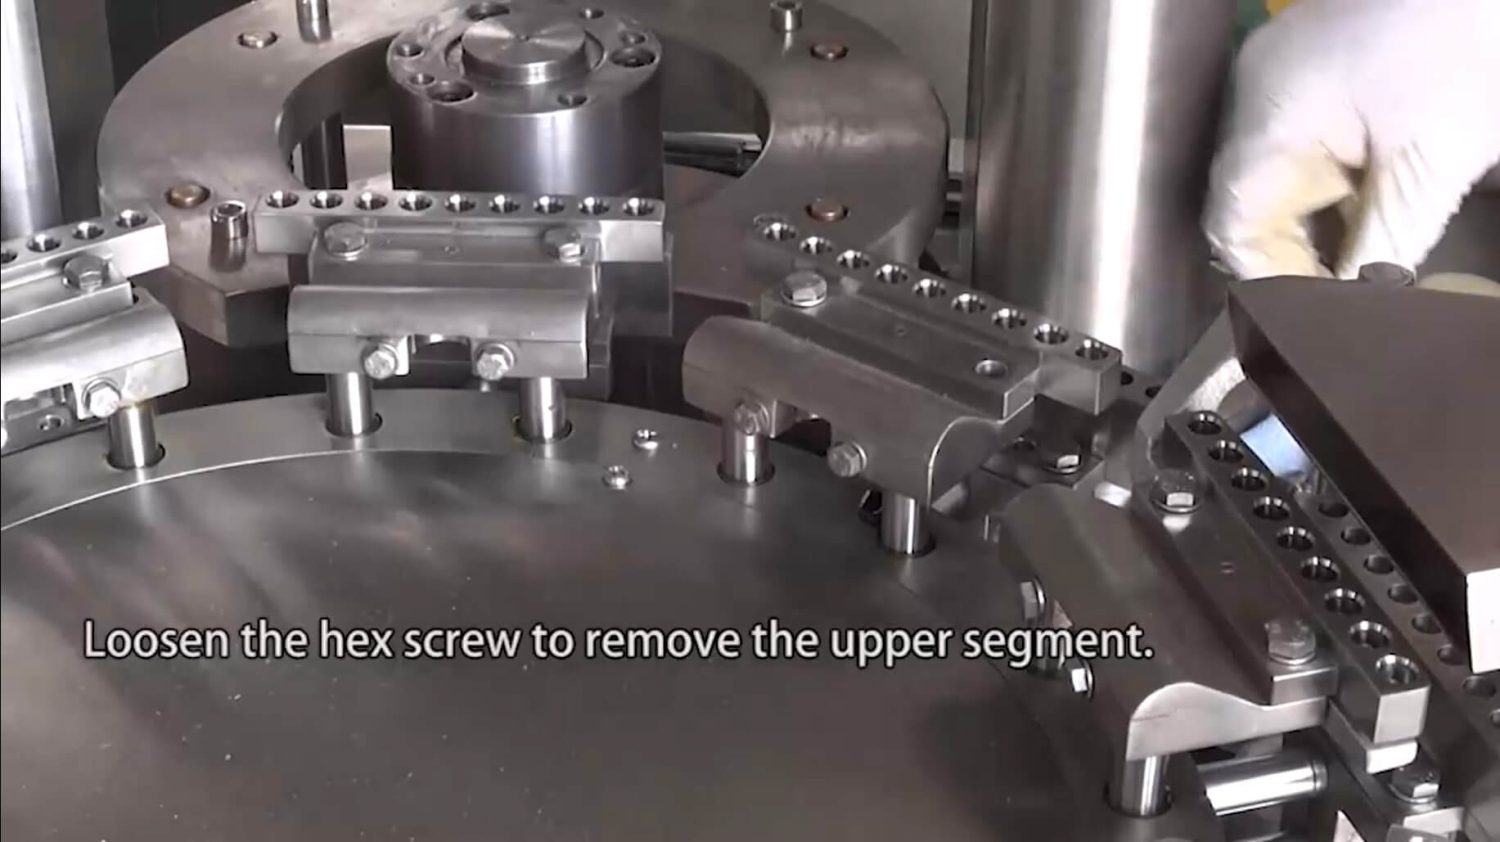
Step 7: Loosen the hex screw to remove the upper segment.
Step 8: Loosen the hexagon socket screws to remove the capsule loading plate.

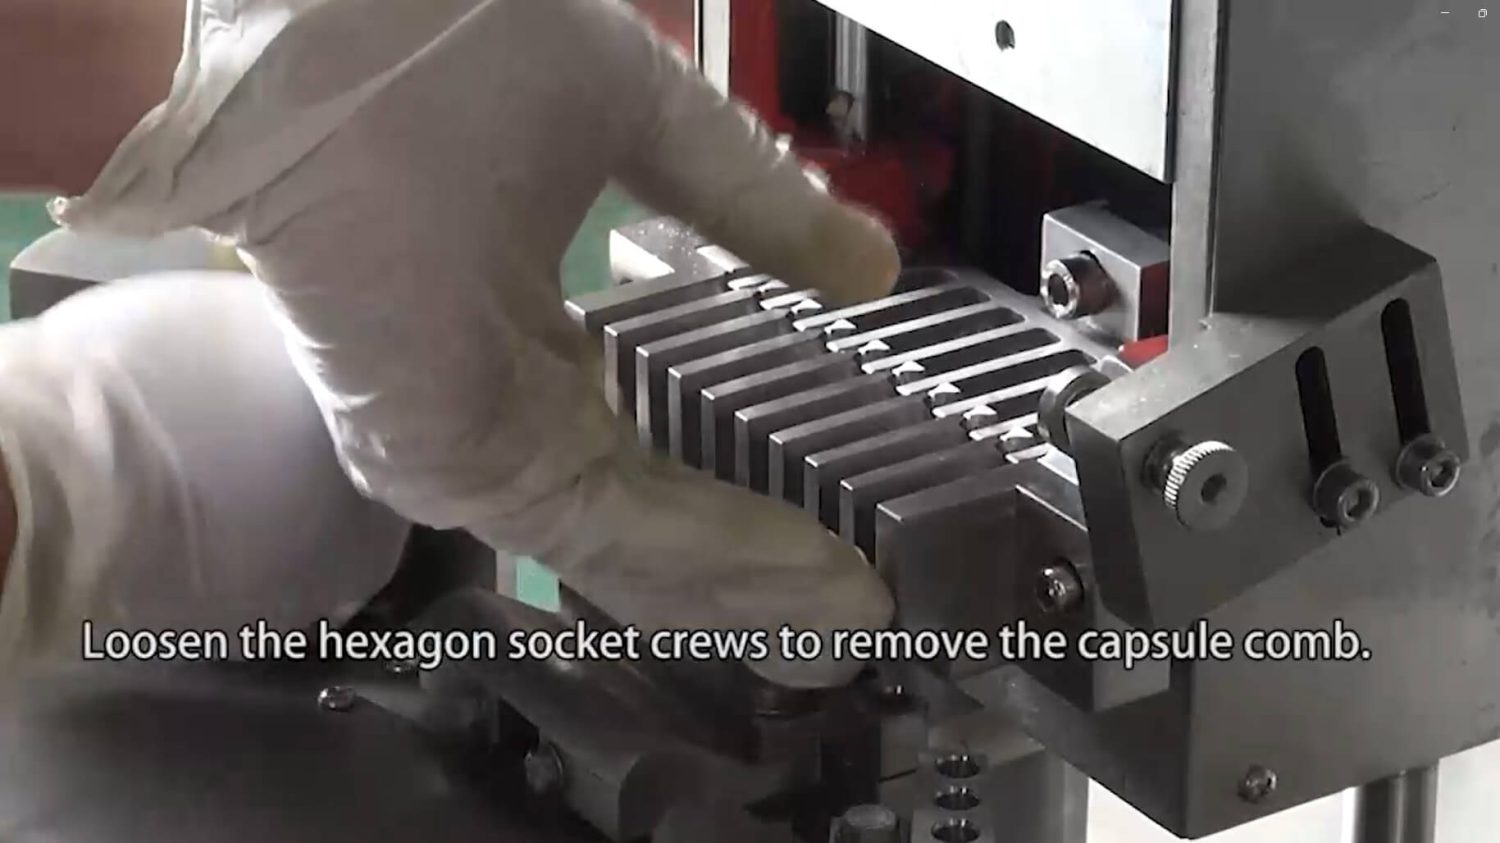
Step 9: Loosen the hexagon socket screws to remove the capsule comb.
Step 10: Loosen the hexagon socket screws to remove the horizontal fork.

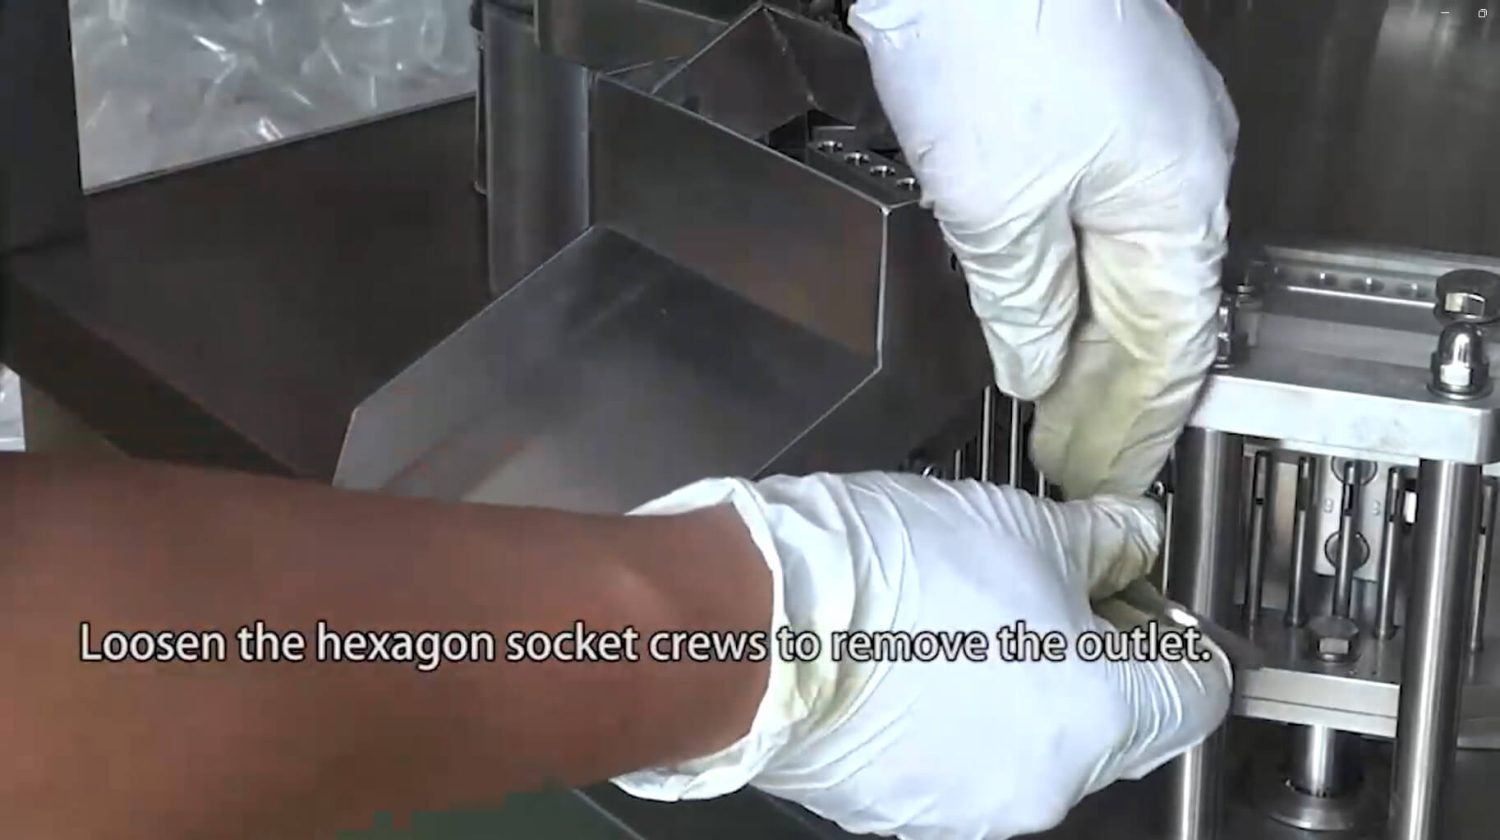
Step 11: Loosen the hexagon socket screws to remove the outlet.
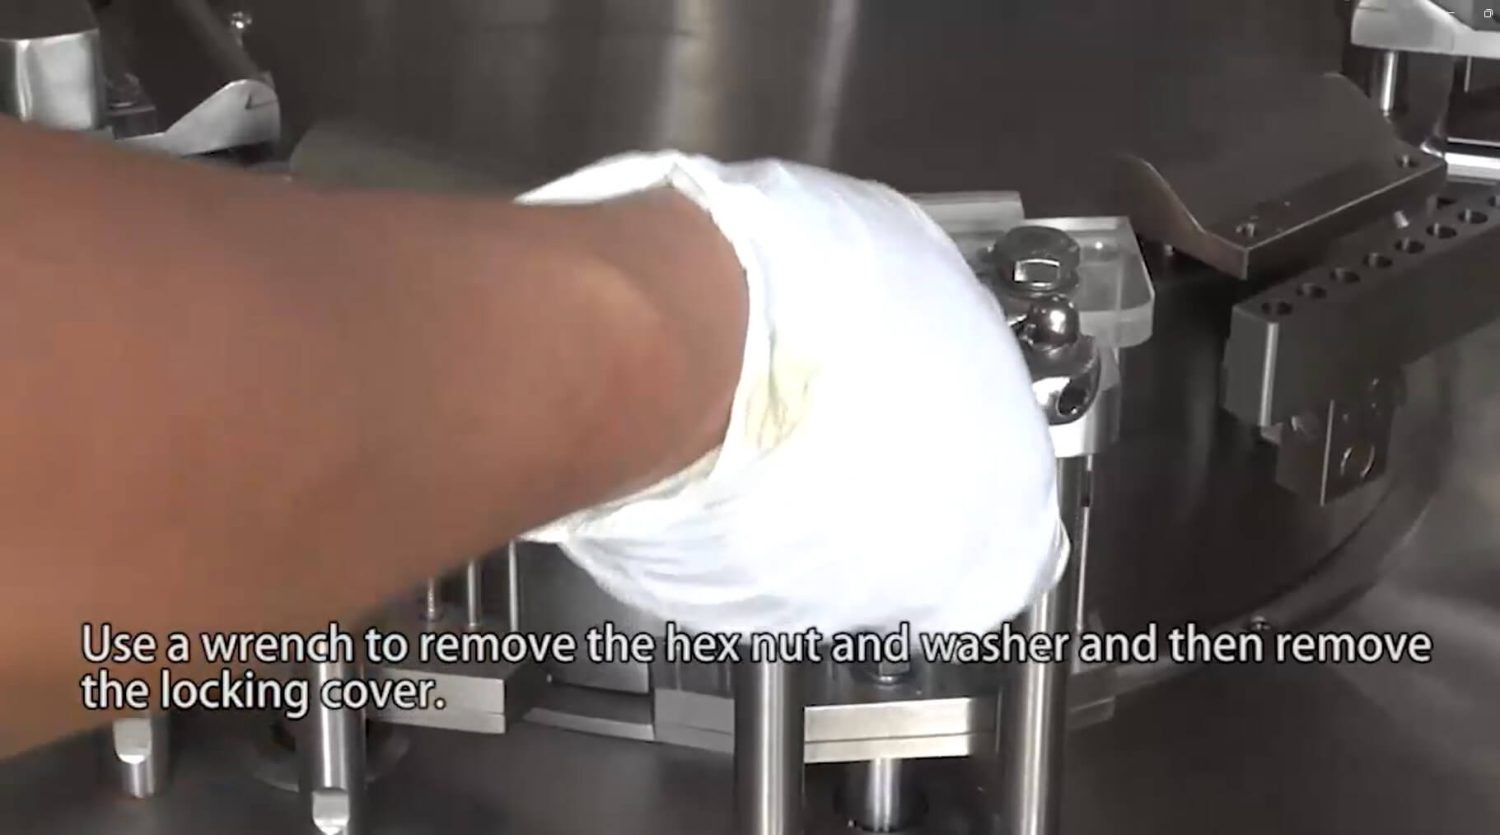
Step 12: Use a wrench to remove the hex nut and washer, then remove the locking cover.
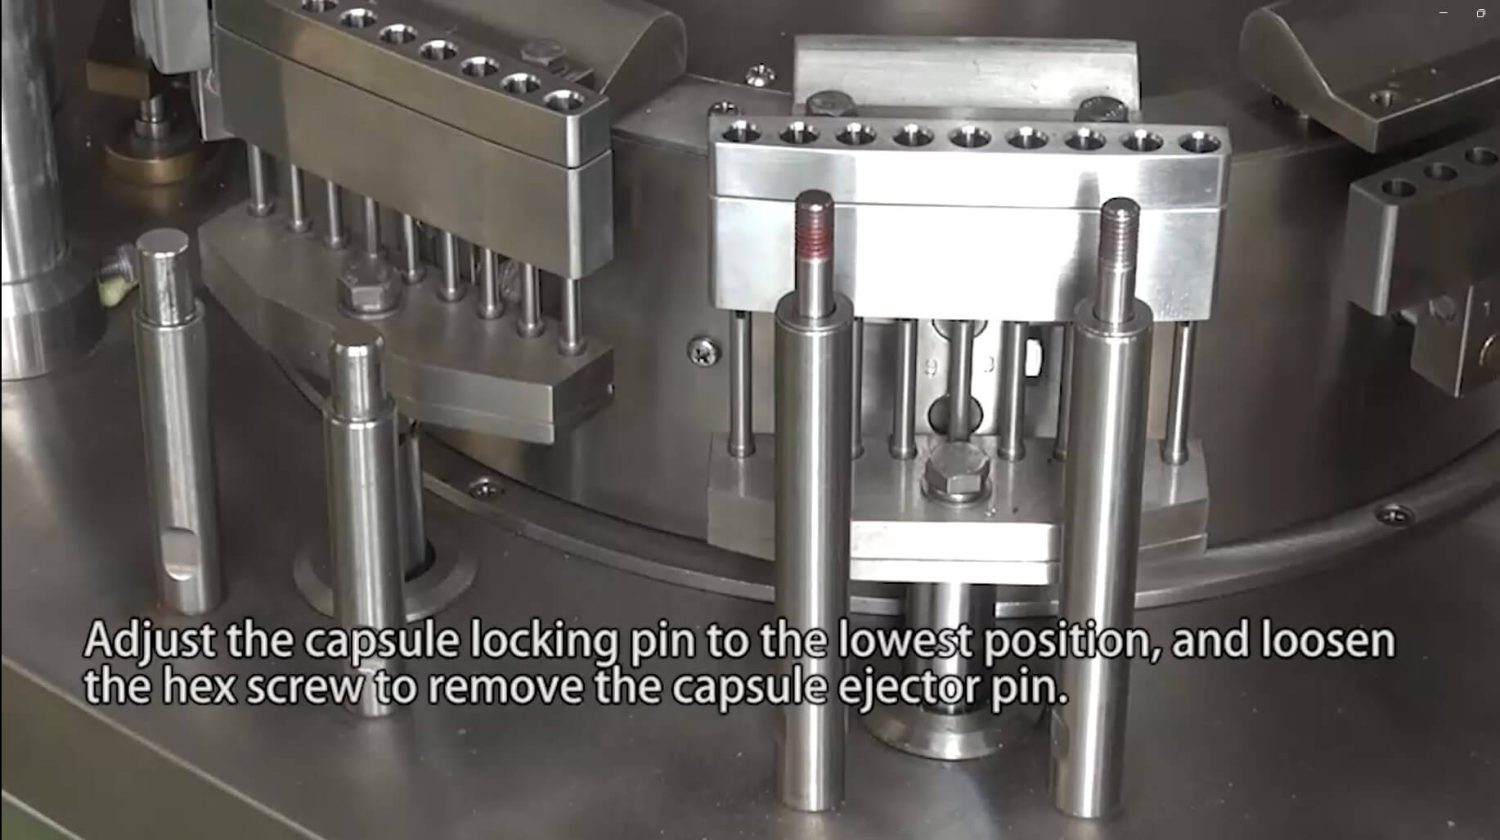
Step 13: Adjust the capsule locking pin to the lowest position, and loosen the hex screw to remove the capsule ejector pin.
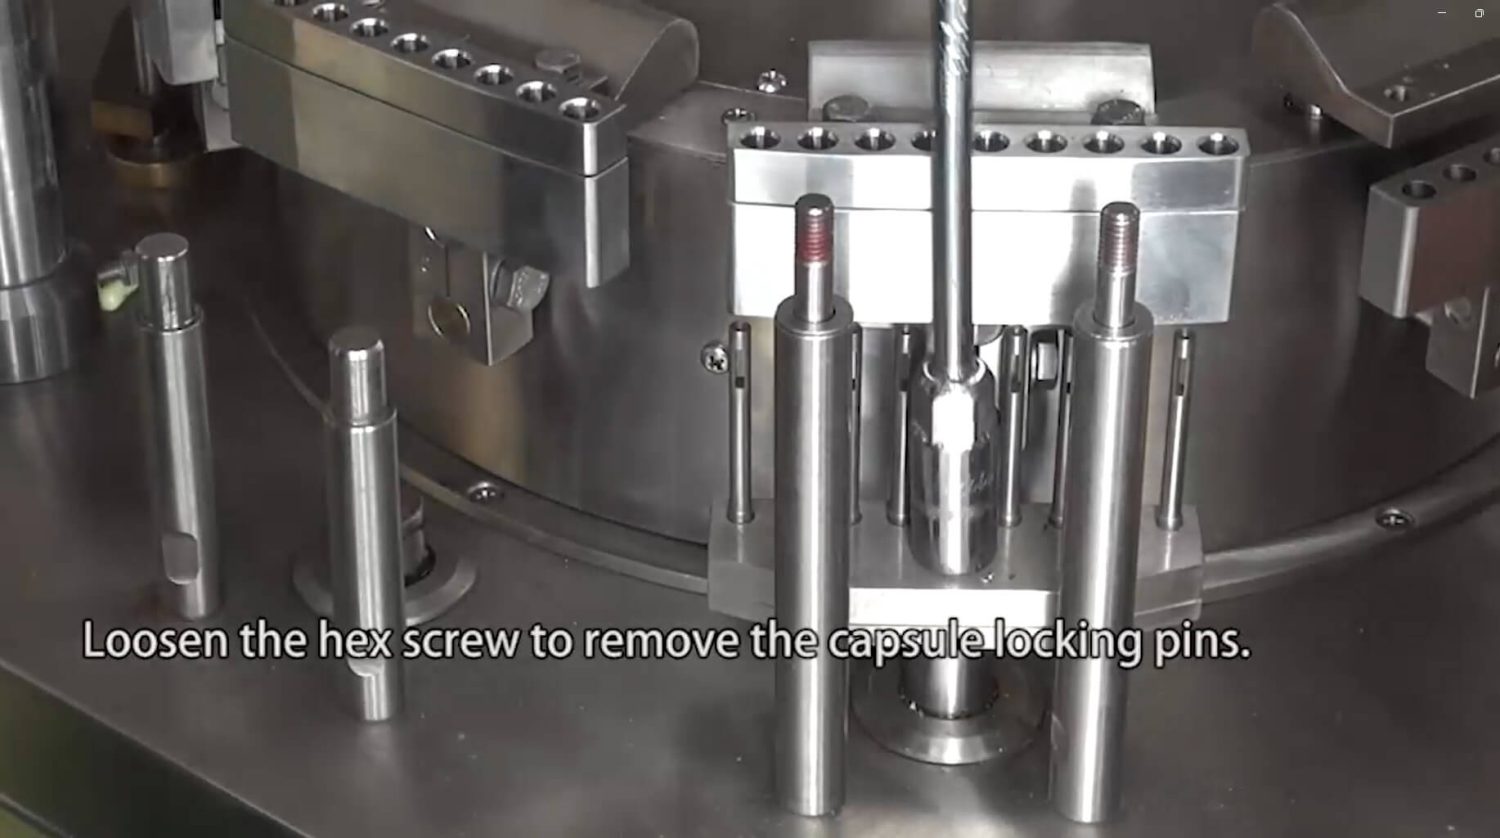
Step 14: Loosen the hex screw to remove the capsule locking pins.
Step 15: Loosen the hex screw to remove the defective capsule rejection handle.
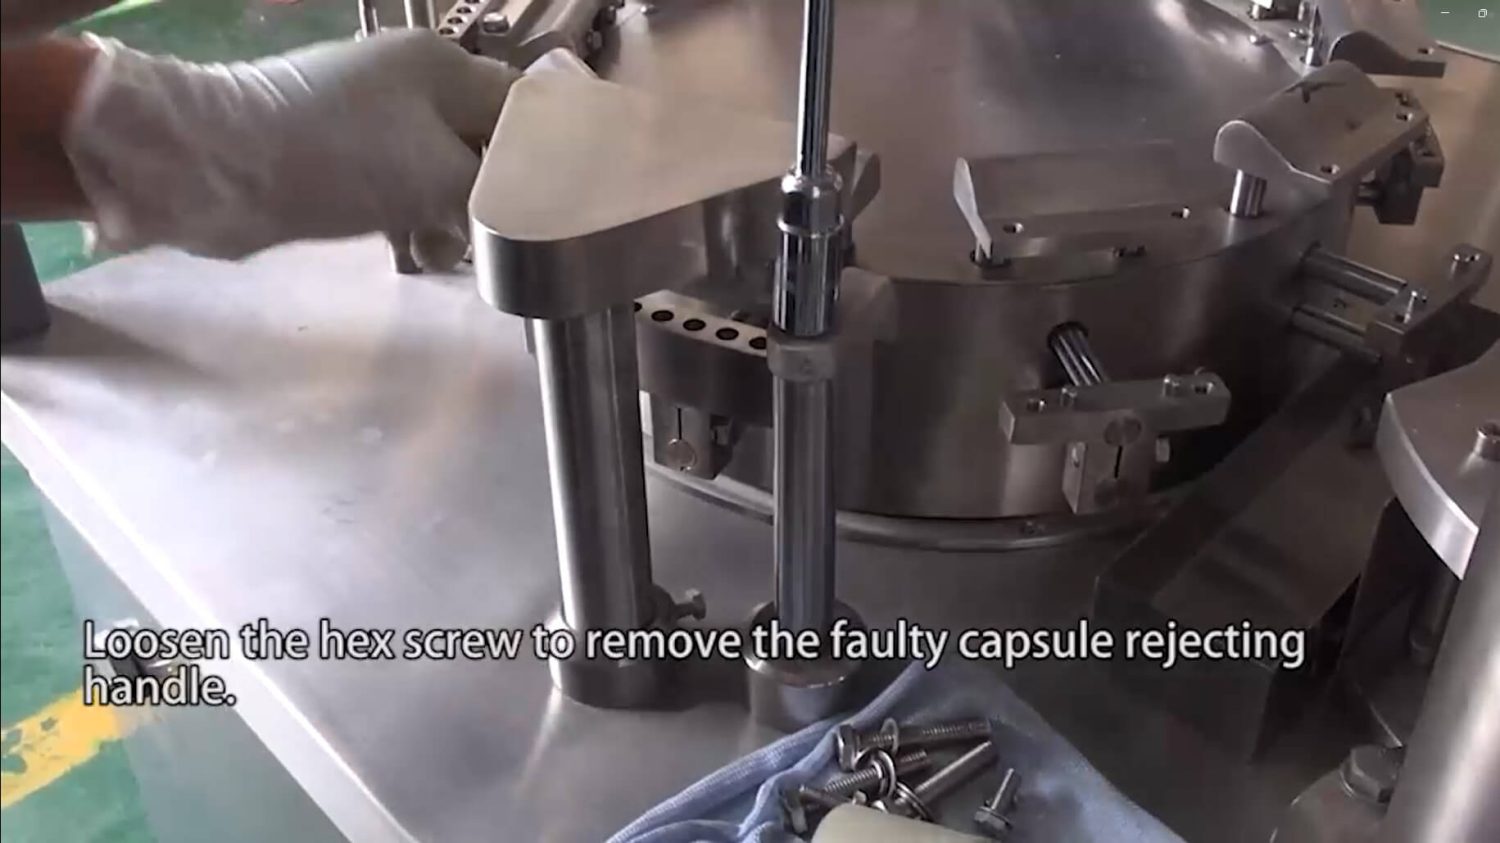
Step 16: The mold disassembly is a bit complex. For a clearer step-by-step guide, please watch the video below.

The mold disassembly is a bit complex. For a clearer step-by-step guide, please watch the video below.
How to Install the Molds
You can read the steps with pictures below for a quick overview, or watch the video for more detailed and clear Installation instructions.
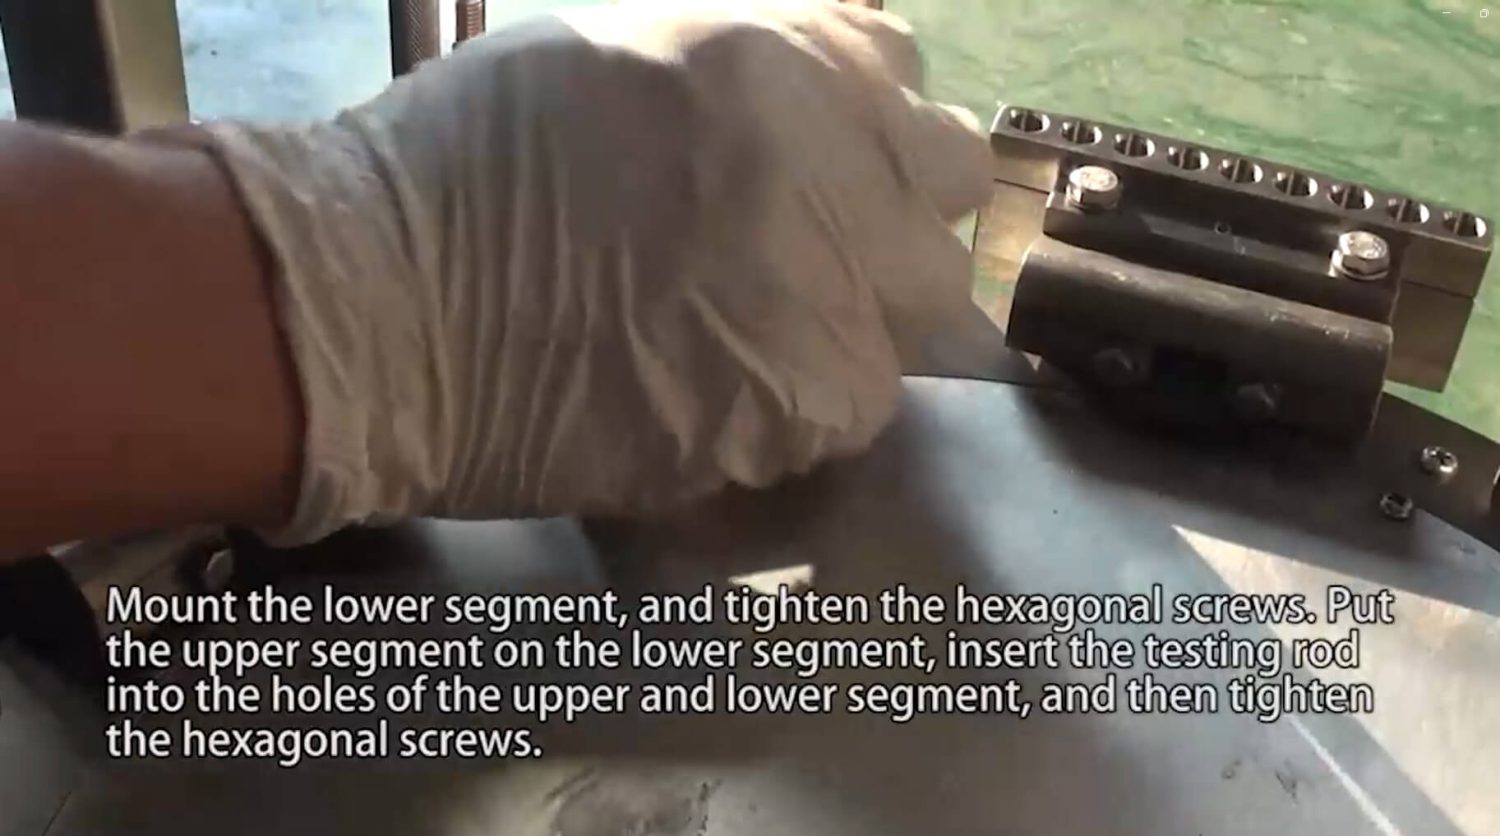
Step 1: Mount the lower segment and tighten the hexagonal screws. Place the upper segment on the lower segment, insert the test rod into the holes of the upper and lower segments, and then tighten the hexagonal screws.
Step 2: Mount the capsule comb on the machine, and tighten the hexagon socket screws. (Please note that the capsule comb should be in the center)

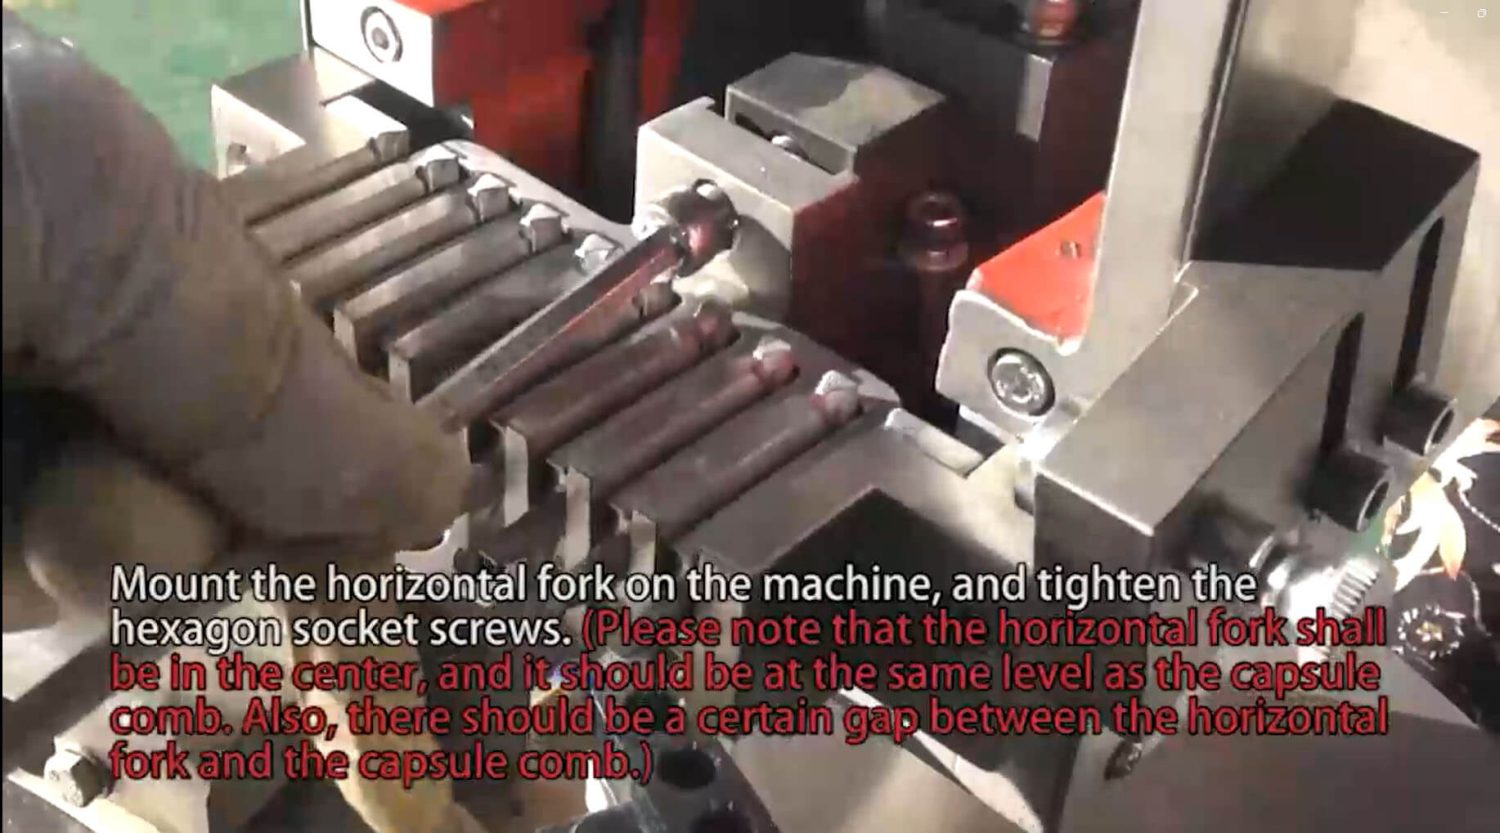
Step 3: Mount the horizontal fork on the machine and tighten the hexagon socket screws. Please note that the horizontal fork shall be centered, at the same height as the capsule comb, and there should be a proper gap between the horizontal fork and the capsule comb.
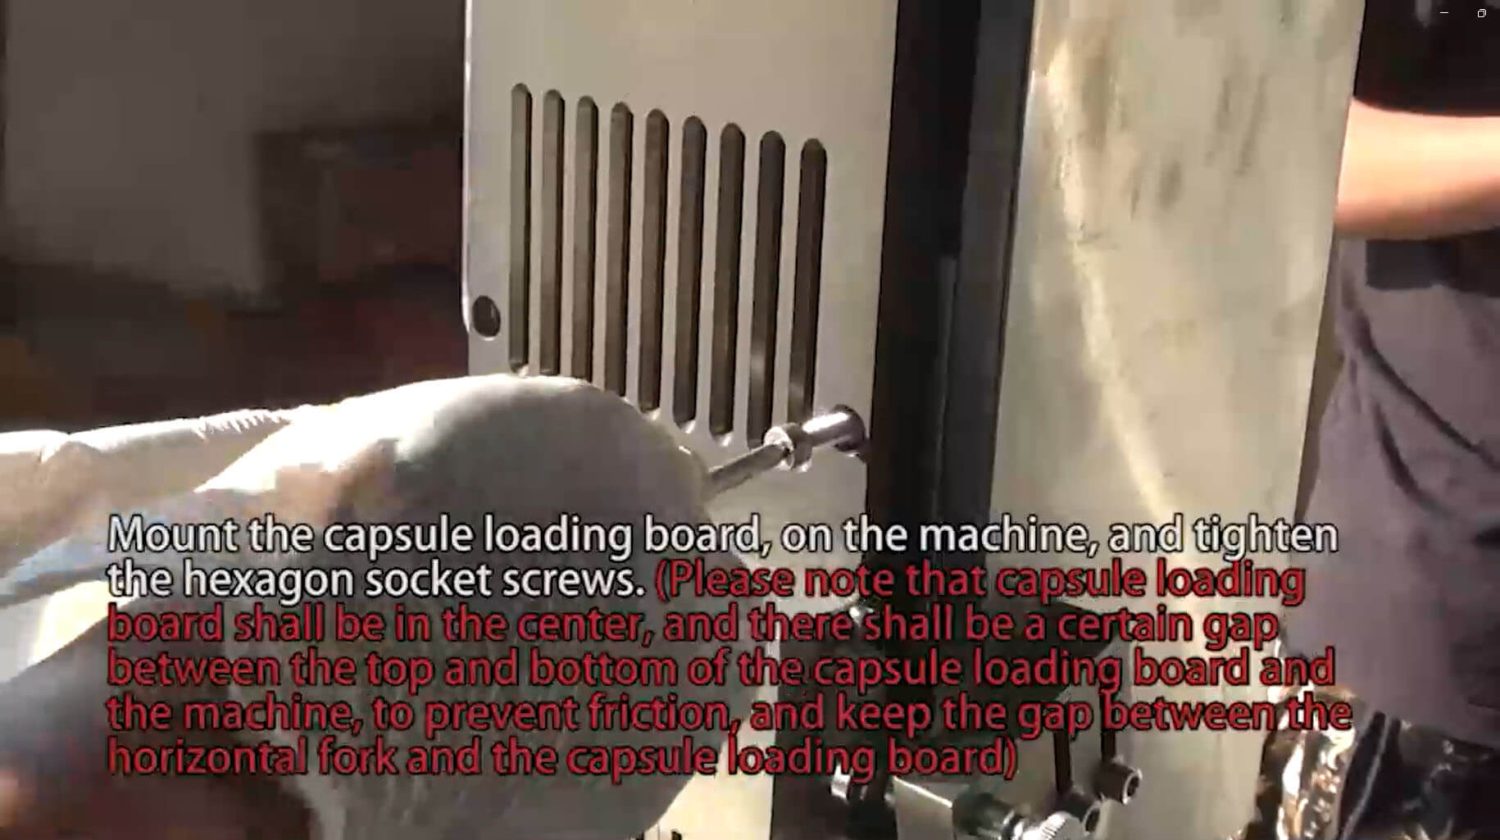
Step 4: Mount the capsule loading board on the machine and tighten the hexagon socket screws. (Please note that the capsule loading board shall be in the center, and there shall be a certain gap between the top and bottom of the capsule loading board and the machine, to prevent friction, and to maintain a proper gap between the horizontal fork and the capsule loading board.)
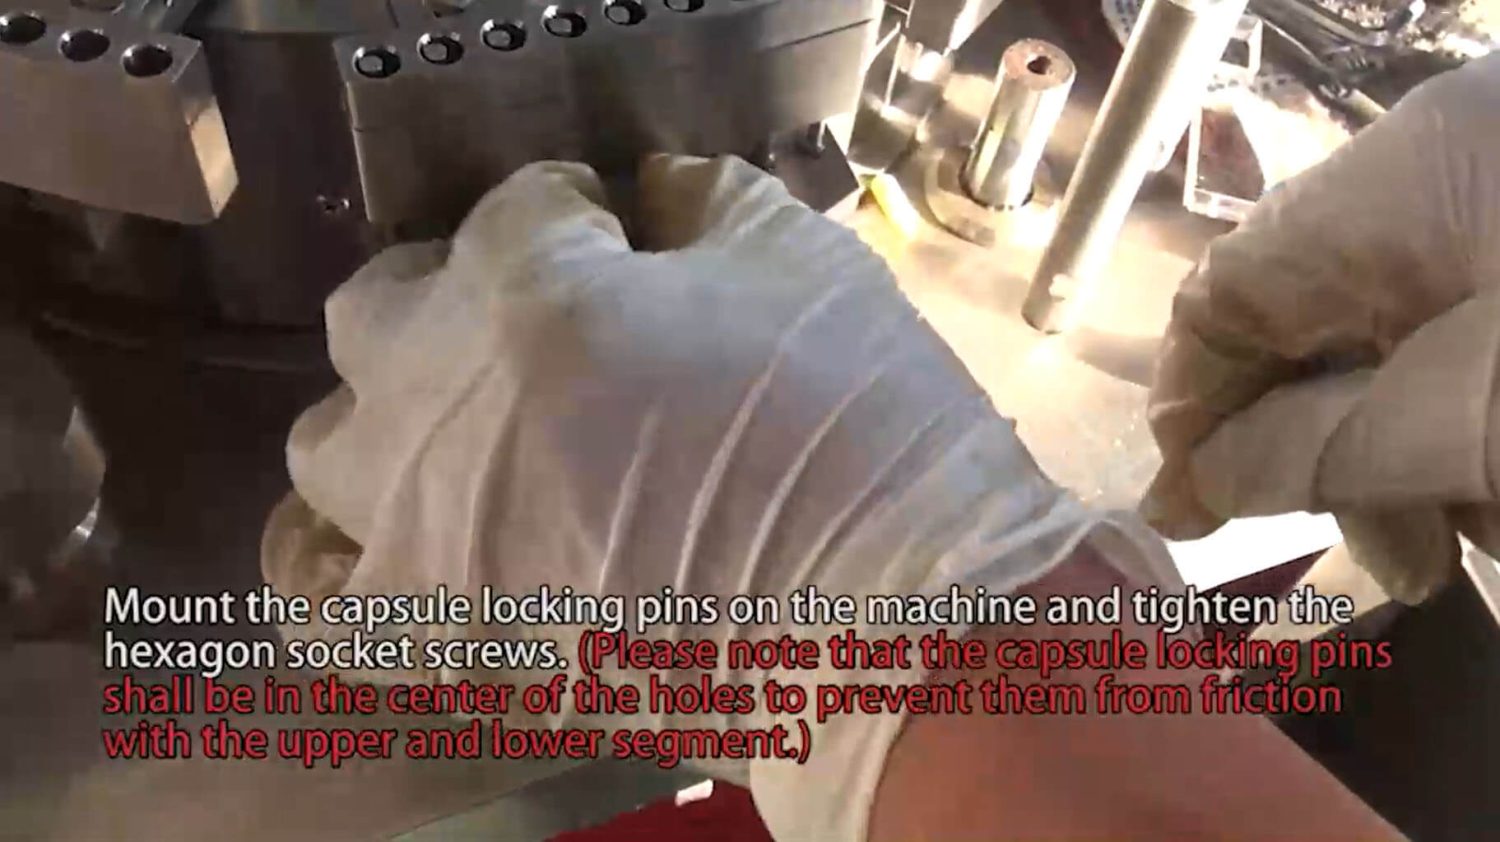
Step 5: Mount the capsule locking pins on the machine and tighten the hexagon socket screws. (Please note that the capsule locking pins shall be in the center of the holes to prevent them from friction with the upper and lower segments.)
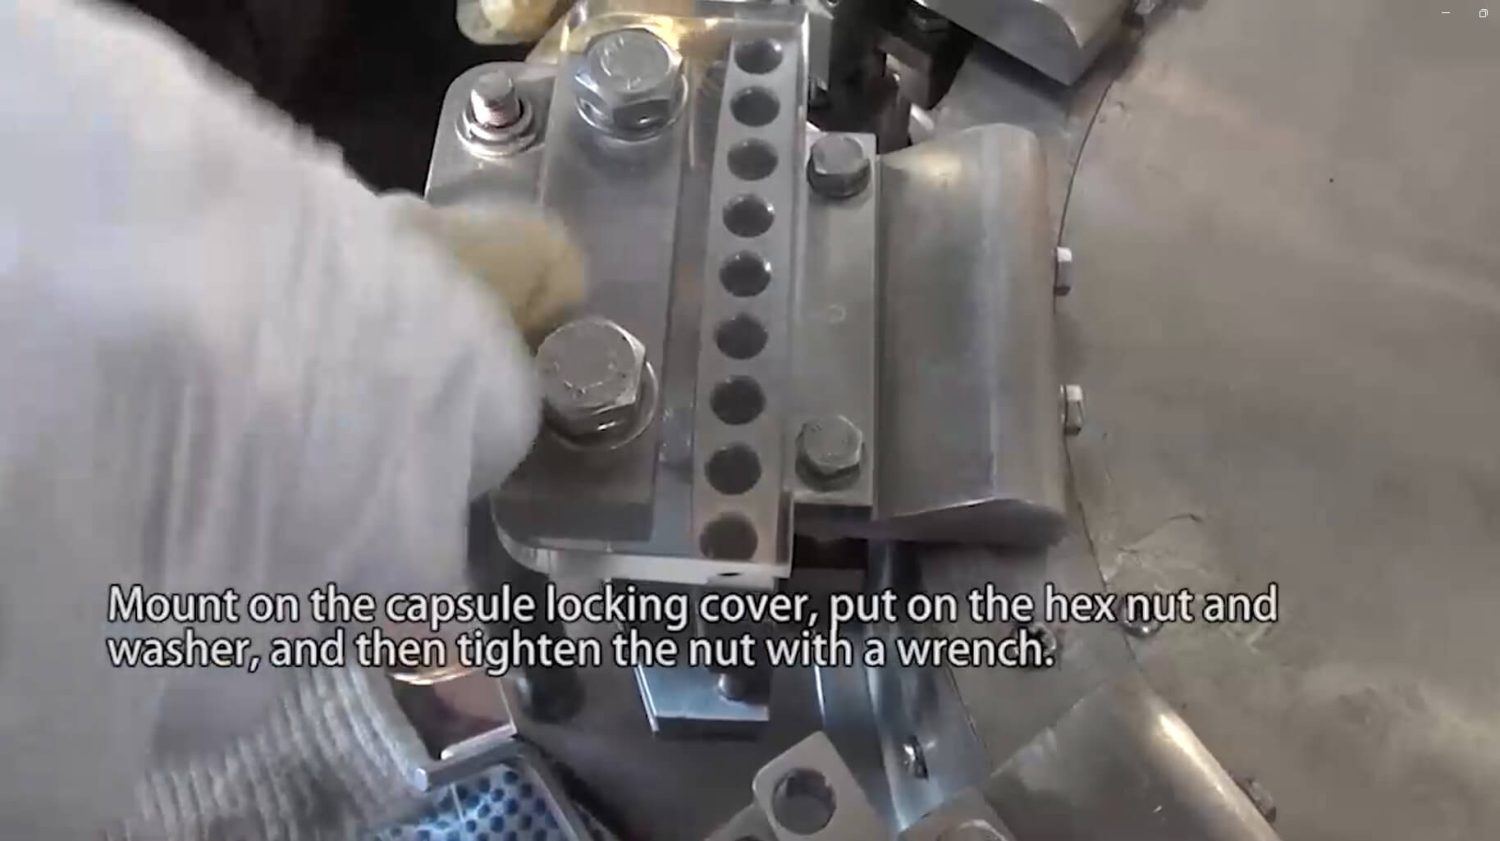
Step 6: Mount the capsule locking cover, put on the hex nut and washer, and then tighten the nut with a wrench.
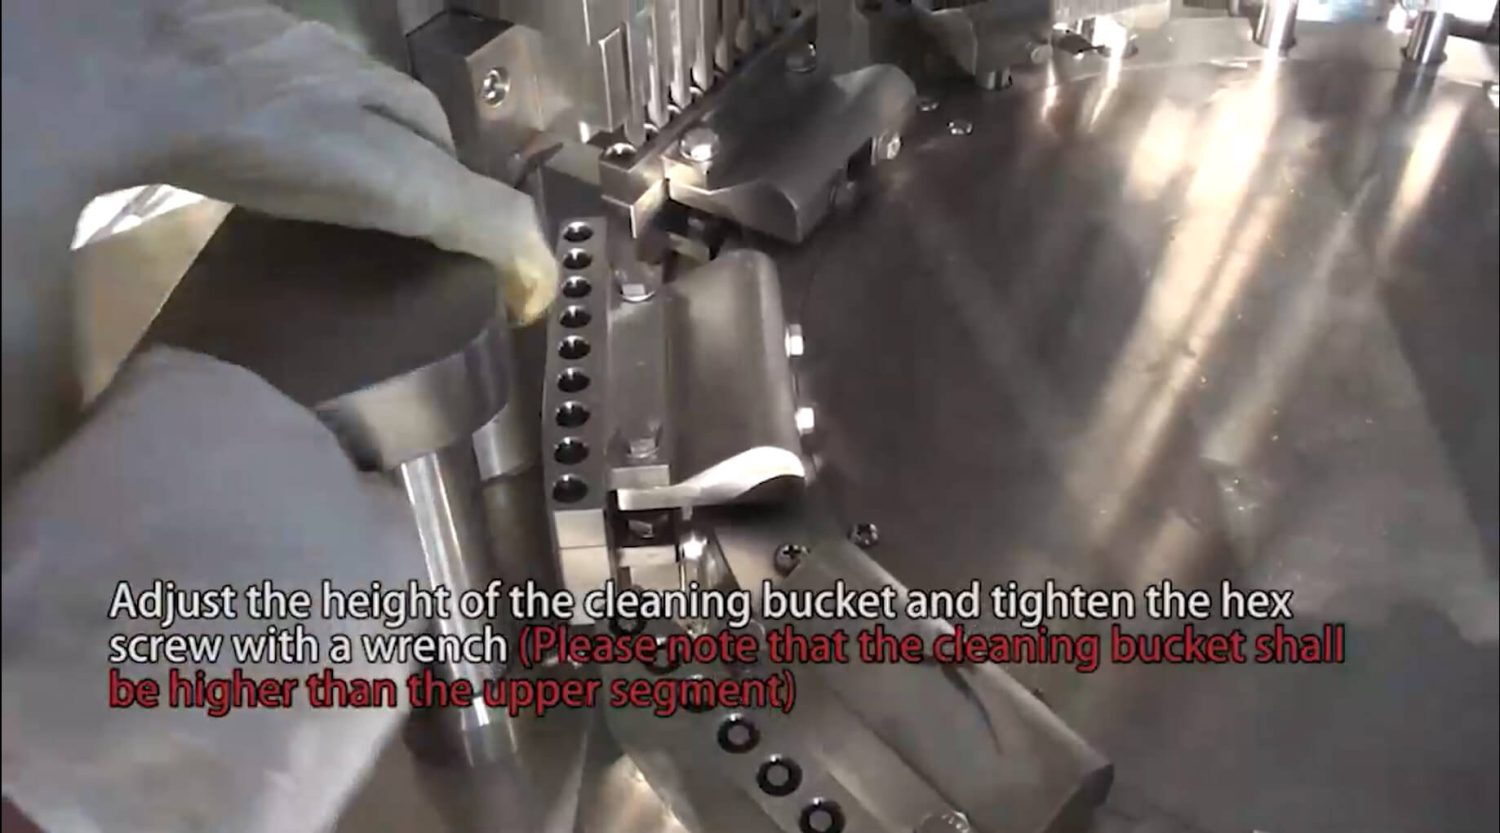
Step 7: Adjust the height of the cleaning bucket and tighten the hex screw with a wrench (Please note that the cleaning bucket shall be higher than the upper segment)
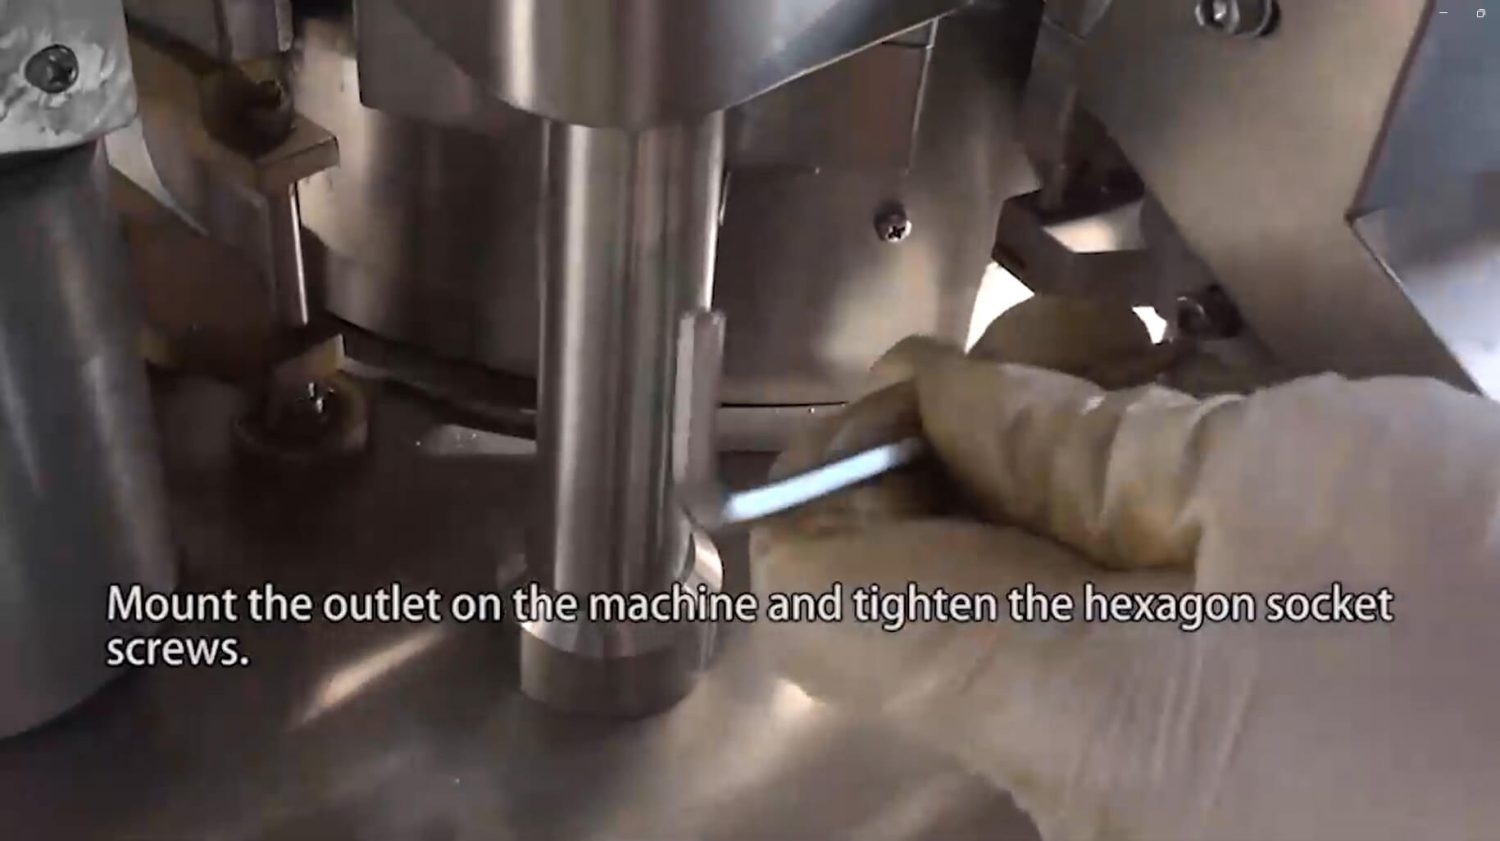
Step 8: Mount the outlet on the machine and tighten the hexagon socket screws.
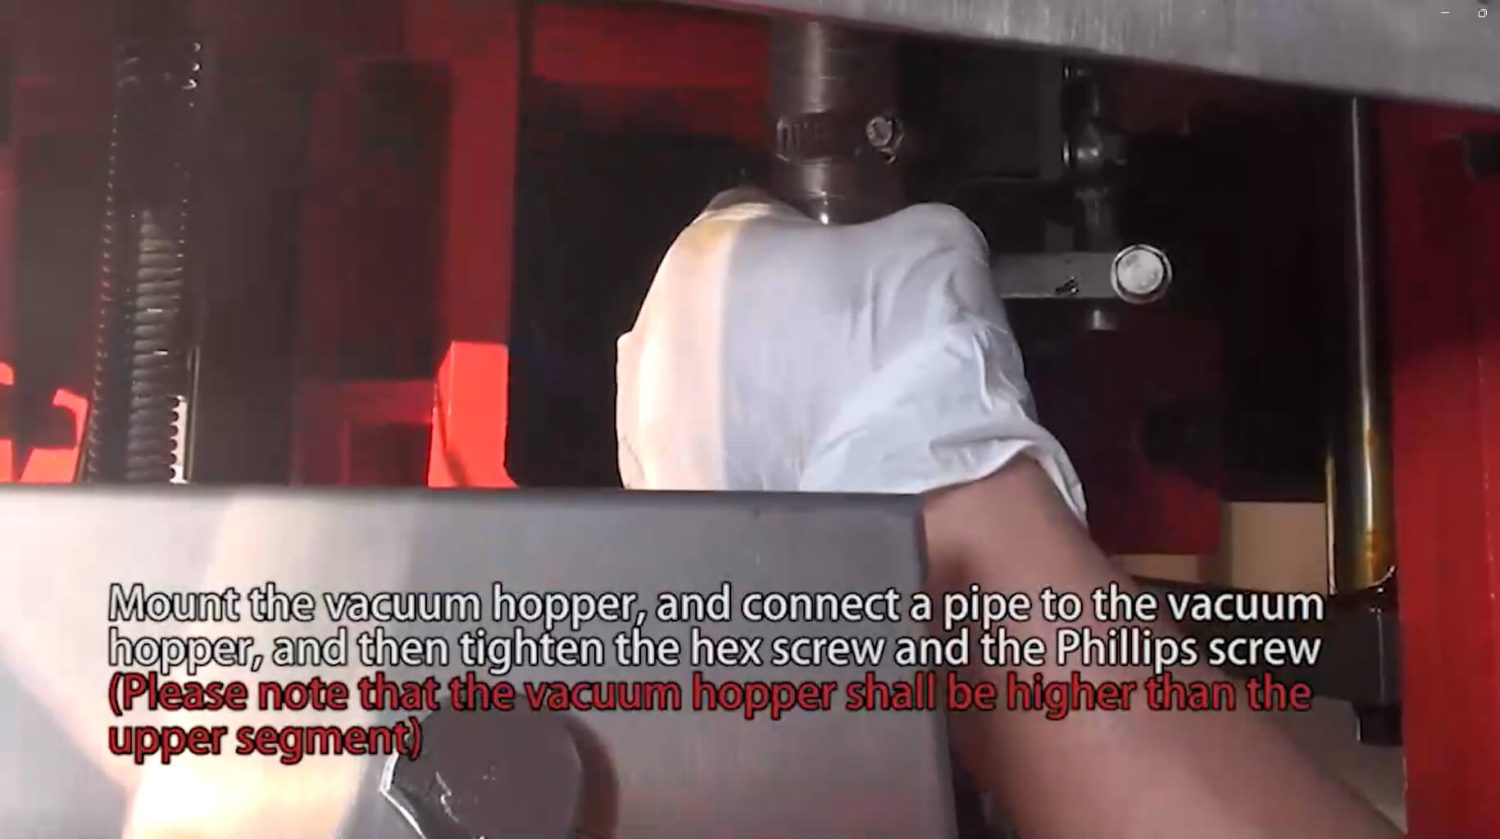
Step 9: Mount the vacuum hopper, and connect a pipe to the vacuum hopper, and then tighten the hex screw and the Phillips screw (Please note that the vacuum hopper shall be higher than the upper segment)
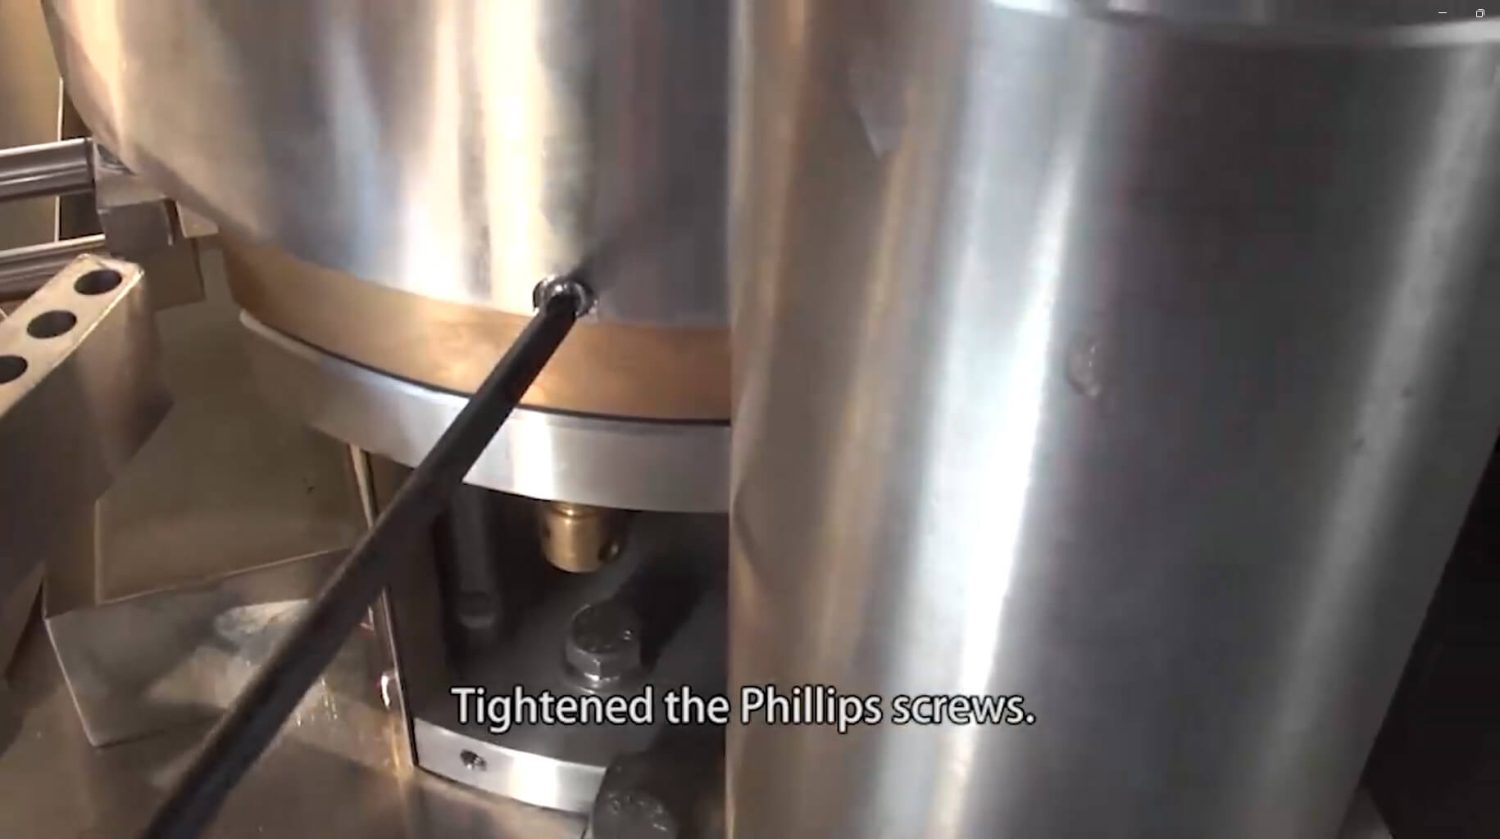
Step 10: Tighten the Phillips screws.
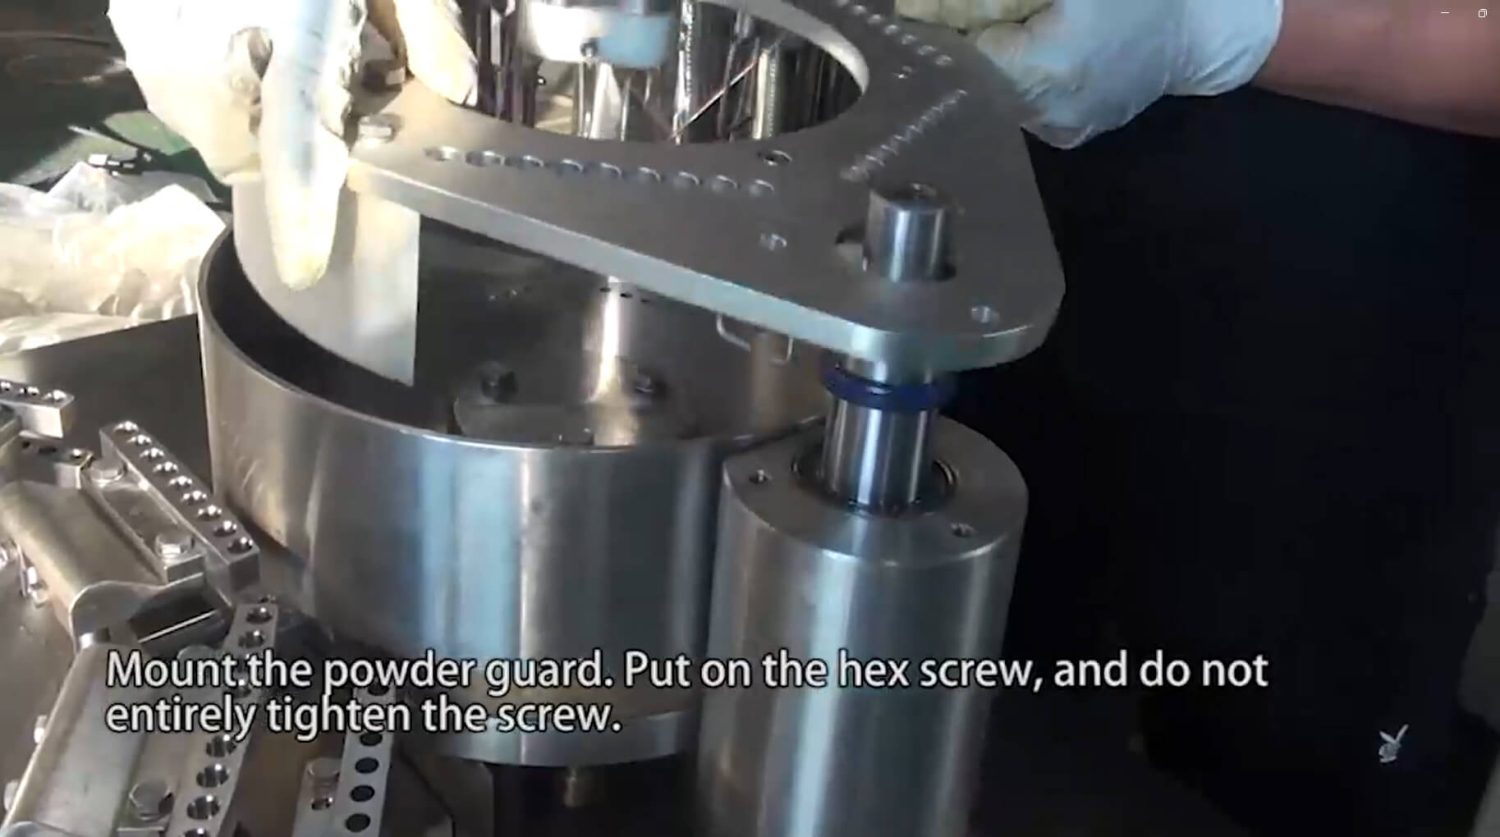
Step 11: Mount the powder guard. Install the hex screw, but do not fully tighten it.
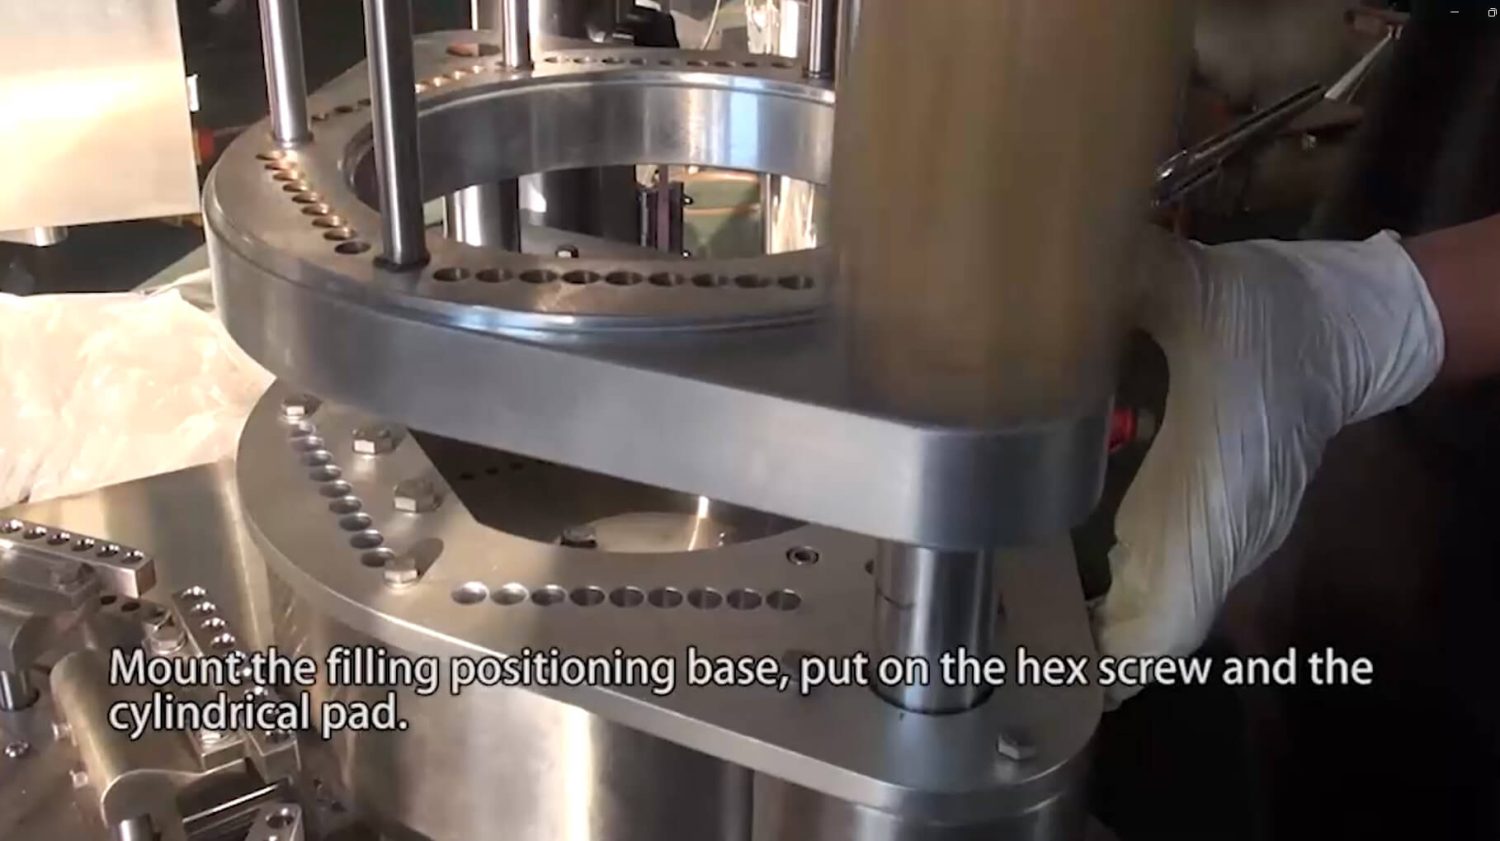
Step 12: Mount the filling positioning base, put on the hex screw and the cylindrical pad.
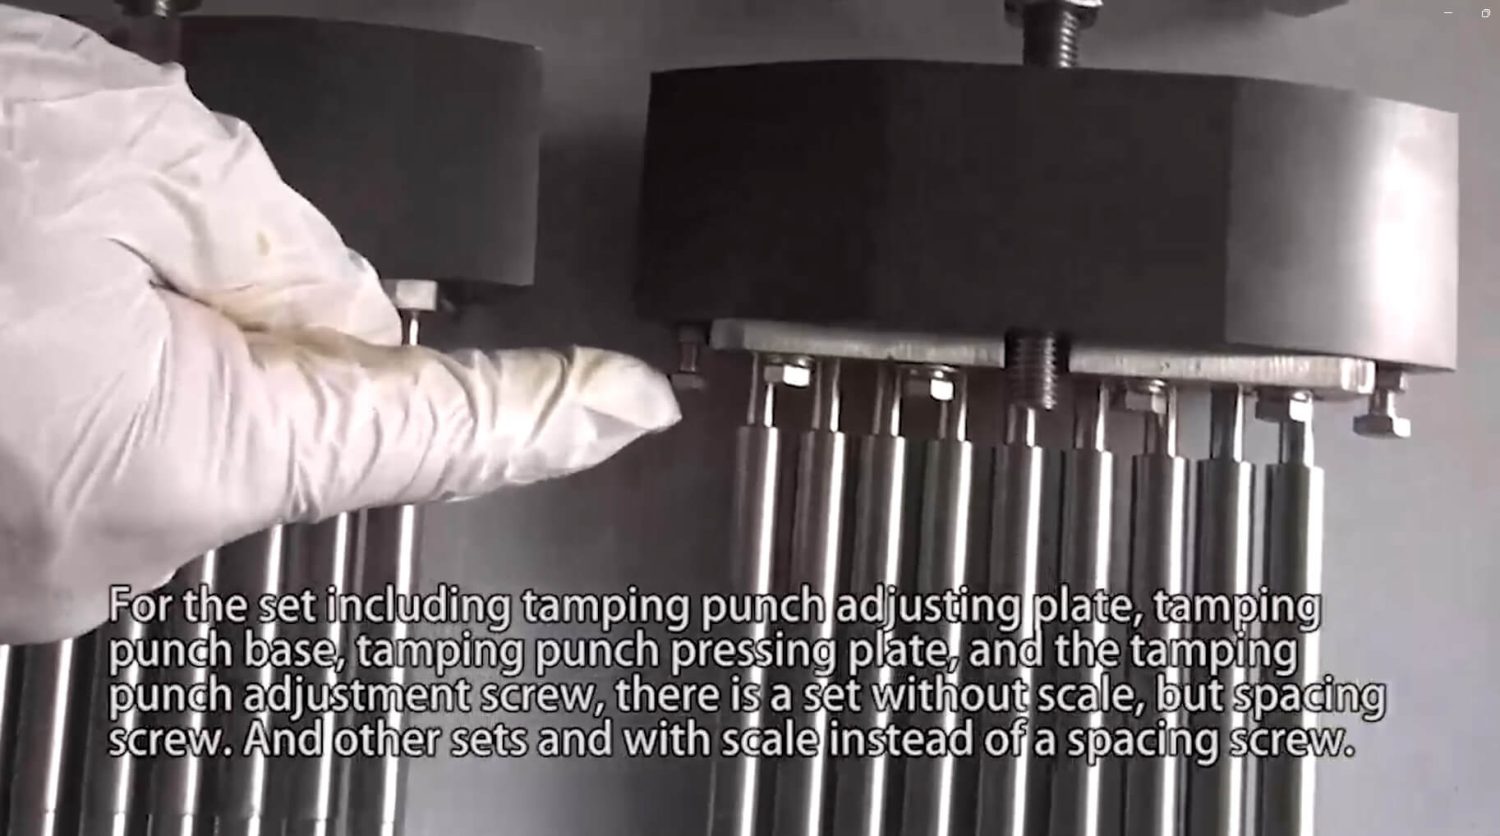
Step 13: Among the sets consisting of the tamping punch adjusting plate, tamping punch base, tamping punch pressing plate, and tamping punch adjustment screw, one set has no scale but uses a spacing screw, while the other sets have a scale instead of a spacing screw.
Step 14: Remove the hex screw and washer, and then remove the tamping punch pressing plate and the tamping punch adjustment screw. The tamping set without a scale has no spring or pad. The tamping set with scale also has springs and pads.

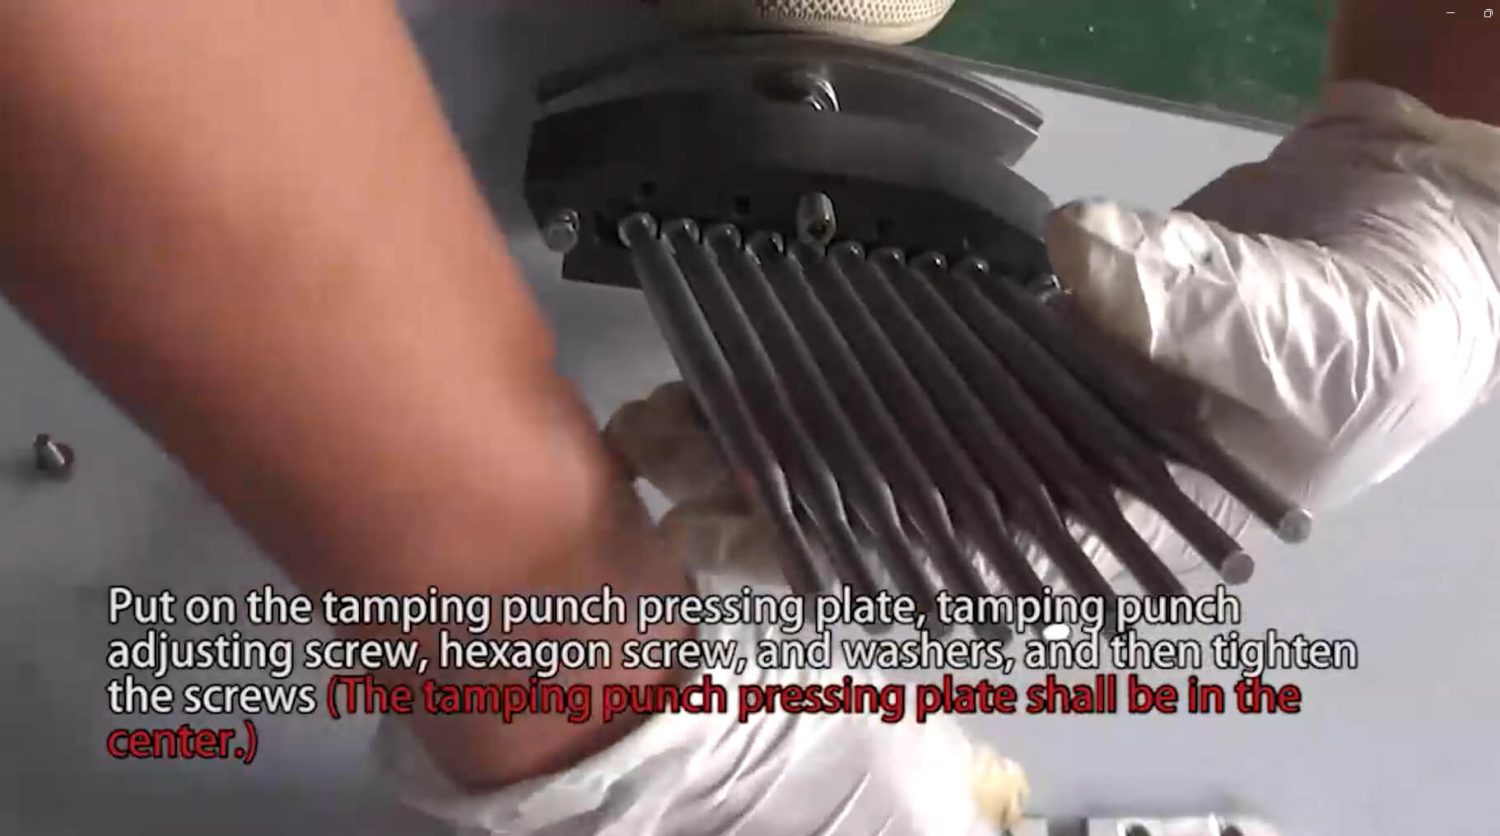
Step 15: Put on the springs and pads, and then install the tamping punch pressing plate.
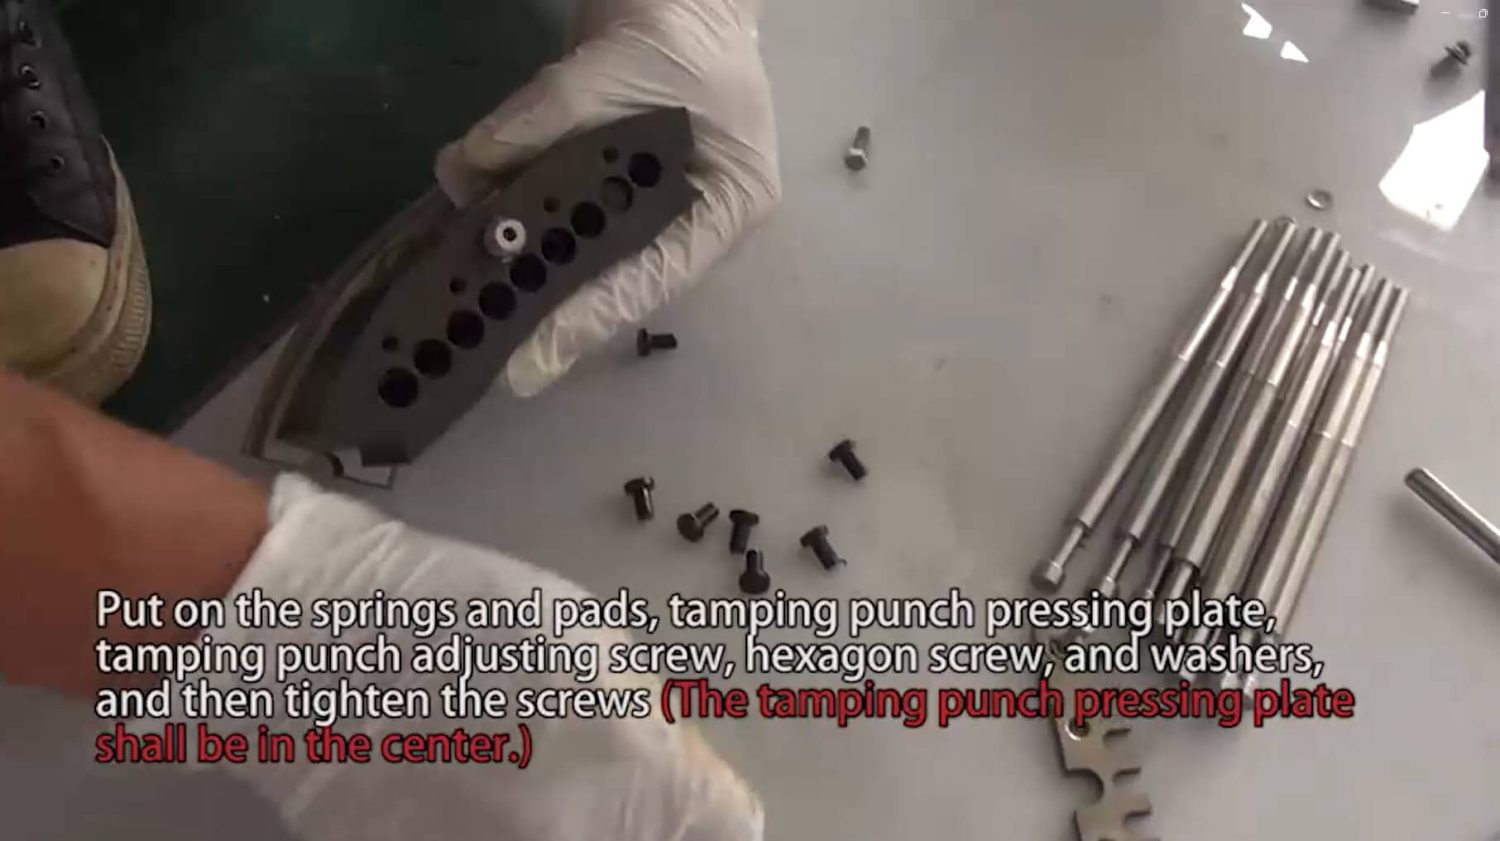
Step 16: Install the tamping punch adjusting screw, hexagon screw, and washers, and then tighten the screws.
Make sure the tamping punch pressing plate is centered.
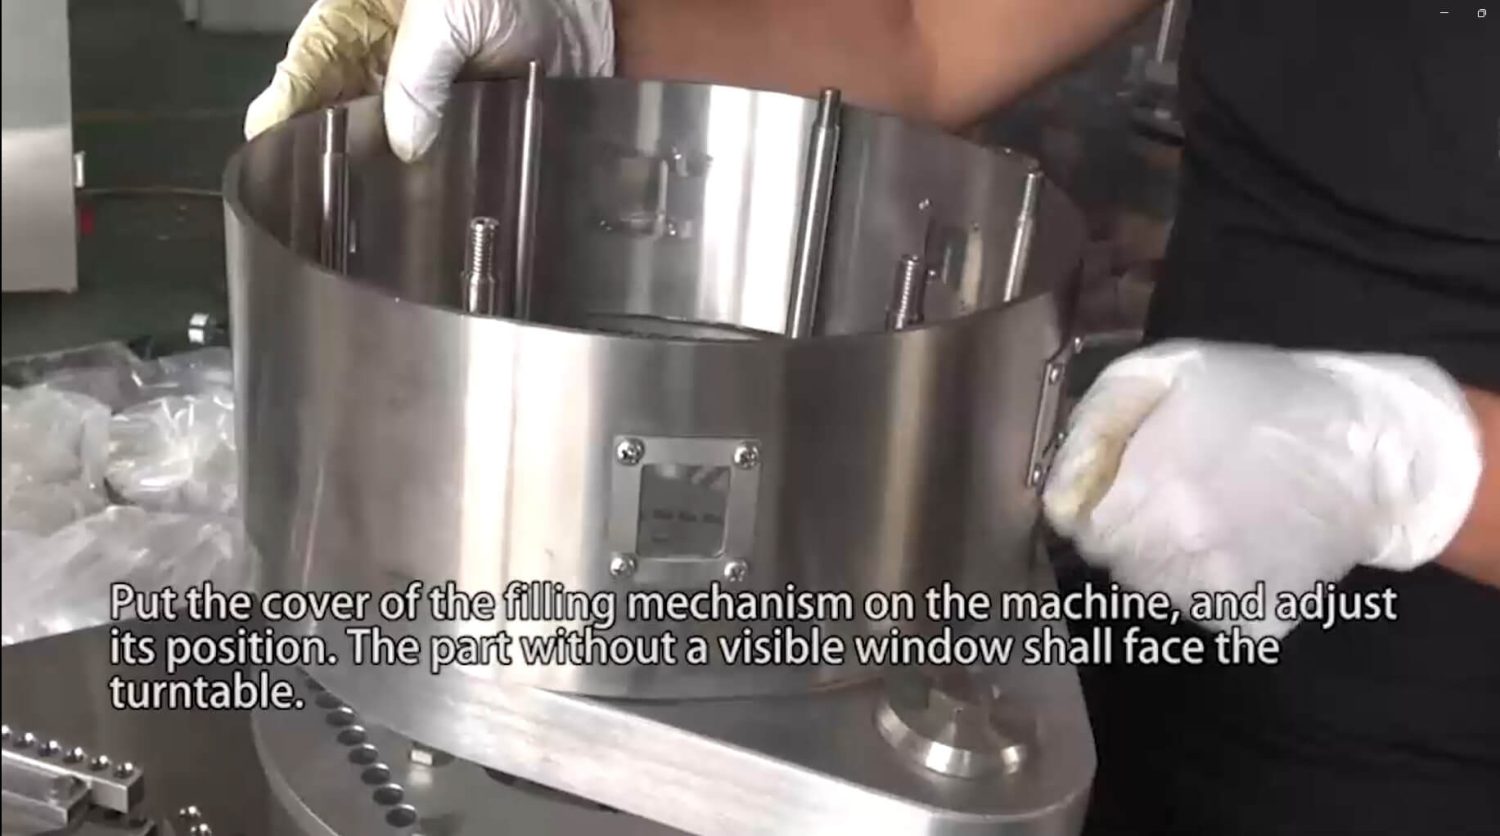
Step 17: Put the cover of the filling mechanism on the machine, and adjust its position. The part without a visible window shall face the turntable.
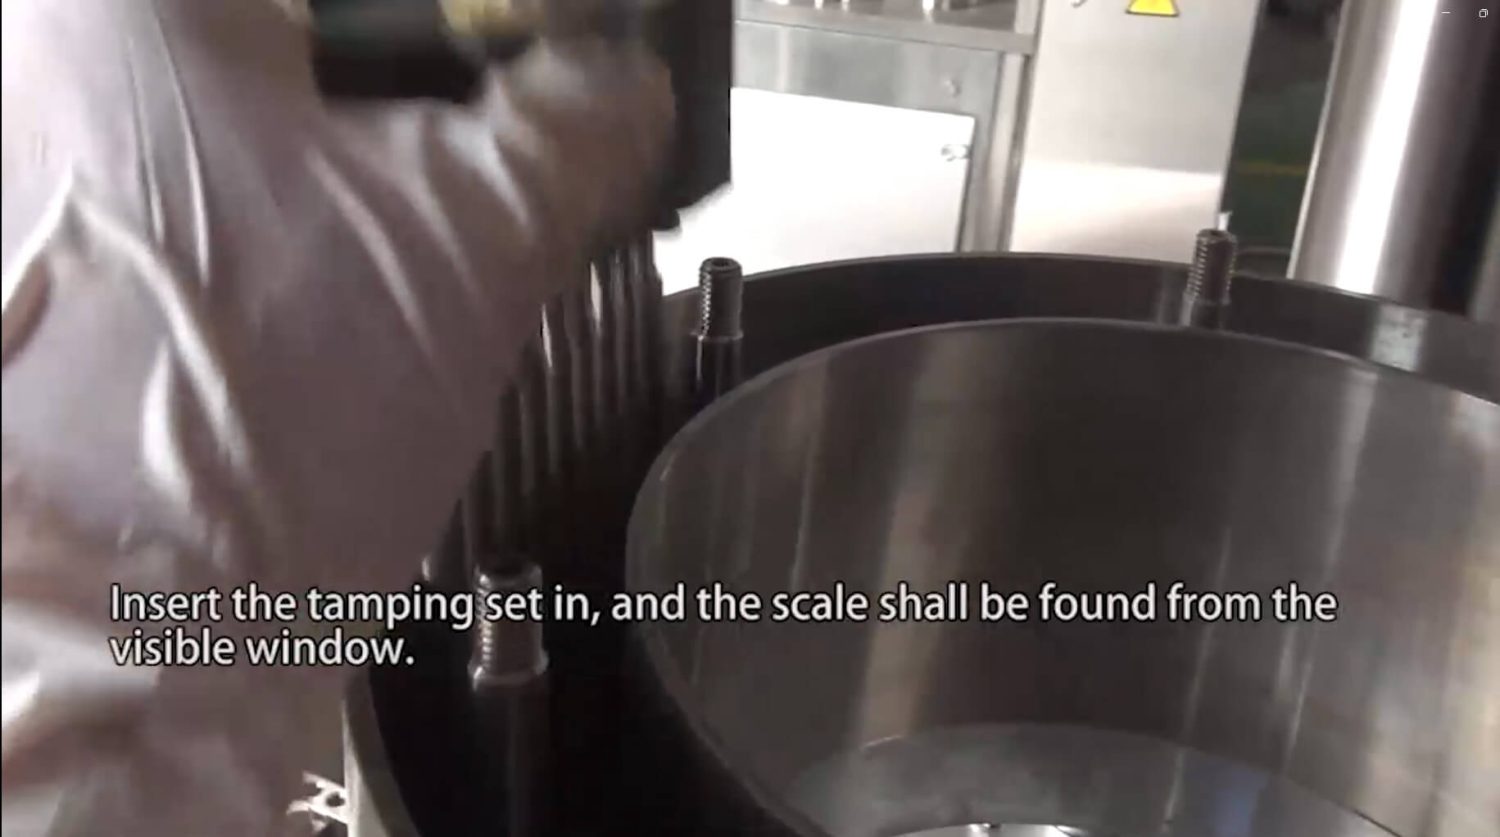
Step 18: Insert the tamping set, and the scale shall be visible through the window.
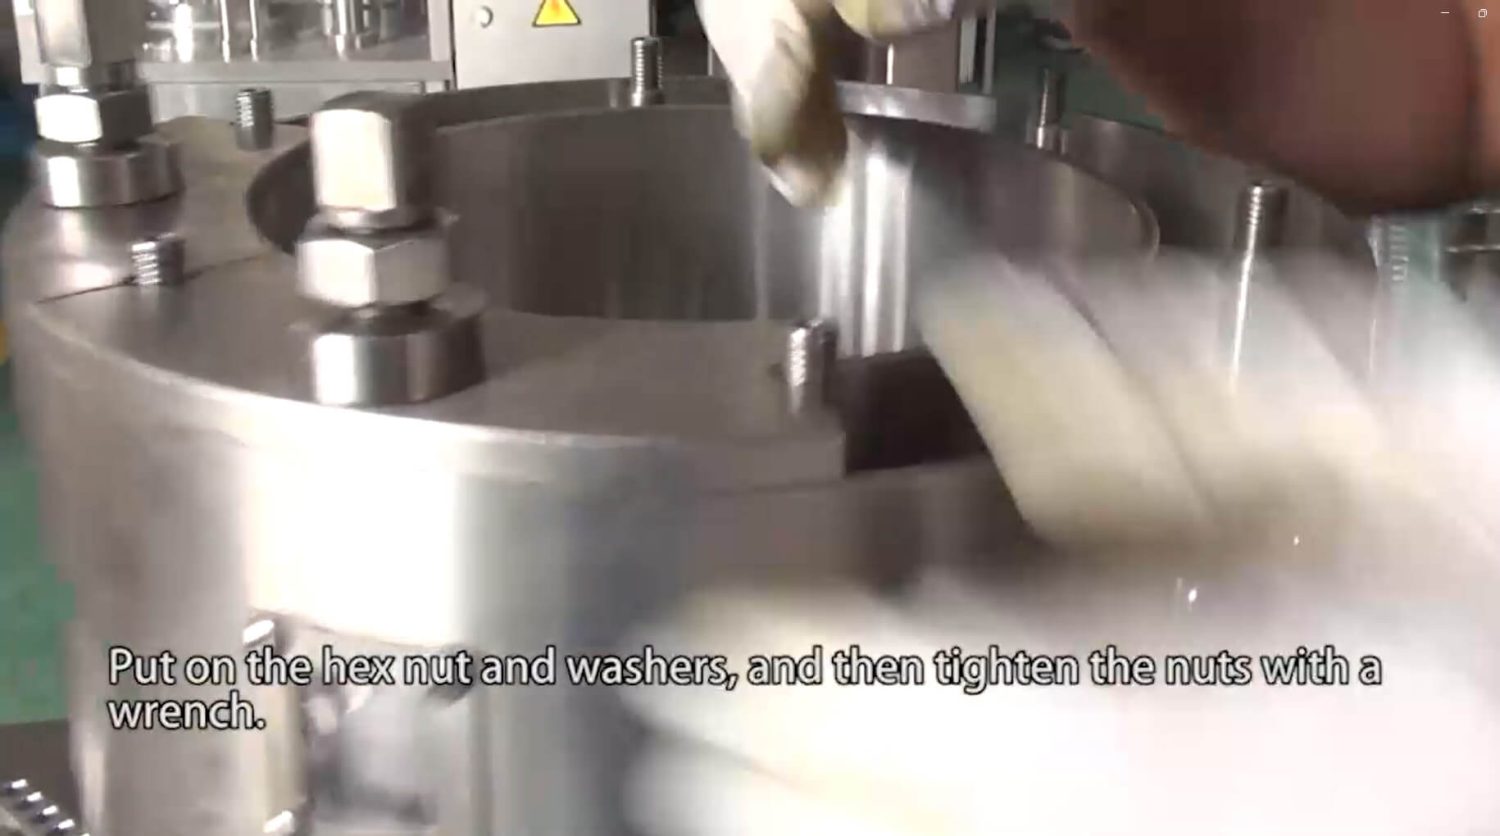
Step 19: Put on the hex nuts and washers, and then tighten the nuts with a wrench.
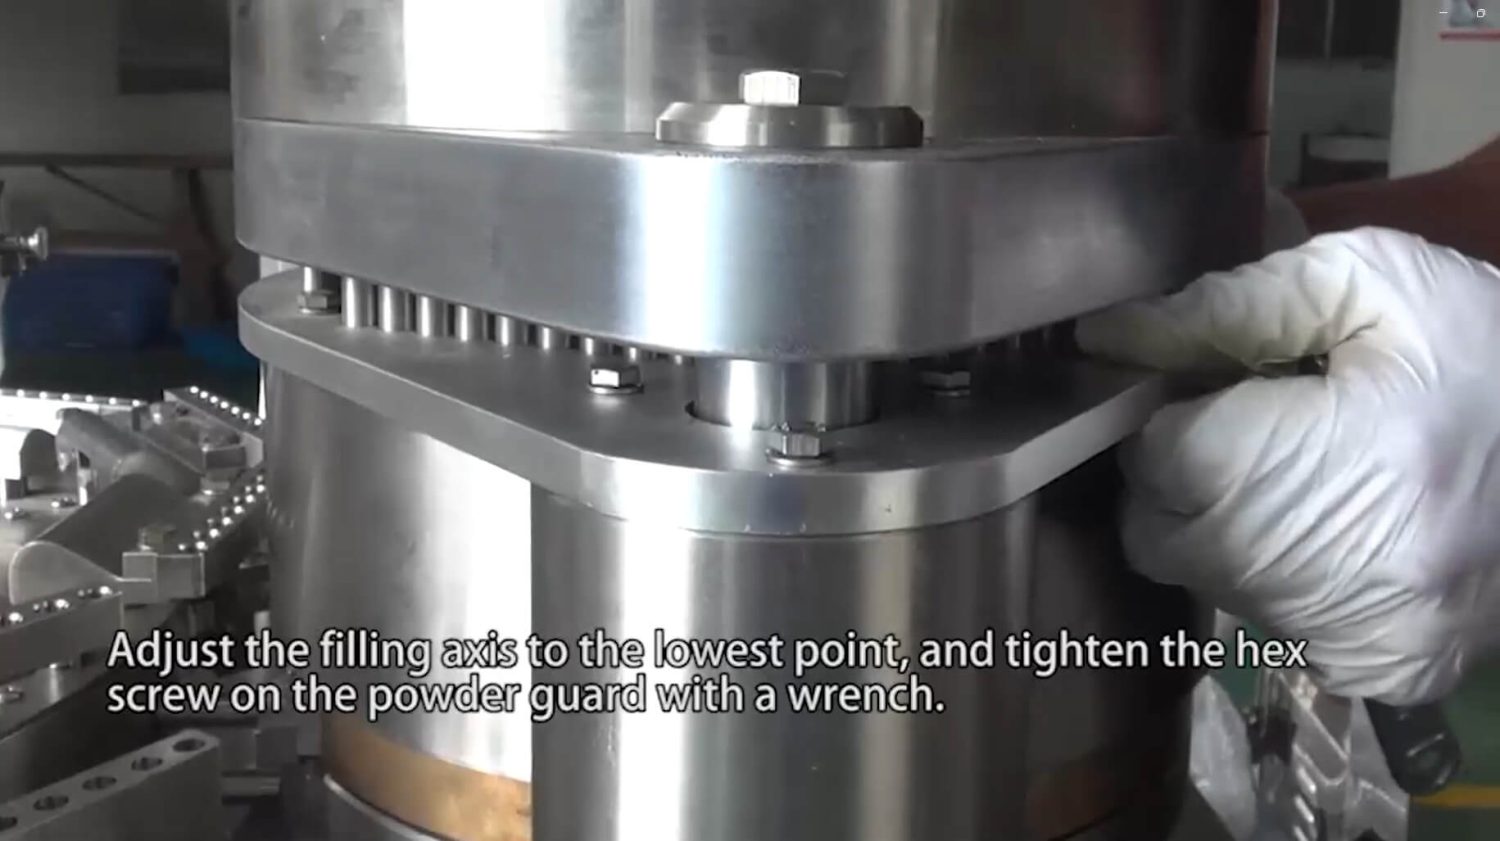
Step 20: Adjust the filling axis to the lowest point, and tighten the hex screw on the powder guard with a wrench.
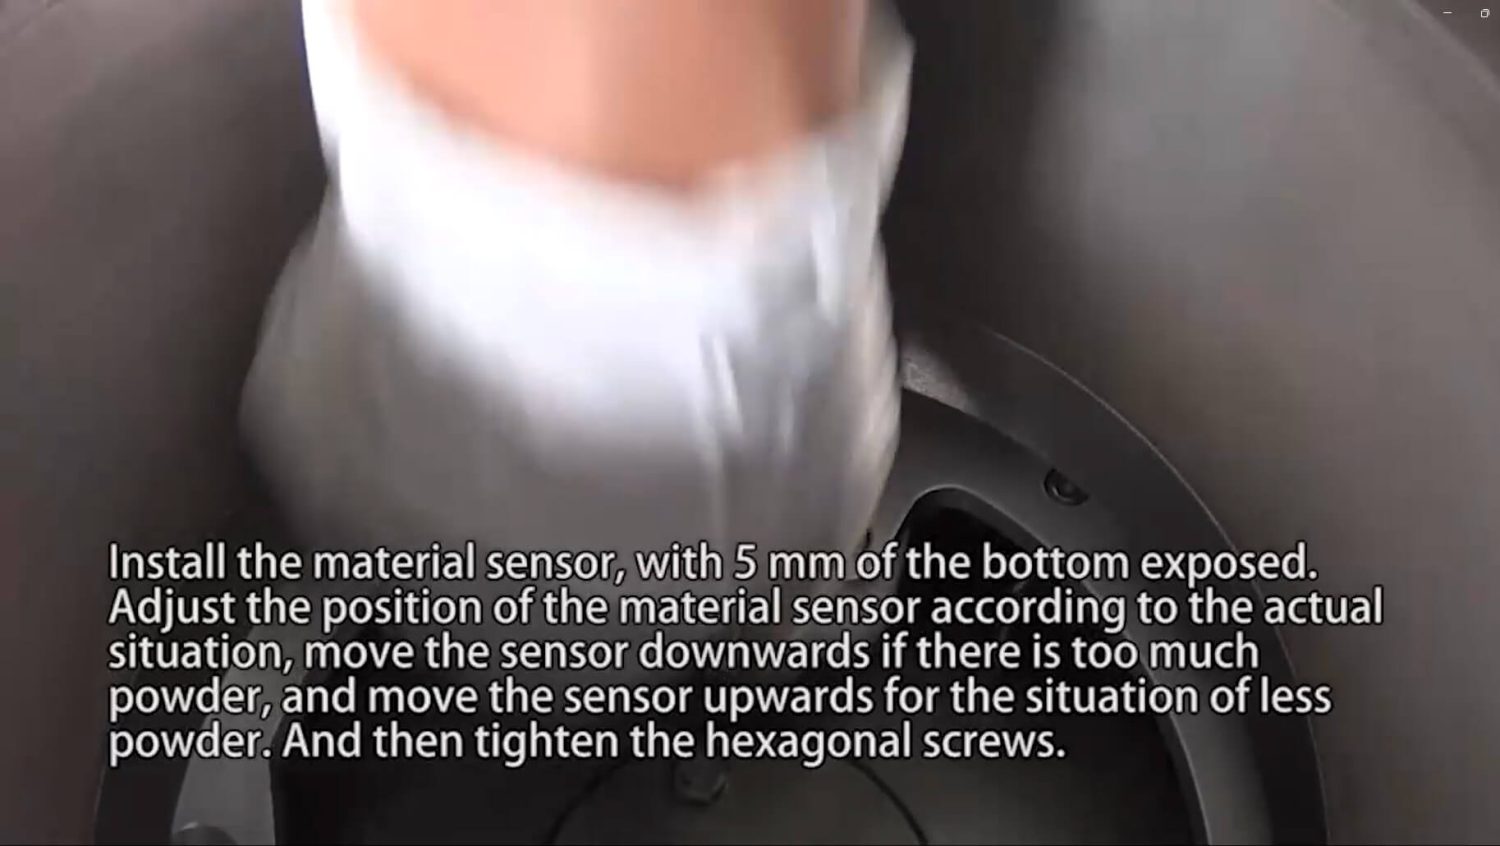
Step 21: Install the material sensor, leaving 5 mm of the bottom exposed. Adjust its position according to the actual situation: move the sensor downward if there is too much powder, and move it upward if there is too little powder. Then tighten the hexagonal screws.
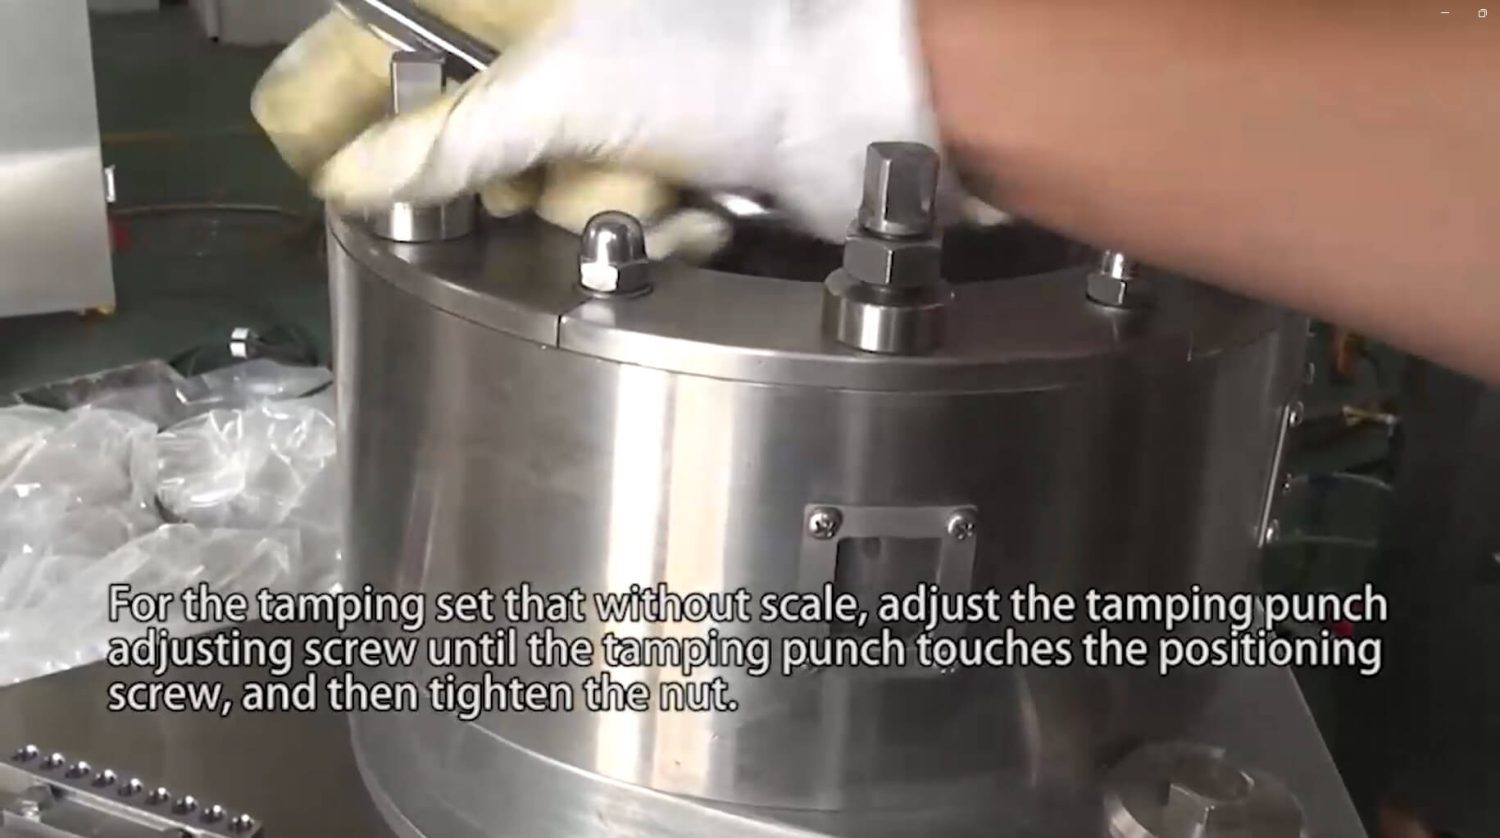
Step 22: For the tamping set without a scale, adjust the tamping punch adjusting screw until the tamping punch touches the positioning screw, and then tighten the nut.
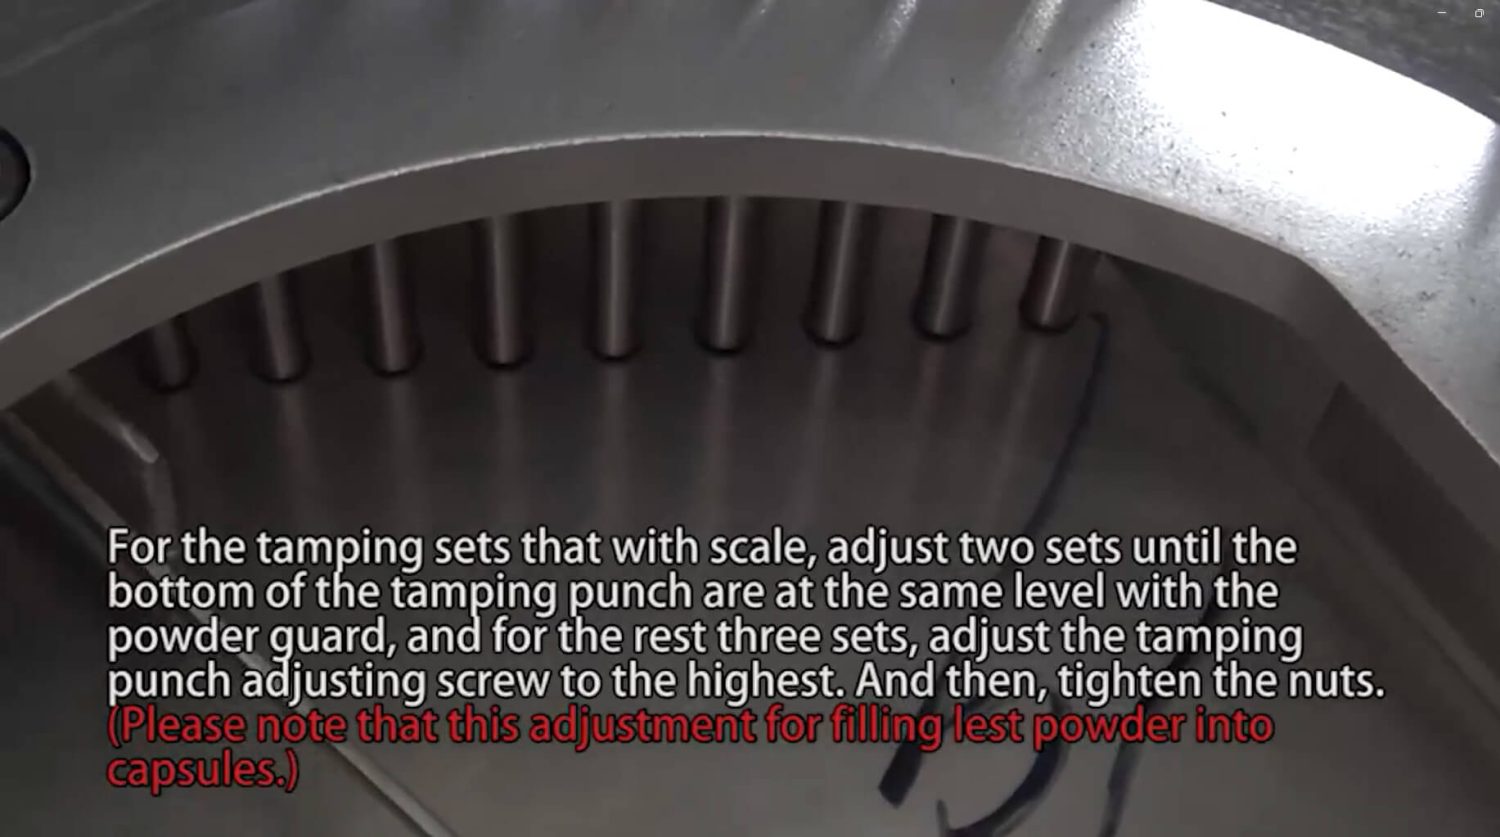
Step 23: For the tamping sets that come with a scale, adjust two sets until the bottom of the tamping punch is at the same level as the powder guard. For the remaining three sets, adjust the tamping punch adjusting screw to the highest position, and then tighten the nuts. (Please note that this adjustment is for filling the least powder into capsules.)
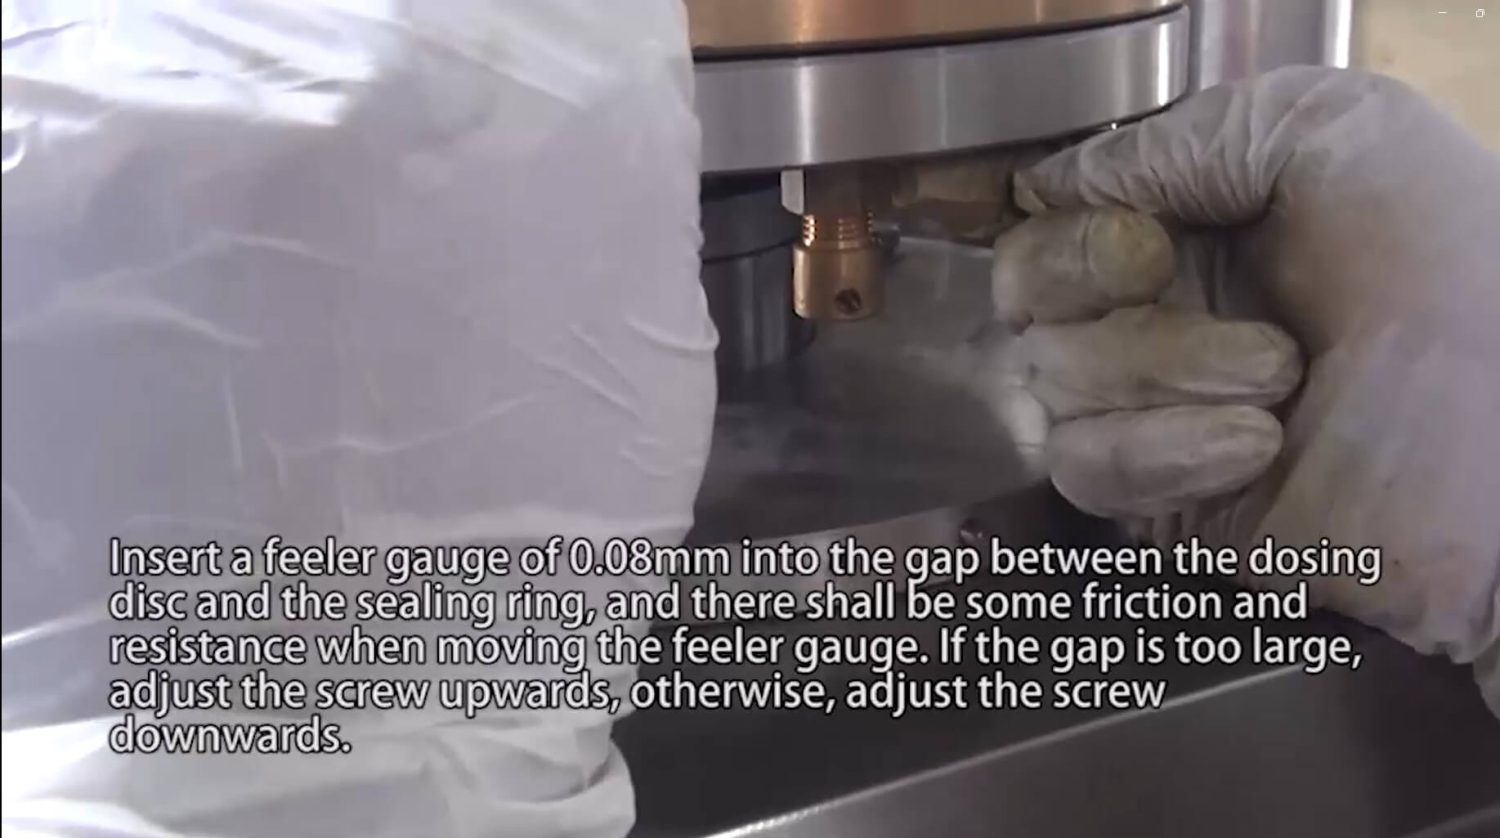
Step 24: Insert a feeler gauge of 0.08 mm into the gap between the dosing disc and the sealing ring, and there shall be some friction and resistance when moving the feeler gauge. If the gap is too large, adjust the screw upwards, otherwise, adjust the screw downwards.
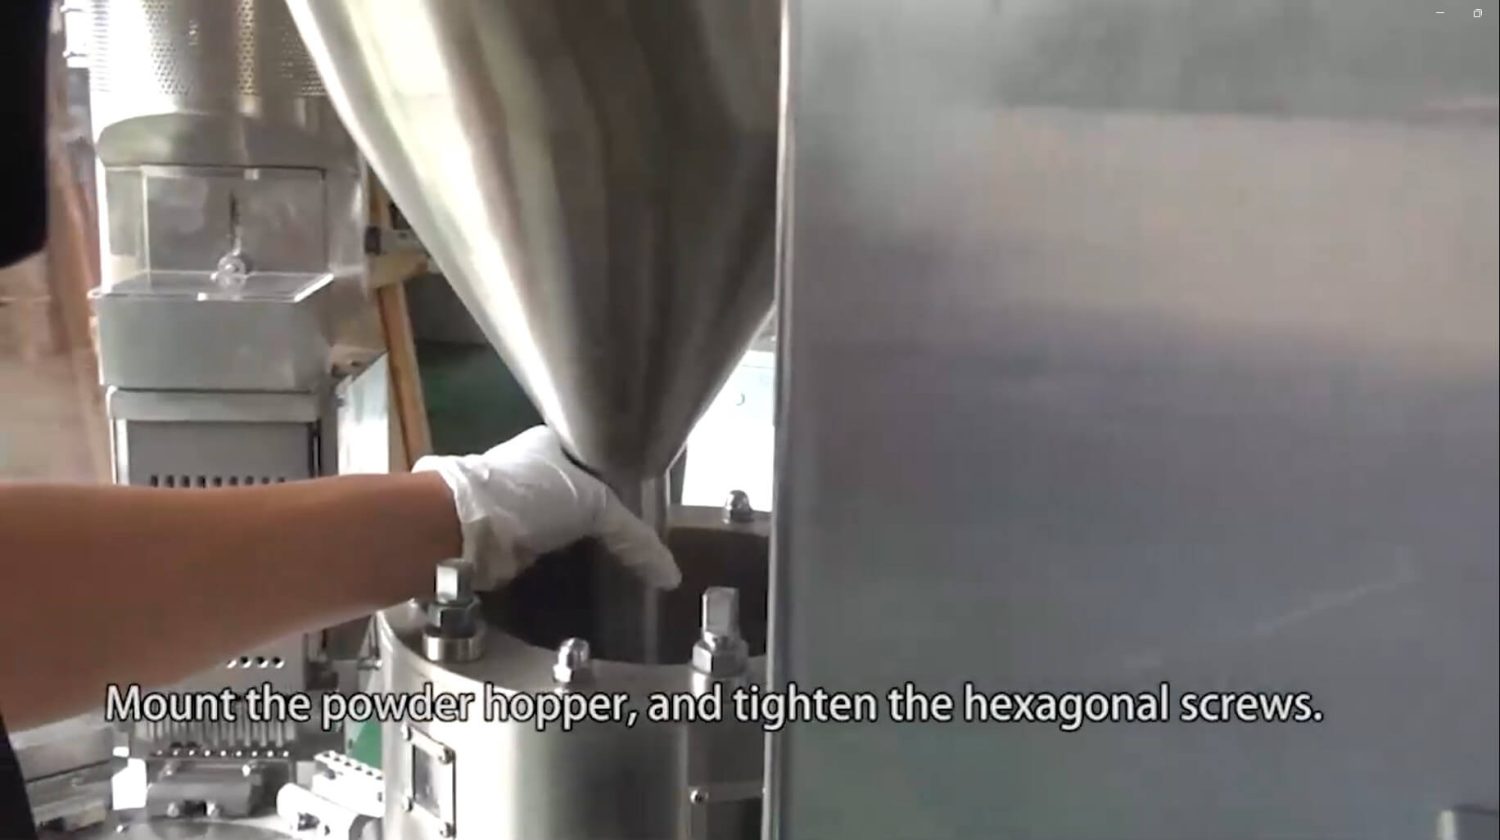
Step 25: Mount the powder hopper and tighten the hex screws.
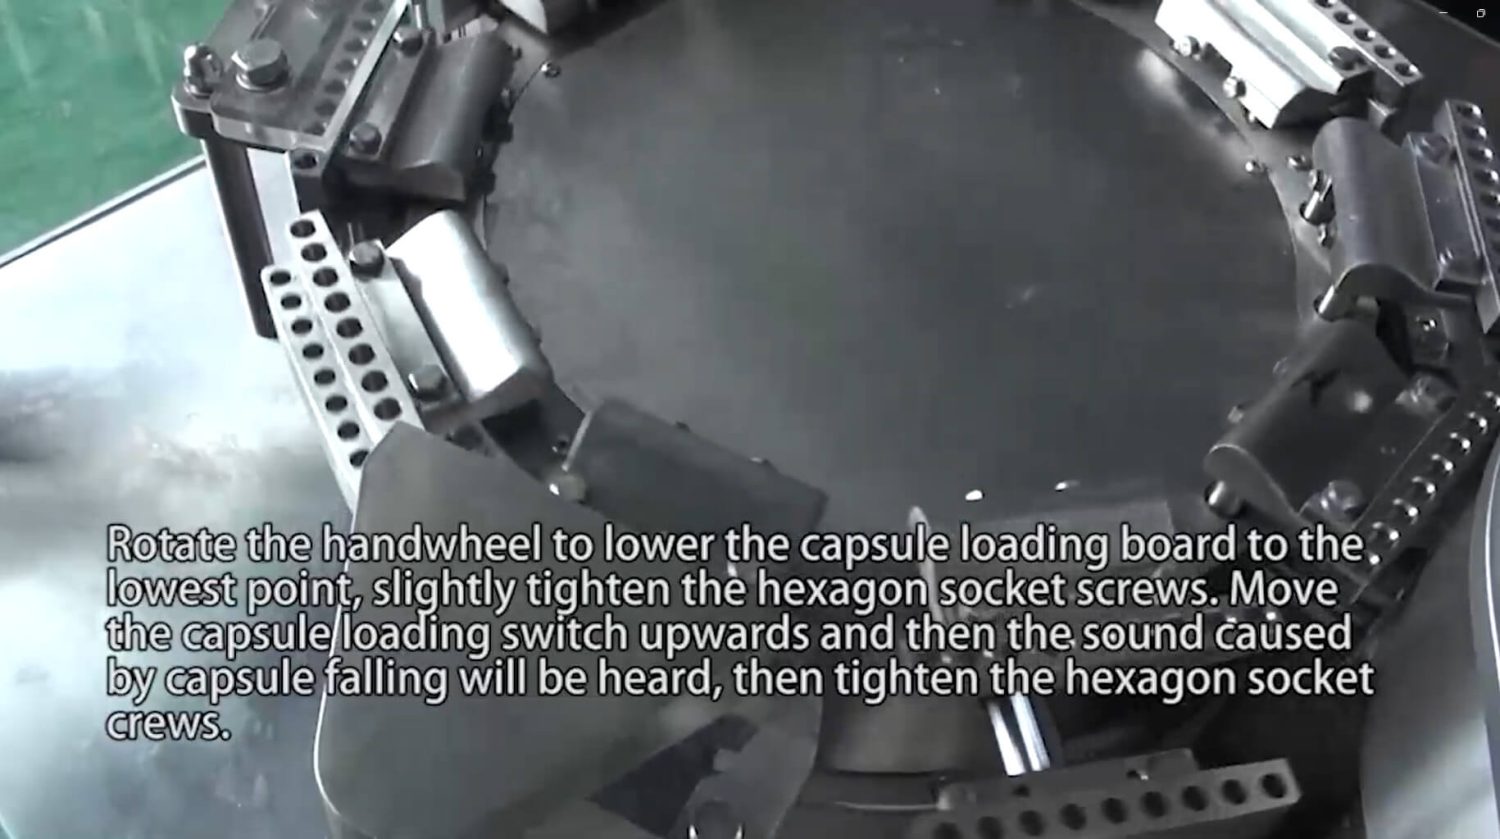
Step 26: Rotate the handwheel to lower the capsule loading board to the lowest point, and slightly tighten the hexagon socket screws. Move the capsule loading switch upwards, and then the sound of capsules falling can be heard. Then tighten the hexagon socket screws.
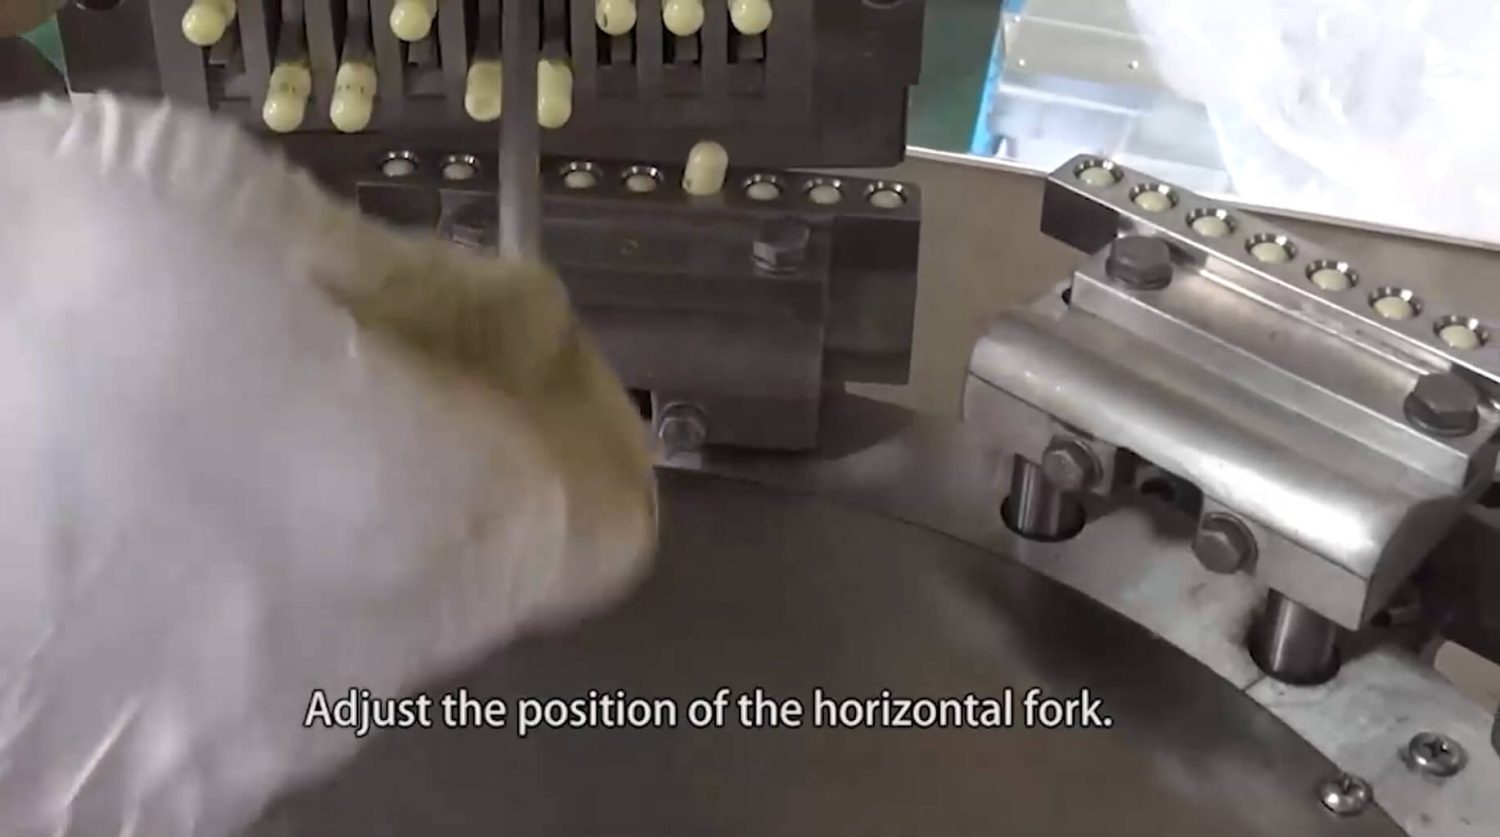
Step 27: Adjust the position of the horizontal fork.
How to Maintain the Capsule Filler
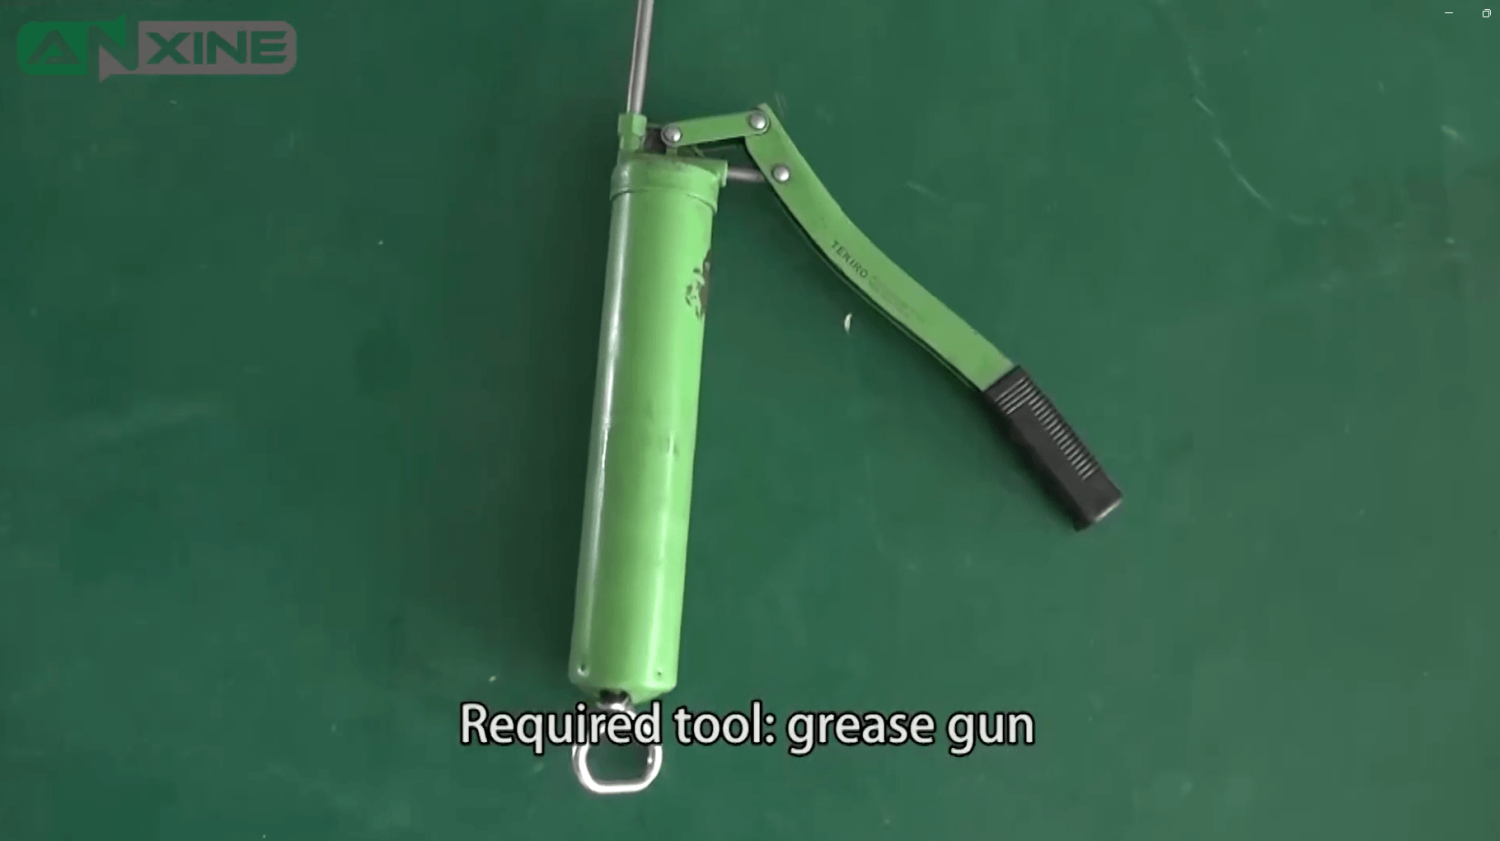
Step 1: Prepare the grease gun.
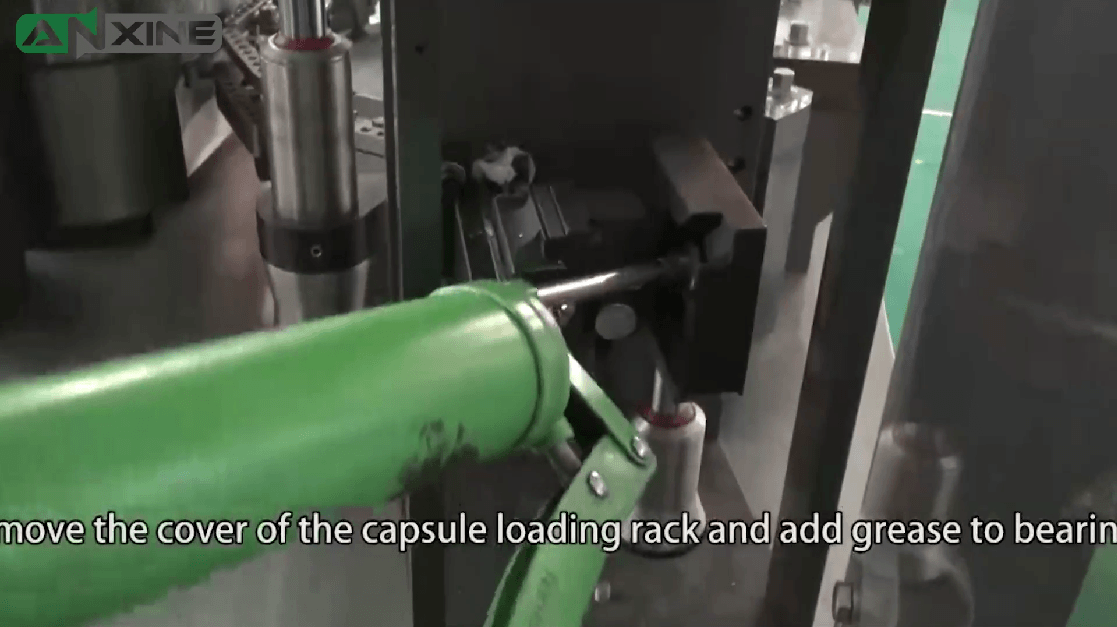
Step 2: Move the cover of the capsule loading rack and add grease to the bearing.
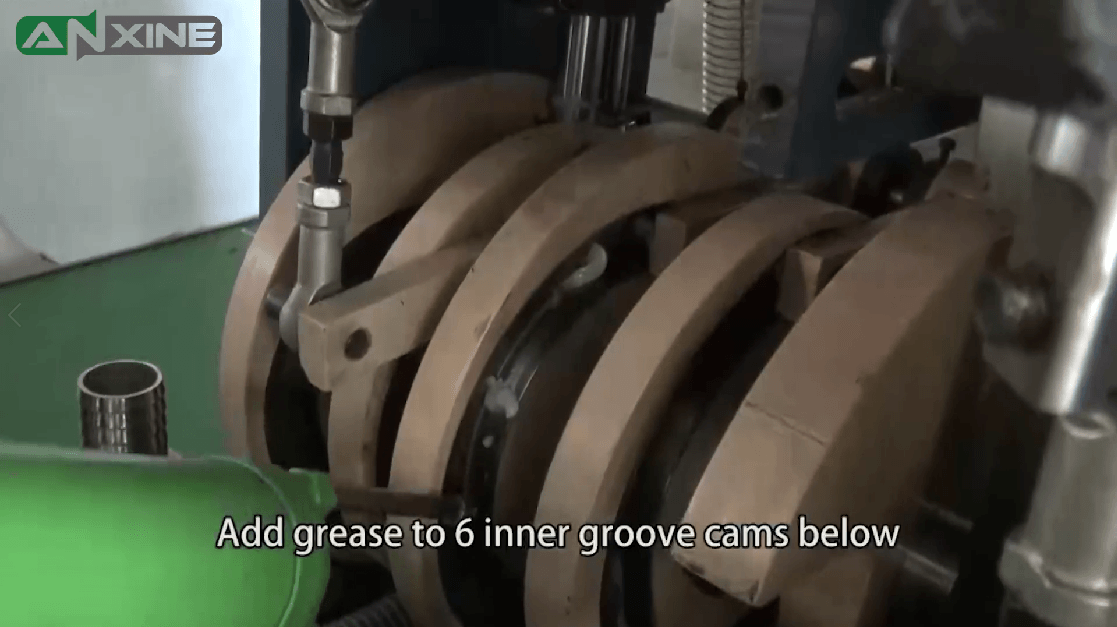
Step 3: Add grease to the six inner-groove cams below.
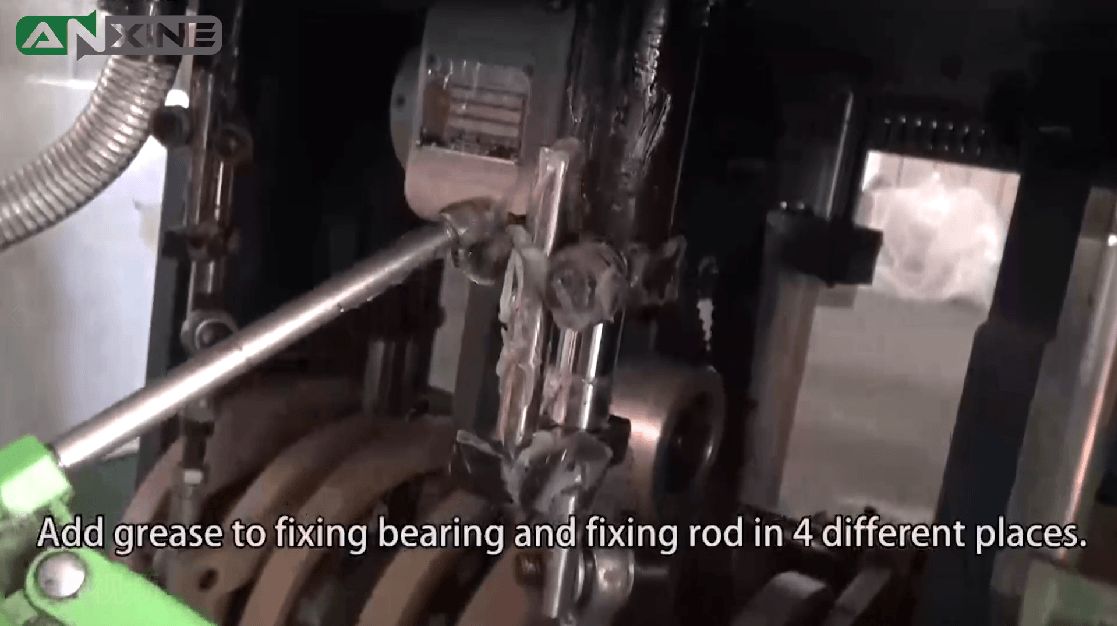
Step 4: Add grease to the fixing bearing and fixing rod in 4 different places.
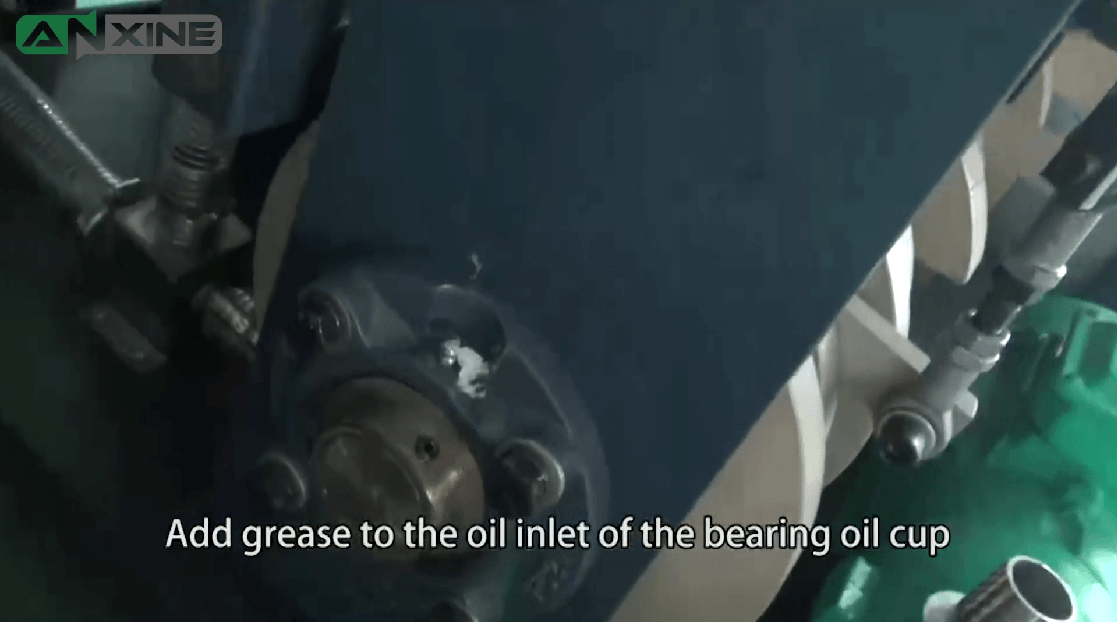
Step 5: Add grease to the oil inlet of the bearing oil cup
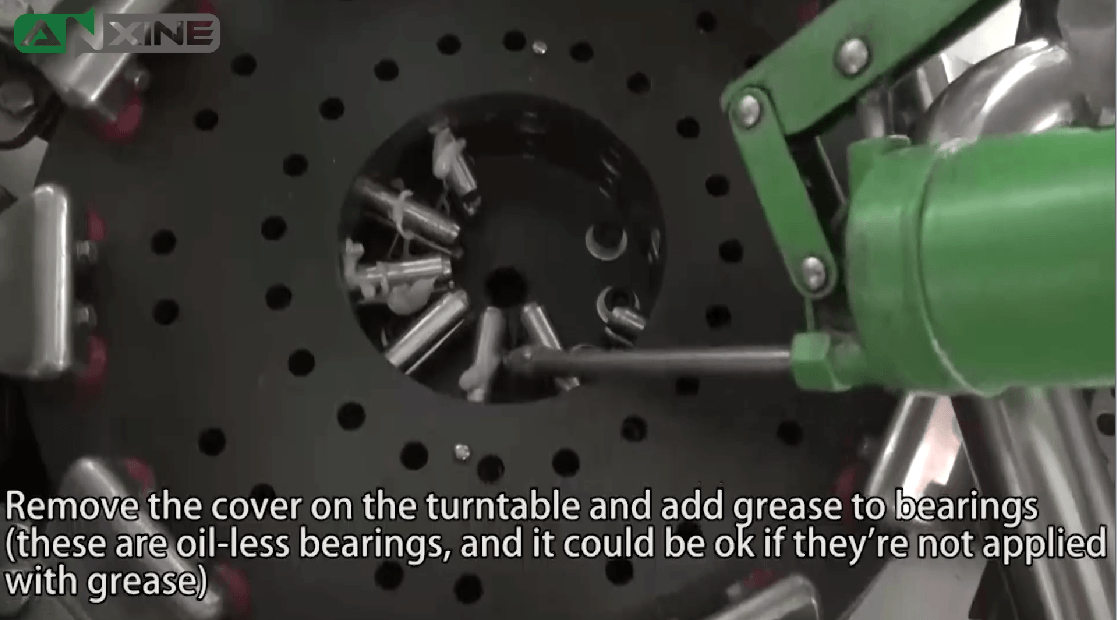
Step 6: Remove the cover on the turntable and add grease to the bearings
(These are oil-less bearings, so it is acceptable if no grease is applied.)