NOTICE
- The following procedures are intended for the Anxine CGZ-4 only. For other brands, refer to the original manufacturer’s instructions.
- Always disconnect the power supply before performing maintenance, cleaning, or mold changeover.
- Only trained and authorized persons are permitted to work on the equipment.
- Your equipment may vary from images or videos due to ongoing upgrades.
- If any part of this guide is unclear, contact Anxine for technical support before proceeding.
Section 1: Operating Procedures of the Vial Filling & Capping System
Step 1: Manually put the vial stoppers into the stopper arranging disc.
Step 2: Manually put the seal caps into the seal cap arranging disc.
Step 3: Manually put the vials into the vial inlet of the vial feeding mechanism, and then push the vials forward to the vial feeding turntable.
Step 4: The vials on the turntable automatically enter the conveyor belt inlet in the rotation direction (anticlockwise) under the guidance of the vial-feeding guide plate, and are orderly transported into the vial-feeding turntable by the conveyor belt.
Step 5: The vial-feeding wheels help the vials go into the hole groove of the main turntable.
Step 6: The cam graduator operates to transport the vials to the positions under the filling needles for filling.
Step 7: When the vials are transported to the positions under the filling needles by the main turntable, the filling head is driven by the servo motor in the machine frame to move up and down so as to make the needles insert into the vials for filling.
Step 8: The vial stoppers enter the stopper dropping tracks orderly, in the same direction and at a certain speed, and slide down to the vacuum stopper-sucking hole where the vacuum generator generates a vacuum to absorb the vial stopper.
Step 9: The vacuum stopper-sucking turning plate instantly turns towards the main turntable to press the vial stopper into the vial mouth.
Step 10: When the vial with a stopper is rotated by the main turntable and sent to the station below the cap-clamping claw, due to the rotating push force, a seal cap automatically hangs on the vial mouth.
Step 11: The vial with a seal cap on its top is transferred to the capping station by the main turntable.
Step 12: The capped vial is transported to the hole groove of the vial-discharging wheel by the main turntable.
Section 2: How to Adjust the Half Stoppering Position for Vials
Note: The parameters in parameter interfaces have been set before delivery. It is prohibited to modify them at will. Otherwise, it is easy to cause vial breakage. Please consult our after-sales department before changing the parameters.
Step 1: There is no need to adjust the vial feeding mechanism or the filling mechanism.
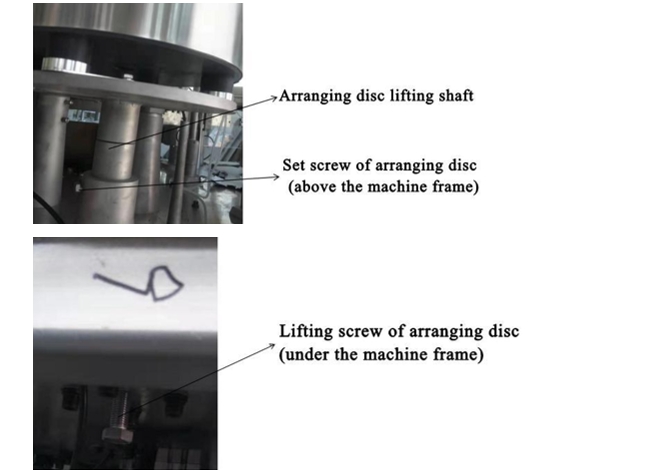
Step 2: Adjust the stopper-feeding position. That is, adjust the stopper arranging disc.
- Loosen the set screw of the arranging disc (above the machine frame).
- Screw the lifting screw of the arranging disc (under the machine frame) to raise the stopper arranging disc to a proper position.
- Tighten the set screw of the arranging disc.
Step 3: Adjust the stopper pressing head.
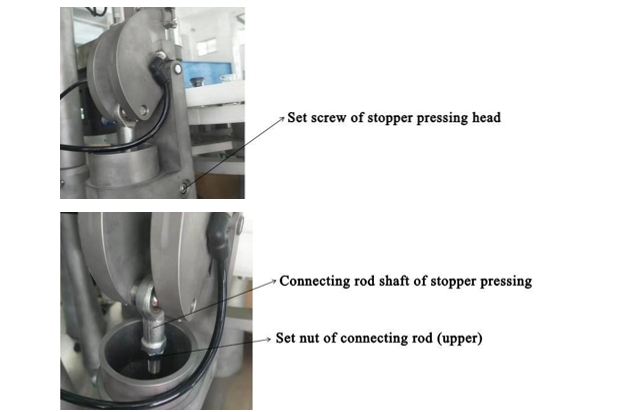
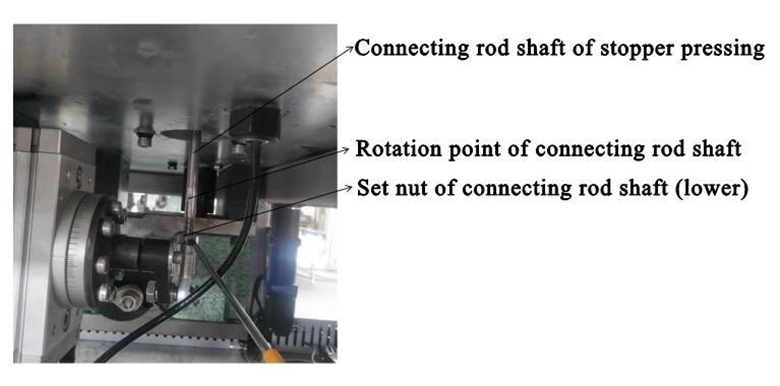
- Loosen the set screw of the stopper-pressing head.
- Loosen both upper and lower set nuts of the connecting rod shaft.
- At the rotation point of the connecting rod shaft, rotate the connecting rod shaft to raise it. Thus, the travel of the connecting rod shaft will be reduced. So will the distance that the stoppers are pressed down.
Step 4: Adjust the seal cap feeding & placing mechanism.
- Rotate the seal cap arranging disc to reserve space at the junction of the cap-dropping track and the seal cap arranging disc.
- Loosen the set screw of the cap-dropping track and remove the track.
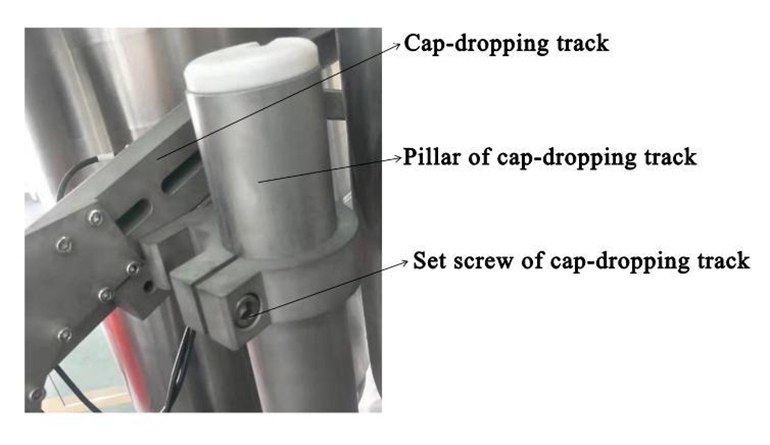
Step 5: Adjust the capping vials.
- In the automatic interface on the touch screen, there is a button to start the capping function. Start it when capping is needed.
- The moment the whole machine is started, the capping function is off by default.
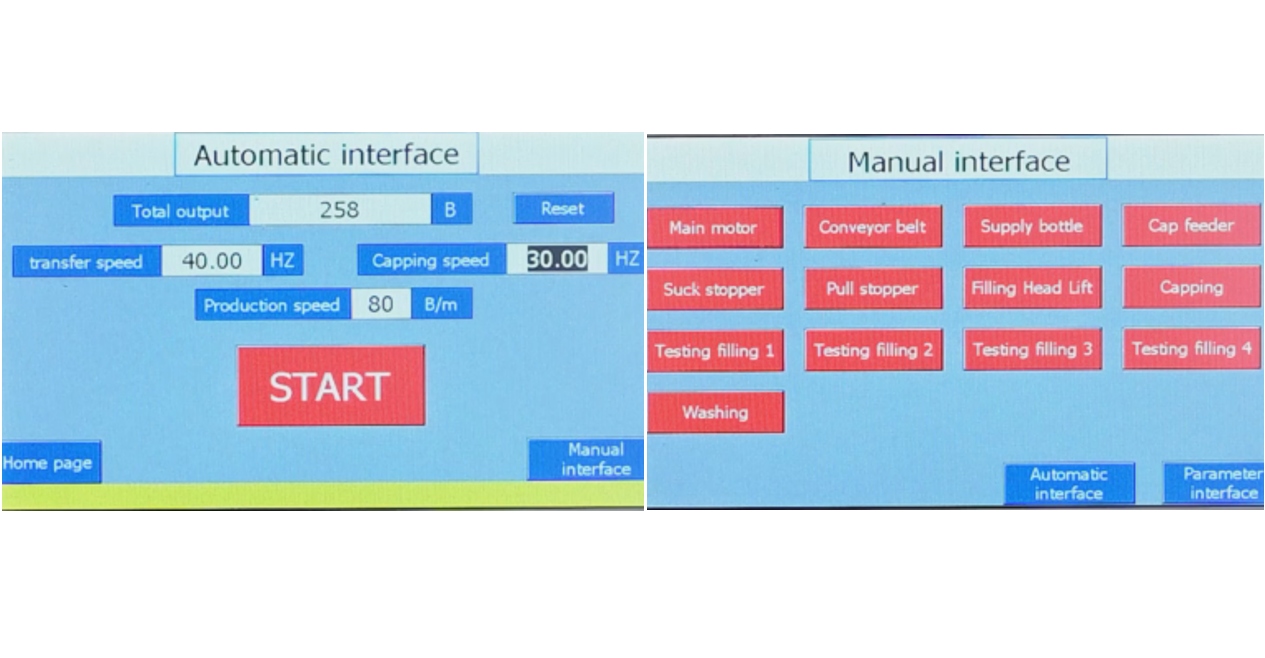
Section 3: Maintenance Guides
Note 1: Replace the lubricating oil of the cam graduator every six months. Clean and maintain the operating system components after work every day, and lubricate them with N68# lubricating oil.
Note 2: Since the electric cabinet is installed in the machine base, it is recommended to wipe all parts instead of washing them. Use a cotton cloth dipped in clean water or water with detergent (such as alcohol or hydrogen peroxide) to clean the machine. Finally, wipe all areas dry with a clean cloth.
Note 3: Clean the machine before production, after equipment maintenance, and especially after work every day.


