
NOTICE
- The following procedures are intended for Anxine equipment only. For other brands, refer to the original manufacturer’s instructions.
- Always disconnect the power supply before performing maintenance, cleaning, or mold changeover.
- Only trained and authorized persons are permitted to work on the equipment.
- Your equipment may vary from images or videos due to ongoing upgrades.
- If any part of this guide is unclear, contact Anxine for technical support before proceeding.
Click to view the WLDH Series Ribbon Blender.
Section 1: Operation Procedures
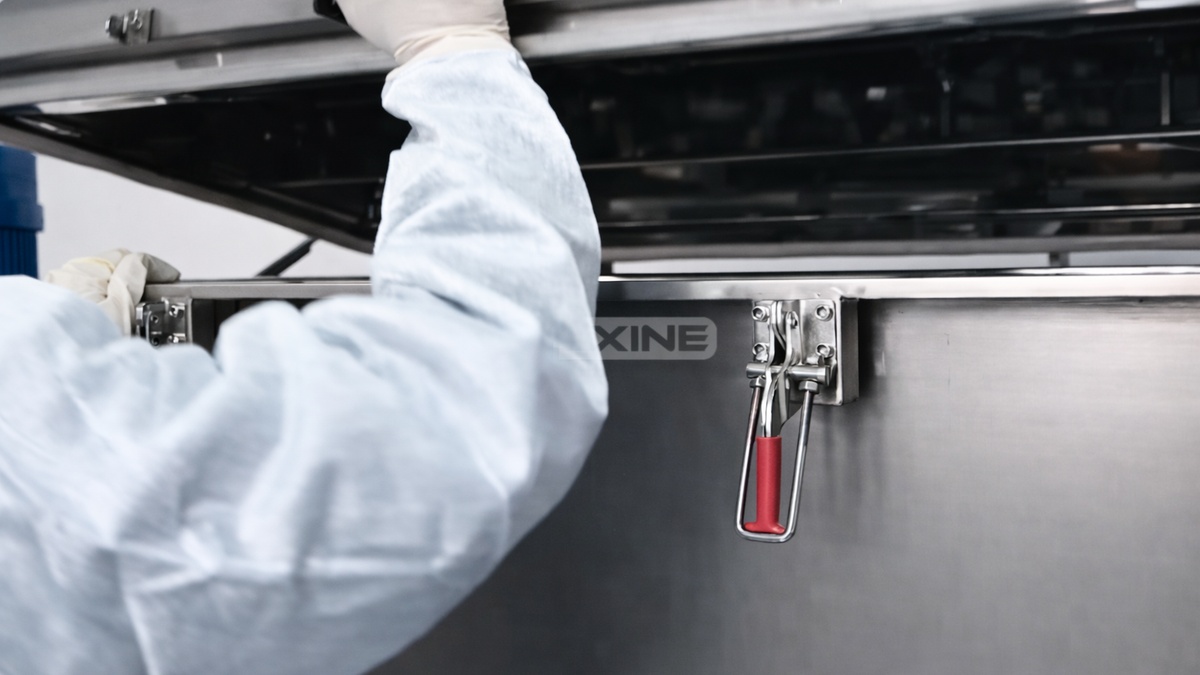
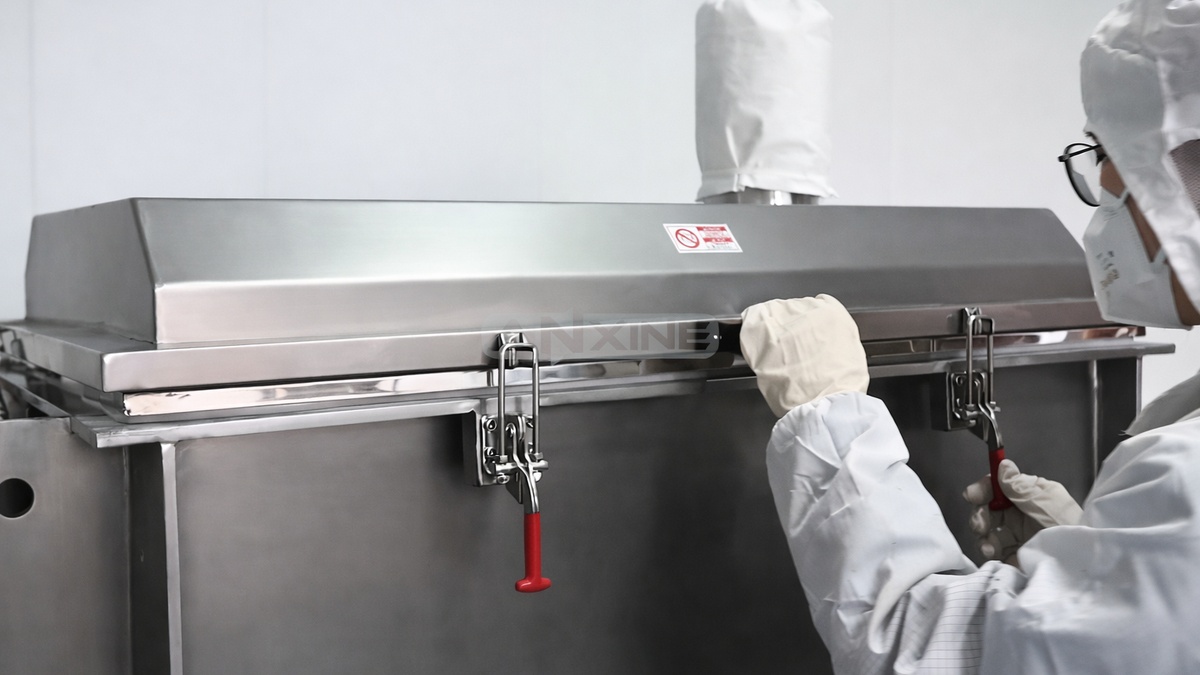
Step 1: Unlatch the safety clamps that lock the top cover of the ribbon blender.
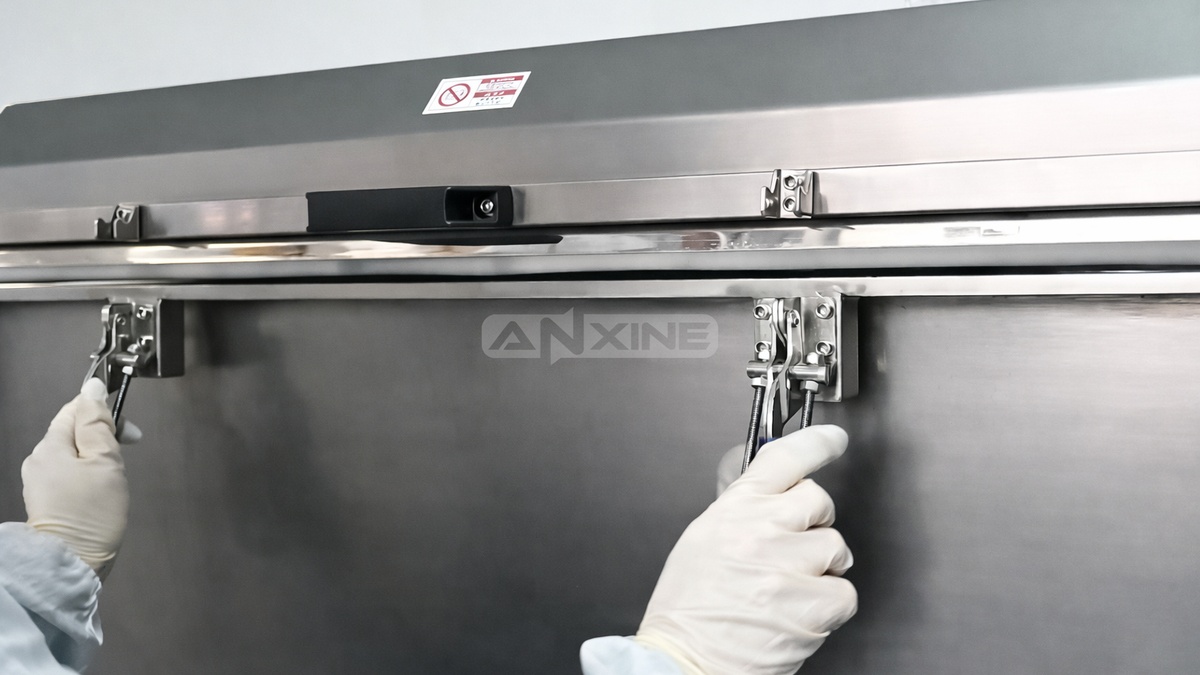
Step 2: Lift the cover to reveal the mixing trough and ribbon agitator.
Step 3: Load bulk materials directly into the open trough. Spread them across the trough to help with uniform blending.

Step 4: Lower the top cover back into place. Then re-engage and tighten all safety clamps.
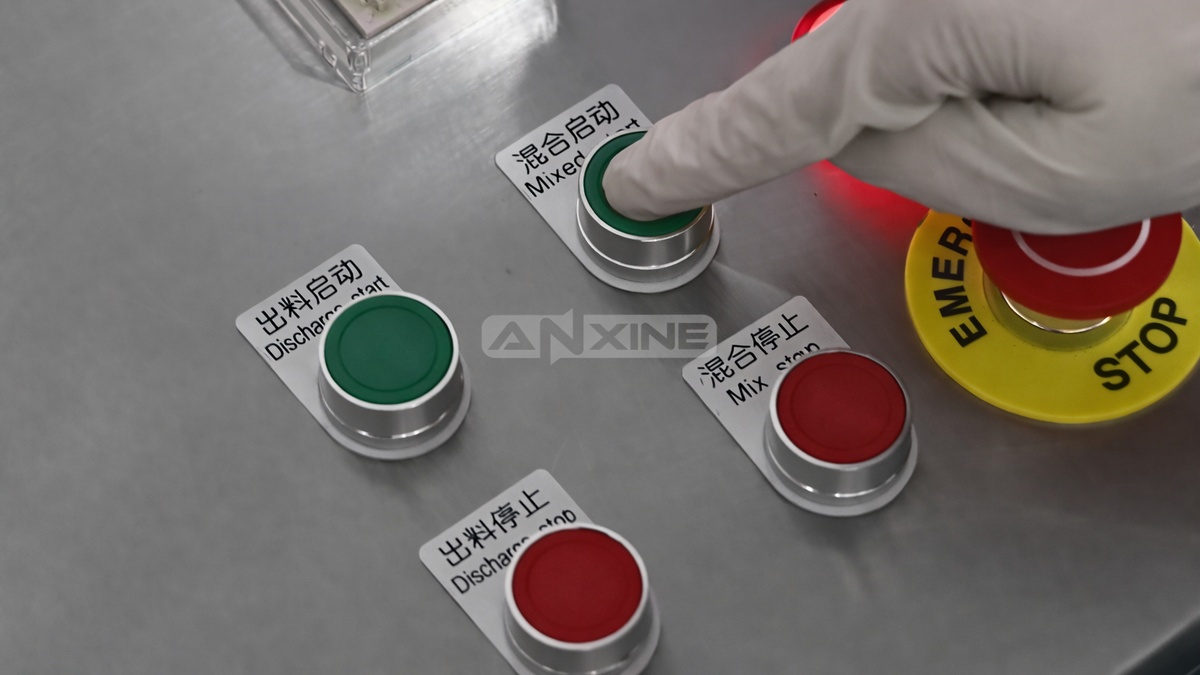
Step 5: Release the Emergency Stop button to restore power to the circuit. Then set the required mixing time on the digital timer.
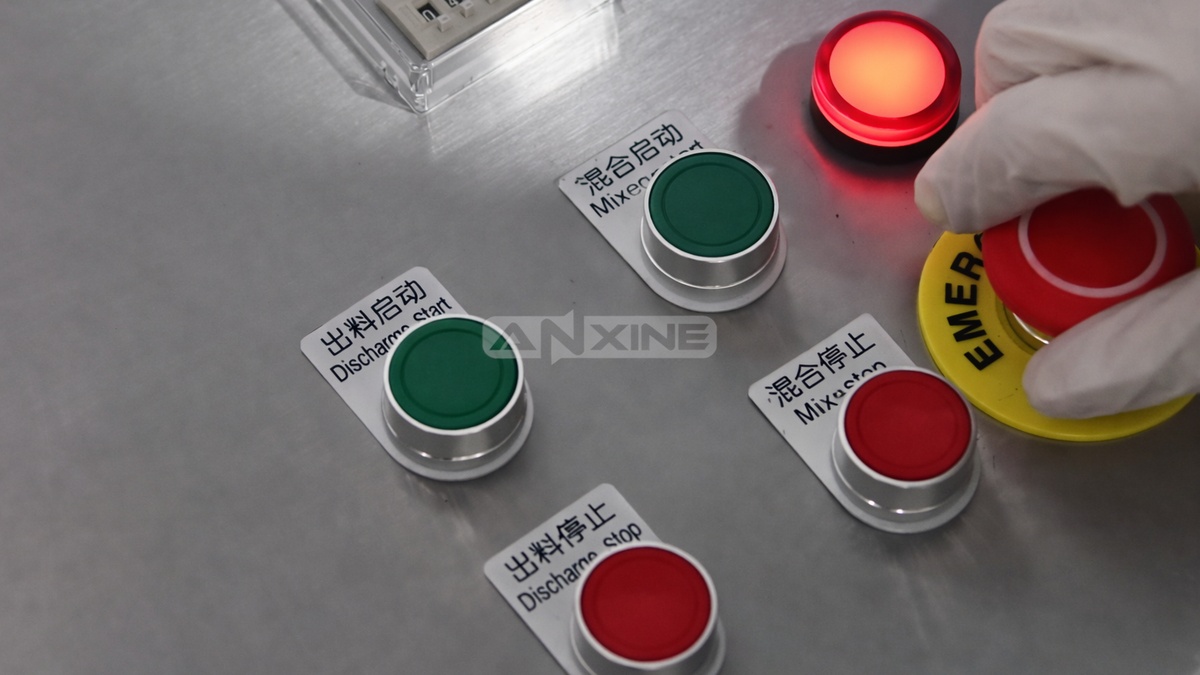
Step 6: Press Mix Start to activate the machine. And the internal ribbon agitator will begin rotating.
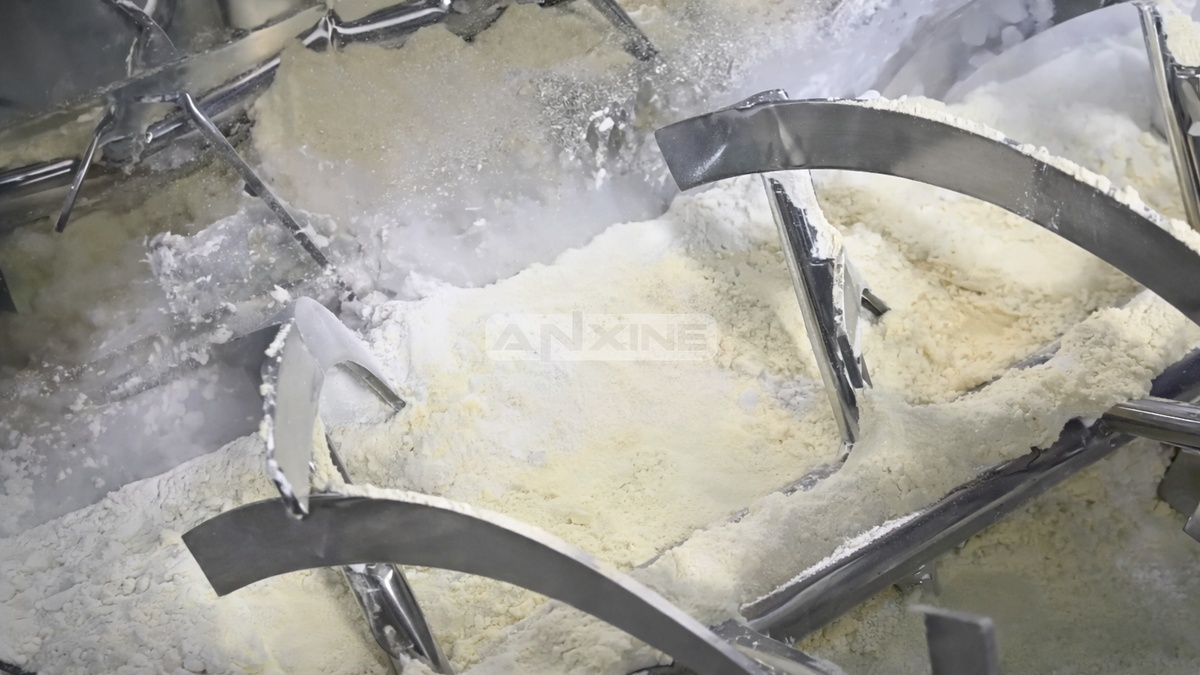
Step 7: The helical ribbons inside the trough move the materials in opposite directions to blend them evenly. The machine will stop automatically when the cycle is complete.
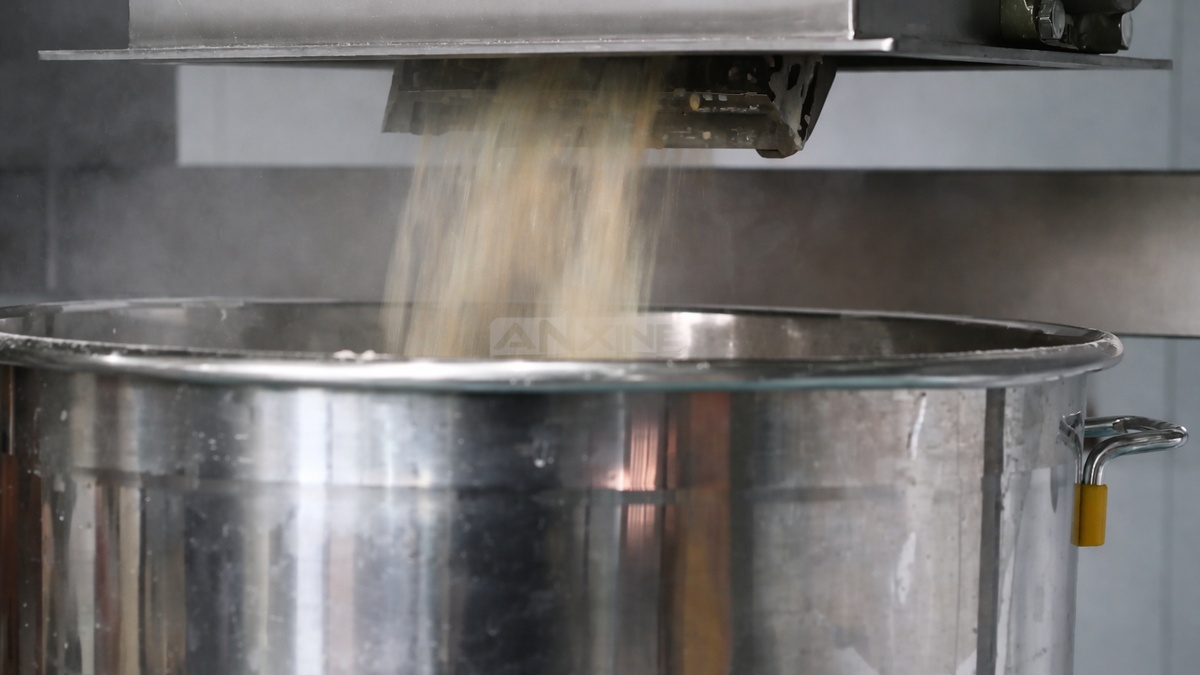
Step 8: When the blending cycle ends, press Discharge Start. This opens the pneumatic valve at the bottom center of the trough.
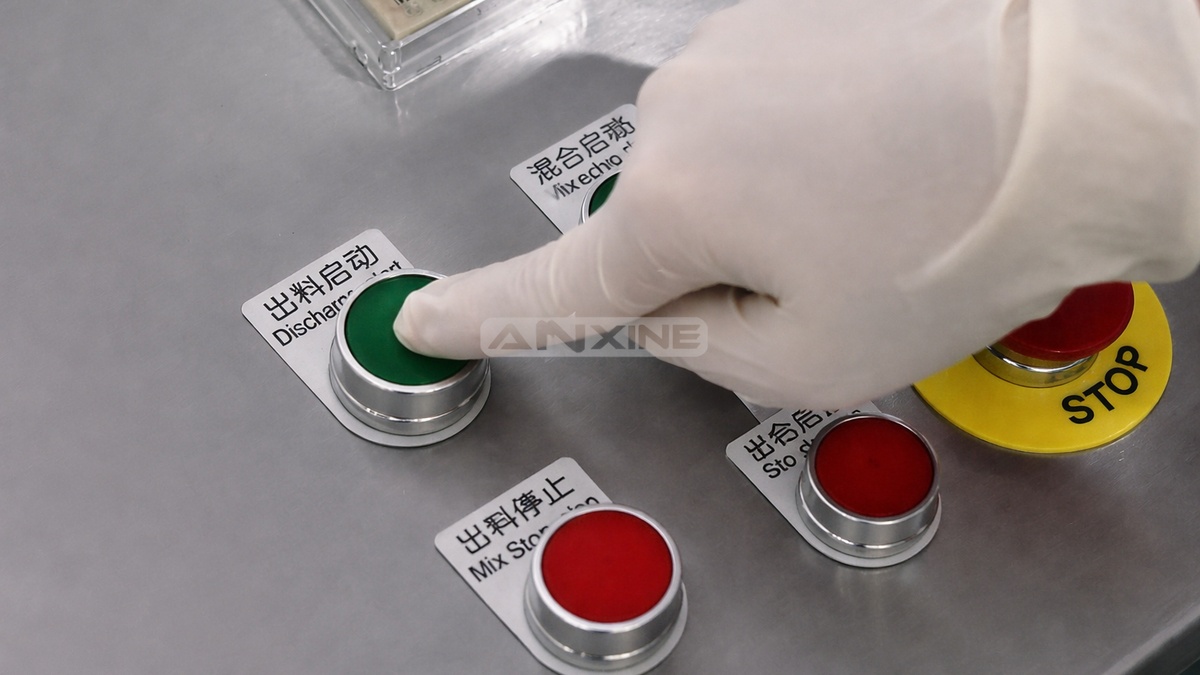
Step 9: The ribbons continue rotating slowly to help push the finished product toward the discharge port until the trough is empty.
You can check more details in this video.
Section 2: How to Install the Base and Connect Power and Air
How to Install the Base
Step 1: Align the powder mixer with the base.
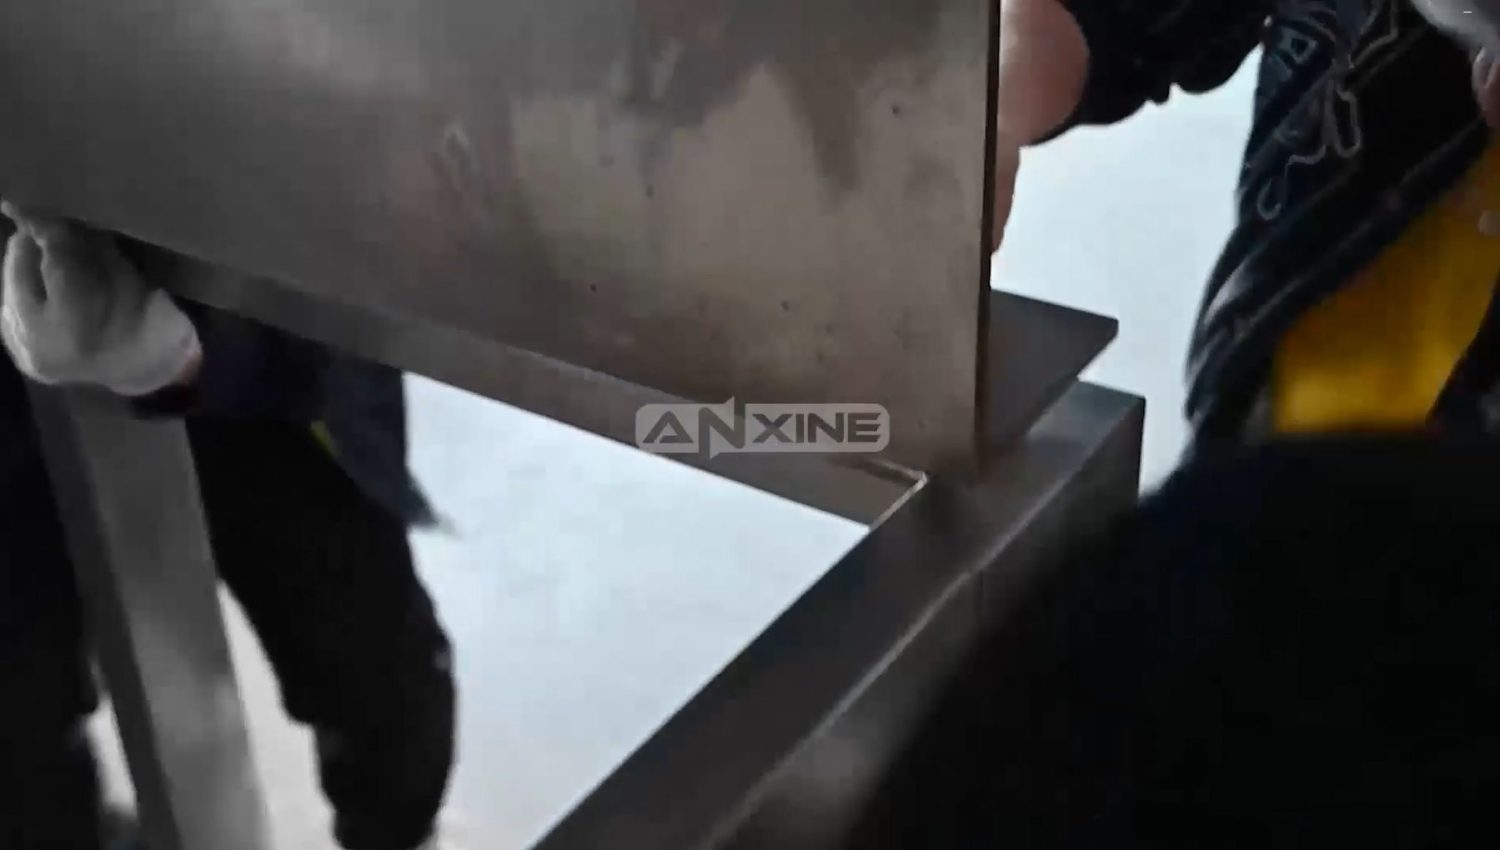
Step 2: Secure it with screws.
Click to watch the video below.
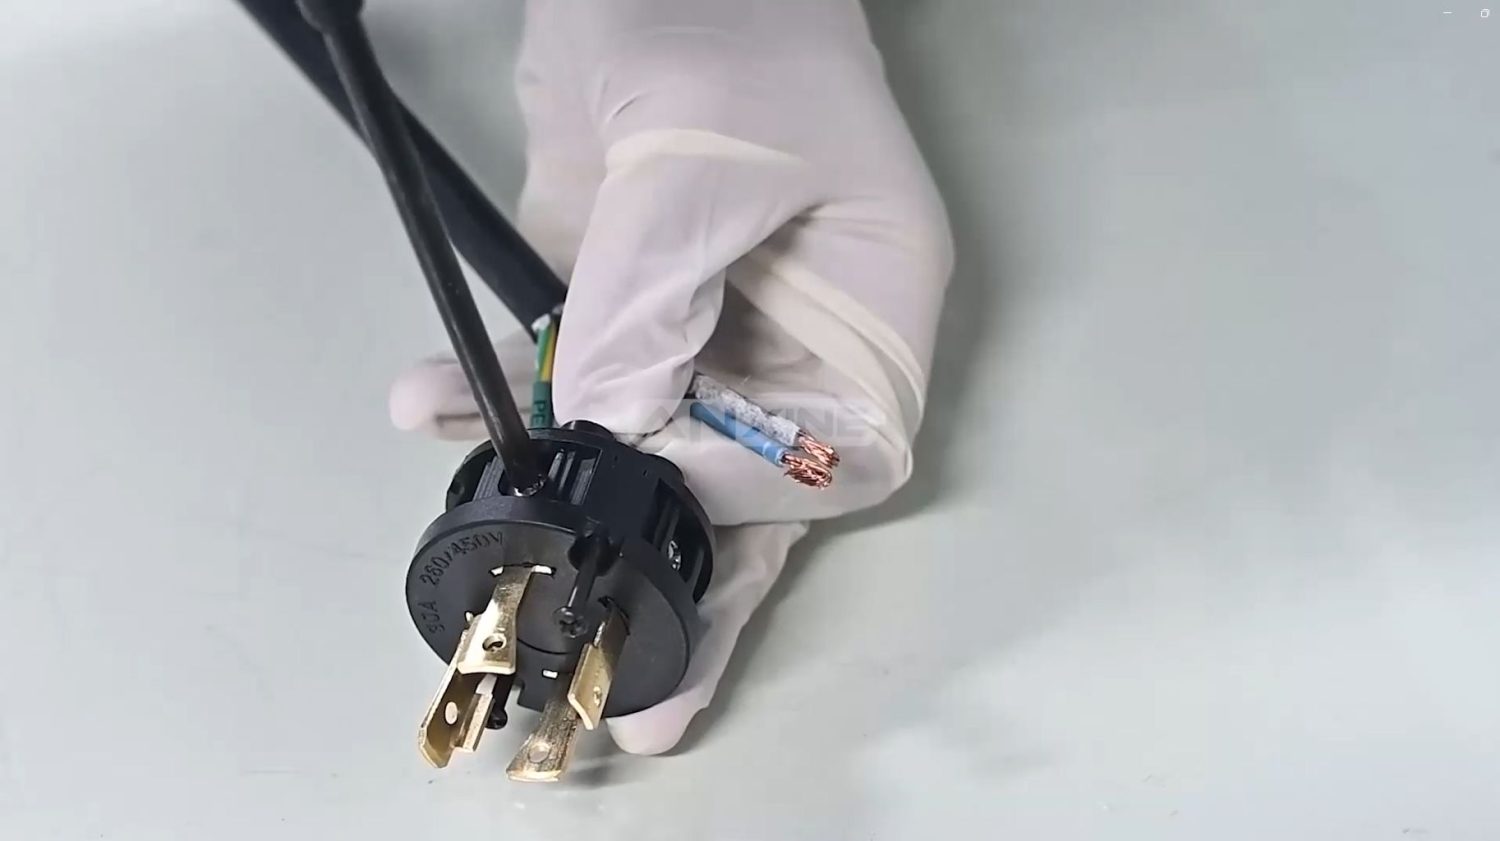
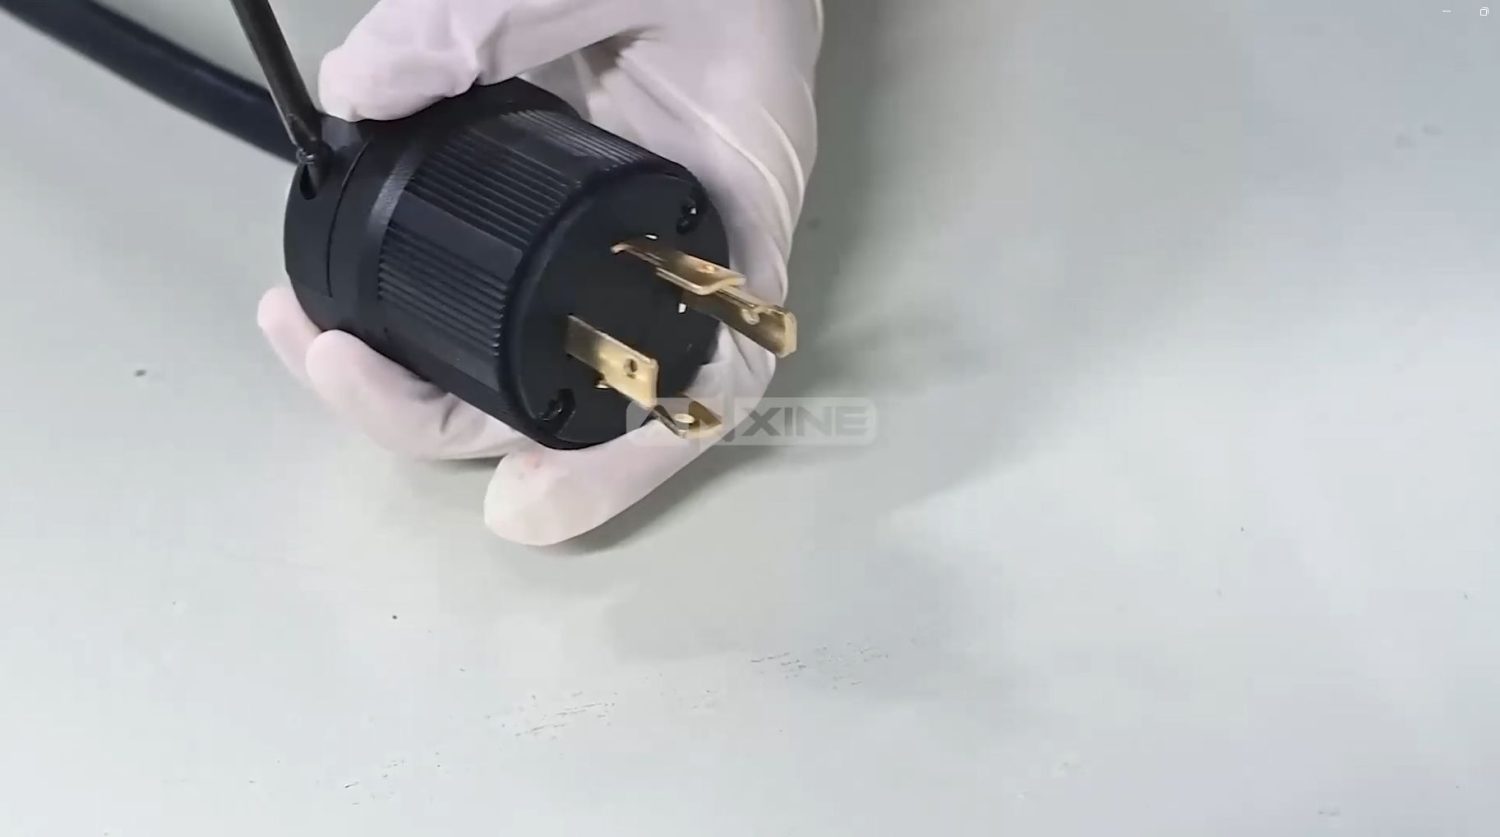
How to Install the Plug
Step 1: There are 4 Strip the power cord, separate the wires, and then remove the insulation at the ends to expose the copper cores.

Step 2: Insert the wires into the plug terminals according to the color code, and then tighten the terminal screws.
Step 3: Lock the plug housing and snap it.
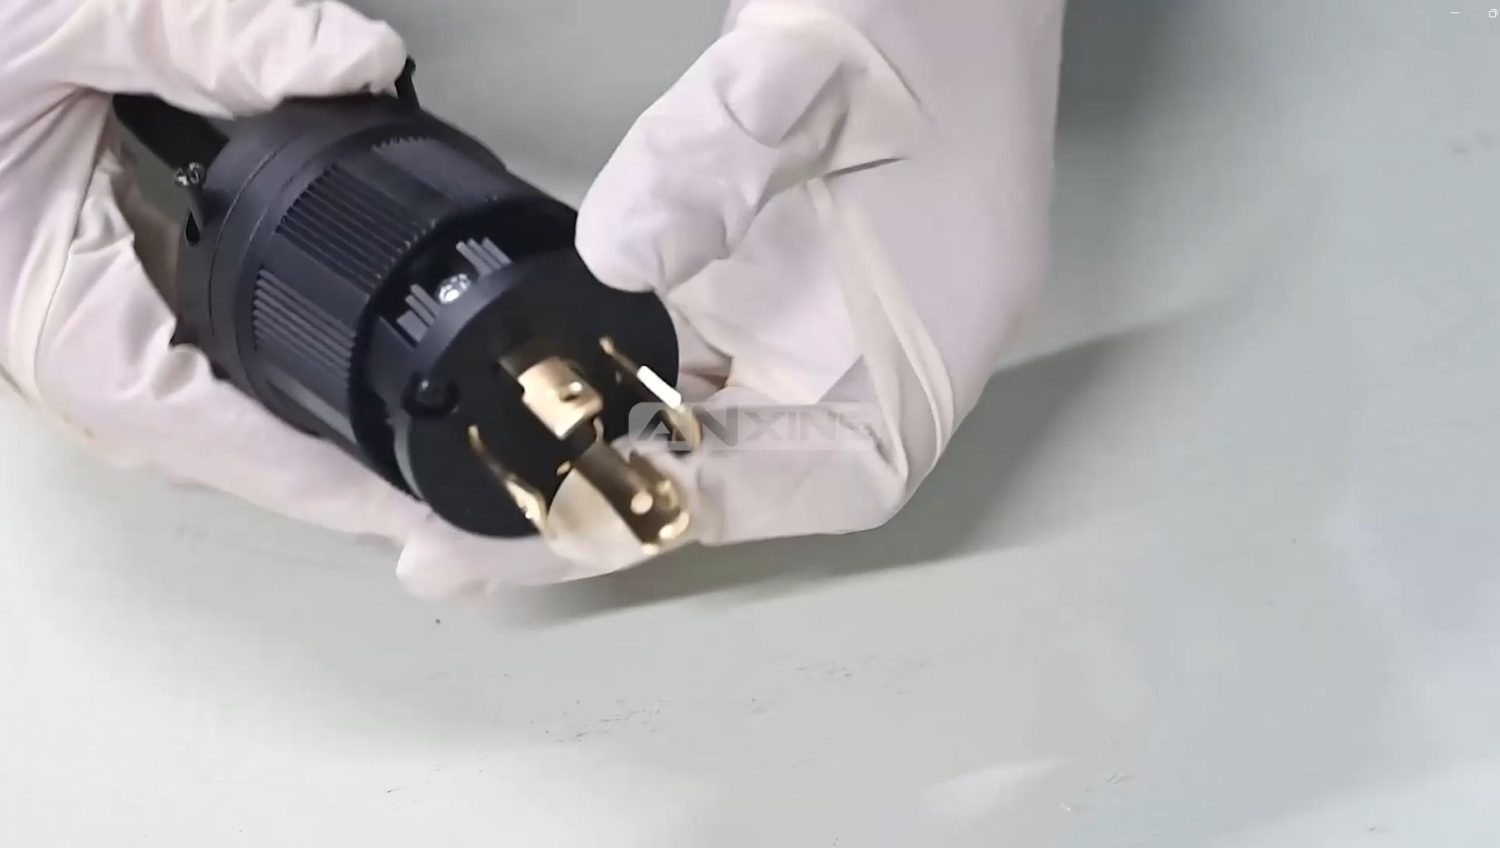
Step 4: Tighten all screws, including the ones on the sides.
The video below shows detailed procedures.
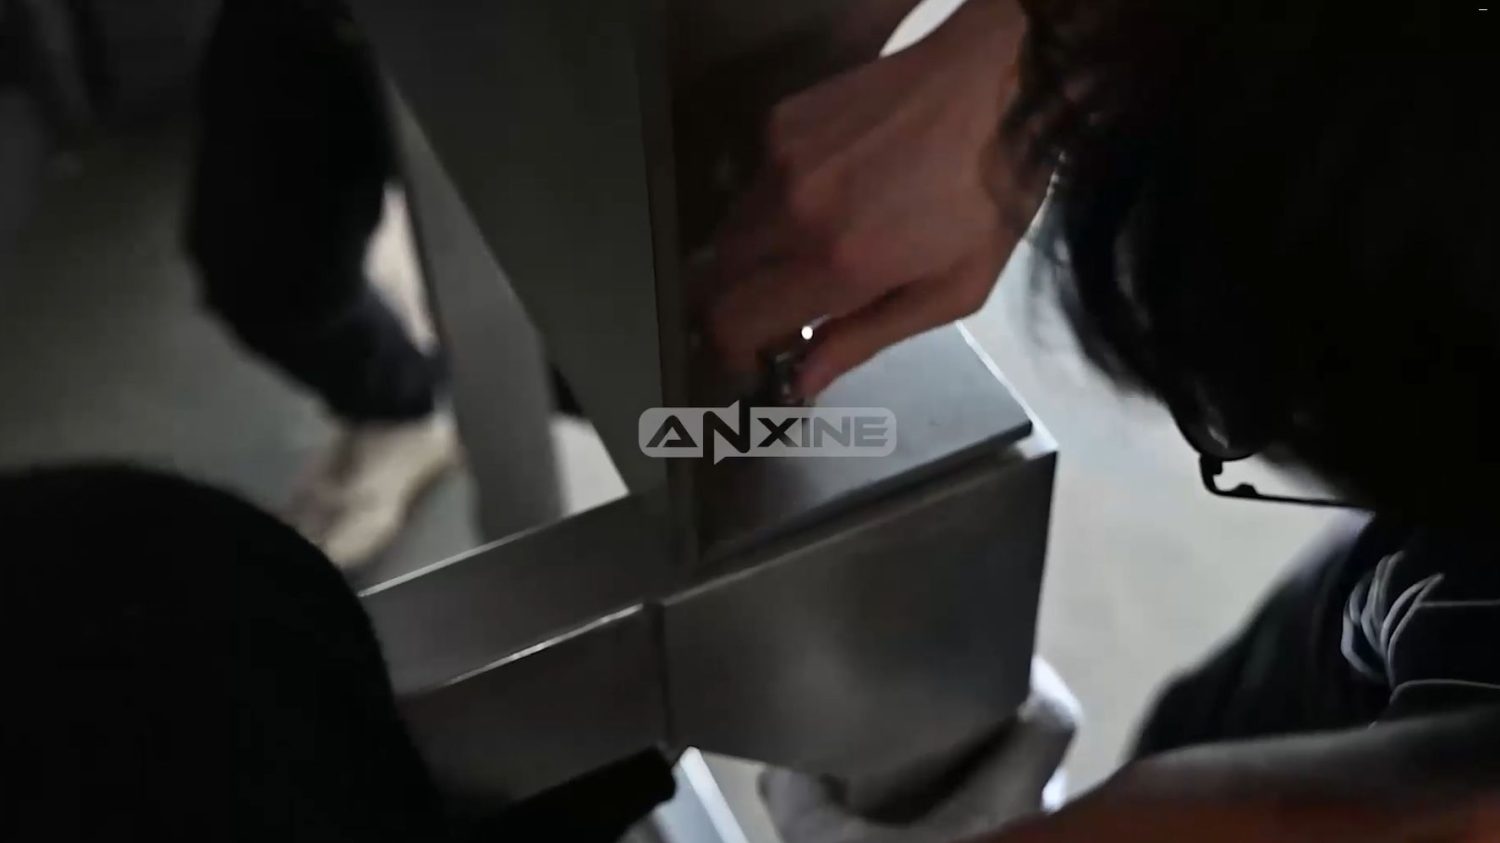
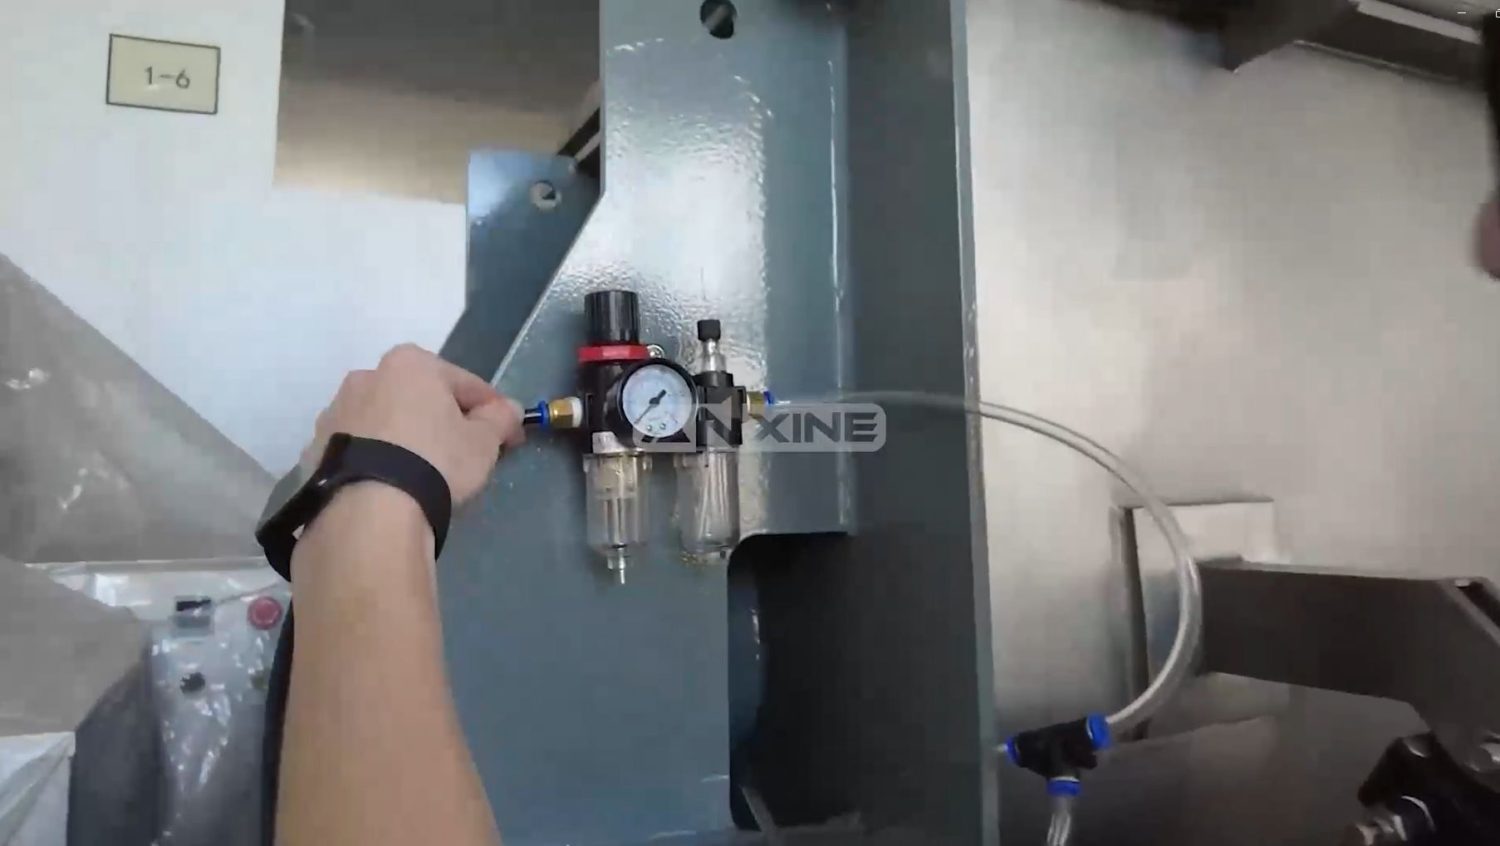
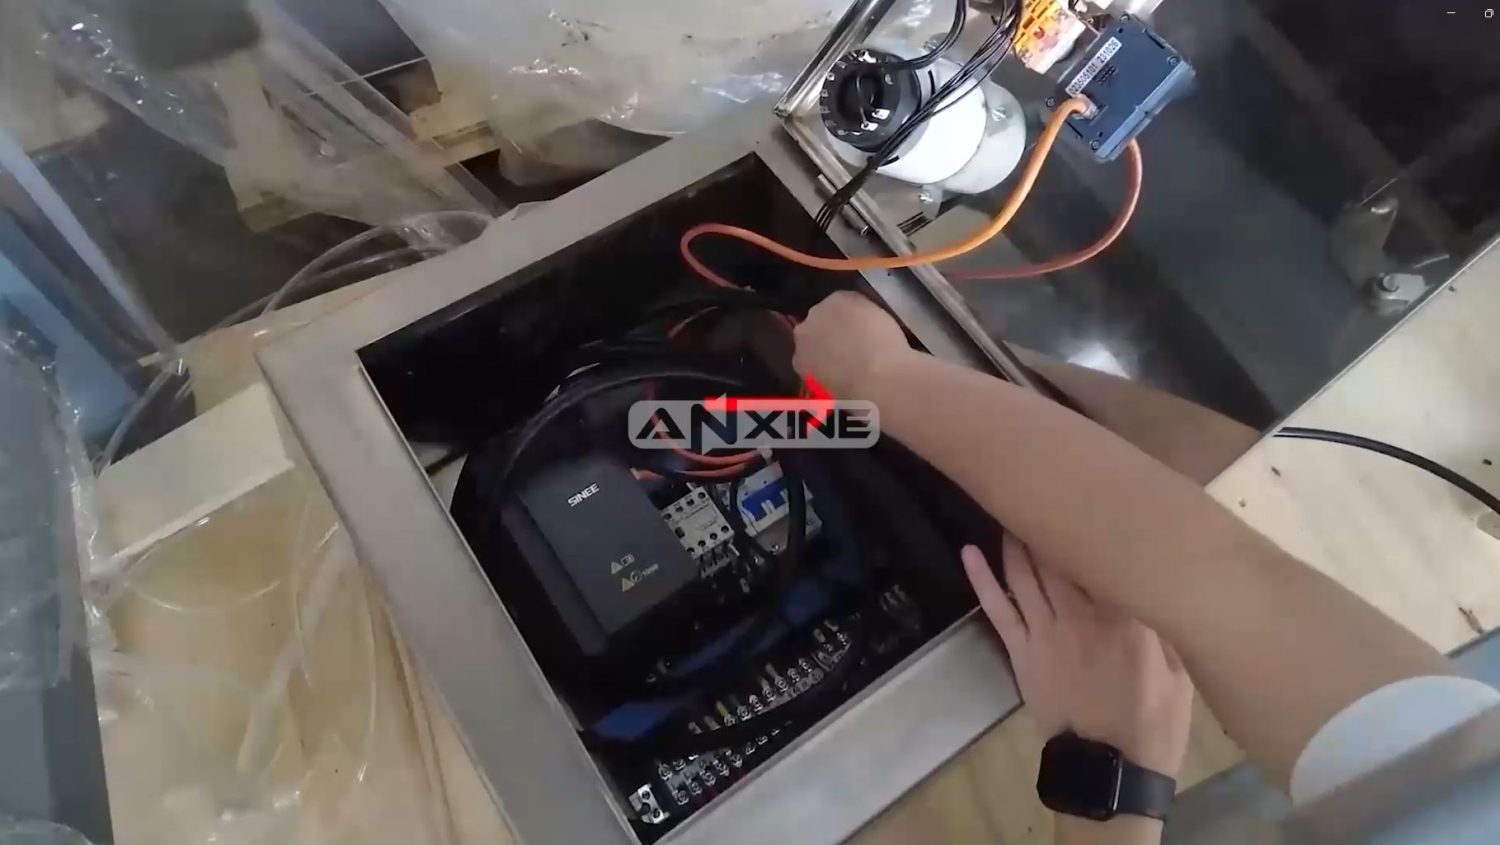
How to Release the Air
Step 1: Connect the air hose with the air fitting.
Step 2: Open the control box cover.
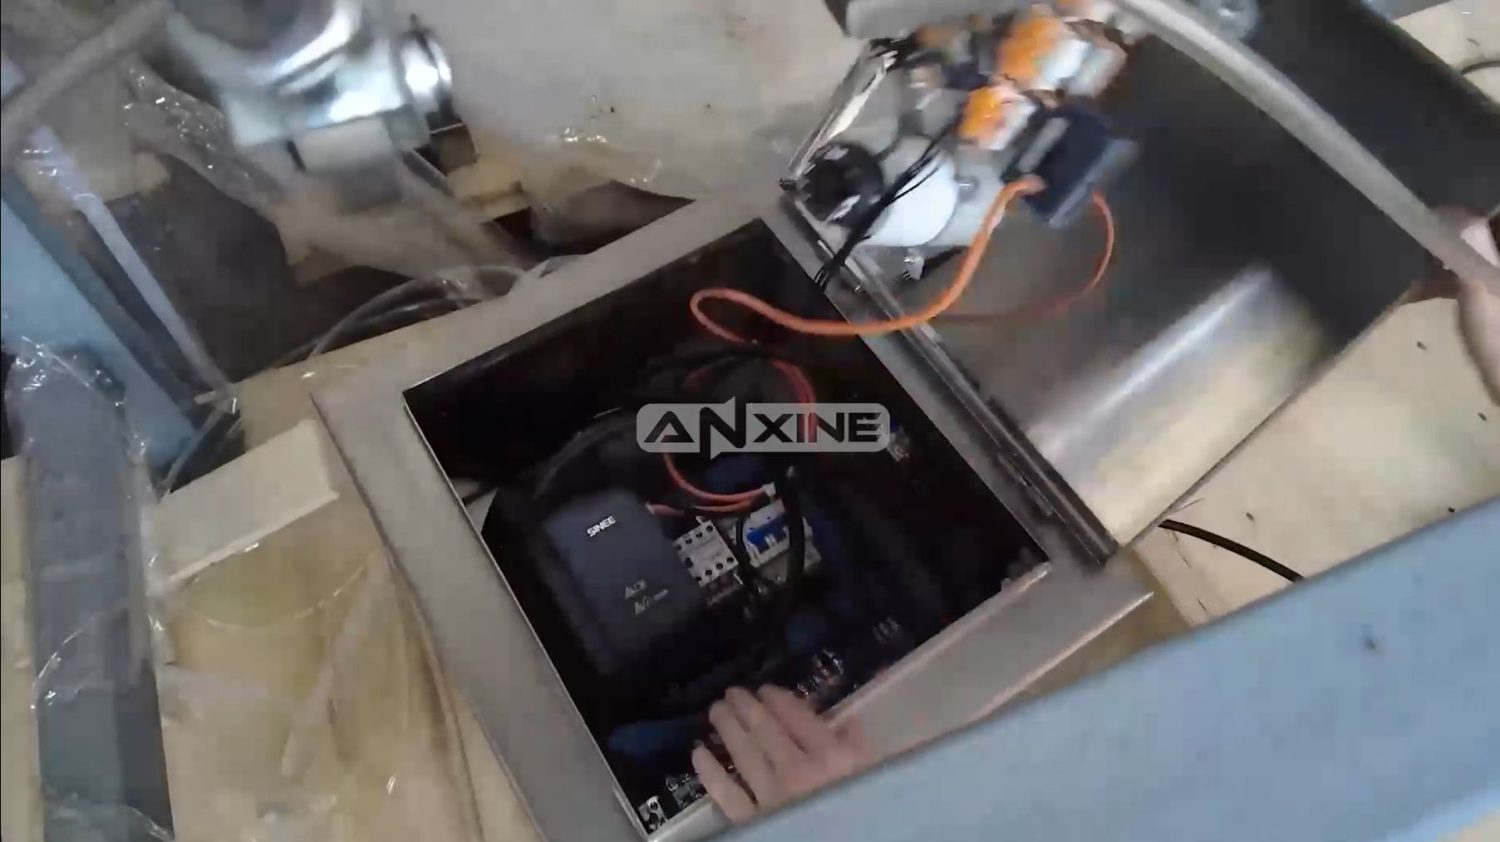
Step 3: Insert the control cable into the terminal.
See the procedures in action! Click to watch.
Section 3: Installation and Maintenance Tips
- During transportation, handle the equipment carefully and avoid collisions.
- When the equipment is installed, it must be installed on a concrete foundation or a relatively strong steel structure platform. After the equipment is installed, it must be fixed firmly with the foundation and cannot shake.
- The motor must be grounded before the equipment is installed and powered on.
- The design of the electrical control system supporting the mixer must meet the national standards, and electrical overload protection must be designed.
- After initial installation, add lubricating oil of the specified grade to the reducer. The lubricating oil shall then be replaced every 3 months.
Section 4: Debugging Procedures
Step 1: Before the initial installation and testing, it is necessary to manually rotate the blades several times to ensure that the mixer is not damaged during the installation process and that the blades do not collide with the cylinder.
Step 2: After the initial installation is completed, the machine should run under no-load conditions for more than 1 hour, and the material can only be added after confirming that there is no abnormal phenomenon in the equipment. When feeding, the feeding material must be gradually increased, the first batch of feeding is 10% of the full volume, the second is 20%, and gradually increases to 60%~70% of the full volume to meet the allowable feeding capacity of the equipment.
Step 3: It is strictly forbidden to start the mixer with materials inside. Feeding and discharging must only be carried out after the machine is started. If there is a power outage during mixing or an emergency shutdown in special circumstances, it is necessary to clean up the materials in the mixer and restart it to start mixing again.
In special situations where it needs to start with materials inside, the customer must explain this before purchasing the equipment, and the operation should be guided by professionals before the operation.
Step 4: At any time, before the equipment is started, it must be ensured that the inspection door and observation window of the equipment are closed, and the installation of the safety cover is completed to ensure the safety of personnel. The machine can be started only when everything is safe.
Step 5: When controlled by a pneumatic switch, the air source pressure should be set to 0.5~0.7 MPa.


